Initializing the AMF Security mini application instance
Initialize AMF Security mini application instance
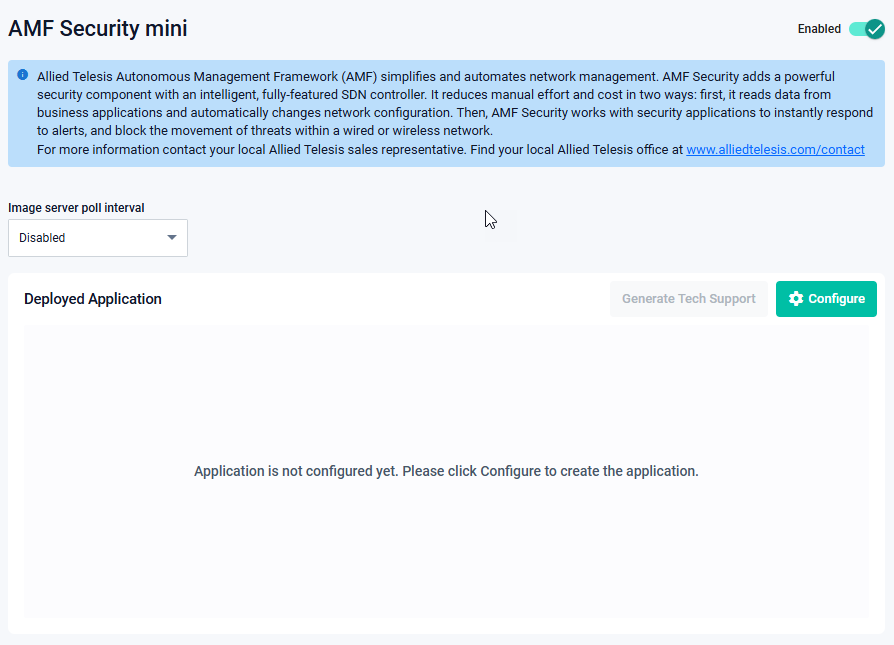
Initially, no application instances of AMF Security mini are configured. To activate AMF Security mini, use the following steps.
-
Download the latest AMF Security mini application image from our website.
-
Transfer the application image to the flash memory of the device. The application image will have the .app file extension.
-
From the menu, select Vista Manager mini -> AMF Security mini.
-
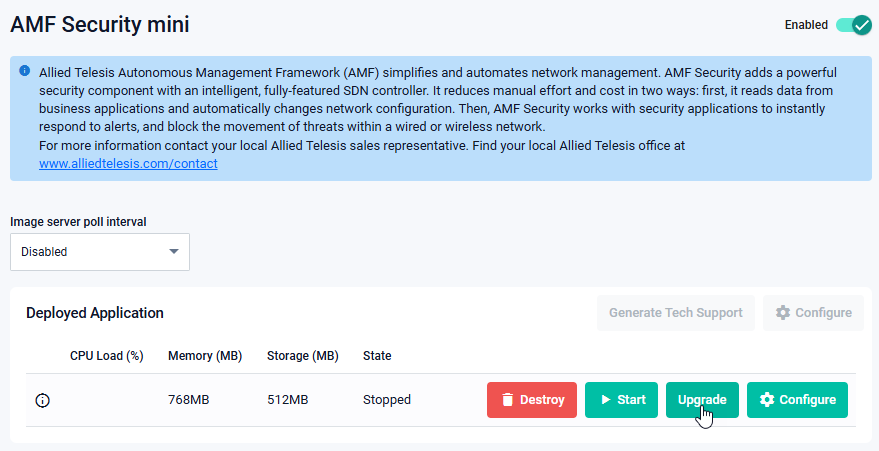
On the AMF Security mini screen, slide the switch at the top right to the right to enable the AMF Security mini application.

-
Click the Configure button.
-
Set the values for the application instance settings according to the table below.
Table 1: AMF Security mini Application Instance Settings
Setting Value Initial Value Image version Select the image transferred to the flash memory of this product in step 2 Unselected Storage size (MB) 512 Unspecified Advanced Settings Memory Limit (MB) 768 Unspecified CPU core limit (core index) 1 Unspecified Network Settings Add network Click to add a network and set the following items accordingly Interface type Shared Shared Host interface Choose the right interface Configuration dependent Use DHCP Unchecked Unchecked IPv4 Address Specify the appropriate IPv4 address/subnet mask length Not set Gateway address Specify the appropriate IPv4 address Not set Add DNS server Required if you want to specify a syslog server by host name on the AMF Security mini side DNS server Enter the IP address of the DNS server Unspecified 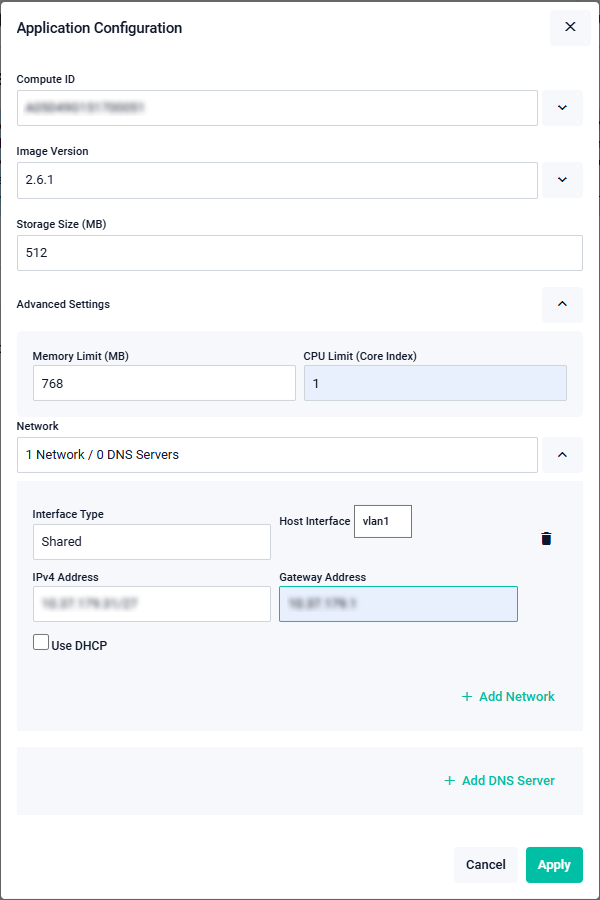
-
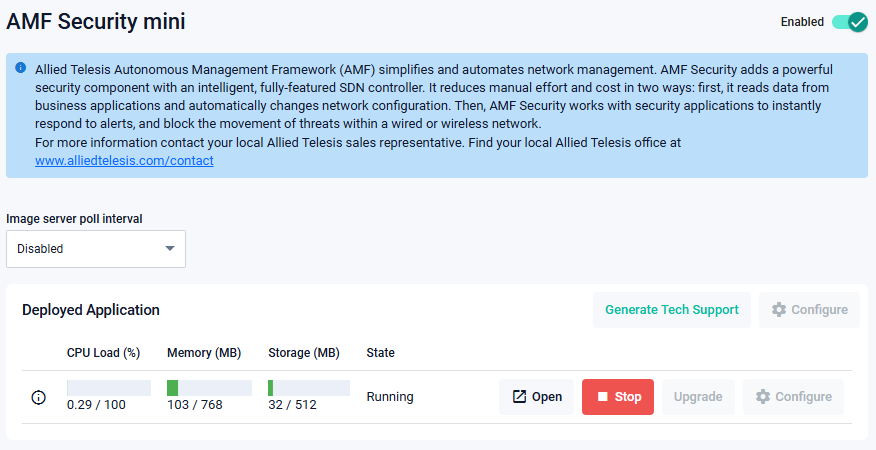
After entering the information in the "Application Configuration" dialog, click the "Apply" button to begin creating the AMF Security mini instance. Creating the instance may take some time. During creation, the status in the Deployed Application list changes from "Extracting" to "Creating". When creation is complete, the status changes to "Running".
Start and stop AMF Security mini application instance
Launching and stopping an AMF Security mini application instance is done from the Deployed Application list above.
- To stop a running instance, click the Stop button.
- To launch a "stopped" instance, click the Start button.
Change AMF Security mini application instance settings
To change the settings of an AMF Security mini application instance, use the following steps.
-
An instance can only be modified if the instance is stopped. If the instance is running, click on the "Stop" button to stop it.
-
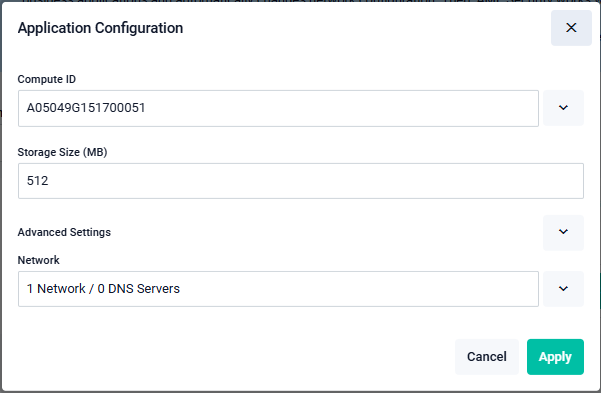
Click on the Configure button on the right side of the Deployed Application list. This opens the Application Configuration Dialog.

-
In the Application Configuration dialog, change the required settings, and then click the Apply button.
Update the AMF Security mini application instance version
To update the version of an AMF Security mini application instance, use the following steps.
-
An instance can only be updated if the instance is stopped. If the instance is running, click on the "Stop" button to stop it.
-
Click on the Upgrade button on the right side of the Deployed Application list. This opens the Application Configuration Dialog.
-
In the Application Configuration dialog, select the updated version from the Image Version drop-down list, and then click the Apply button.
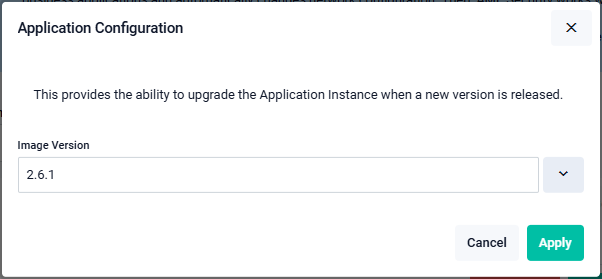
NoteUpdates to versions older than the version in use (version downgrades) are not supported.
Delete AMF Security mini application instance
To delete an AMF Security mini application instance, use the following steps.
-
An instance can only be deleted if the instance is stopped. If the instance is running, click on the "Stop" button to stop it.
-
In the Deployed Applications List, click the Destroy button.

Disable AMF Security mini
To disable AMF Security mini, stop or delete the application instance, then slide the switch in the upper right corner of the screen to the left.
NoteThe control is disabled while the application instance is running. If you want to disable it, delete the application instance first.
07 Oct 2025 12:05