Installing AMF Security
To install AMF Security on your server, take the following steps:
NoteIf the link of the network interface of the installation destination environment is up, the installation taks some time. The installation time may be reduced if the link of the network interface of the environment is down, but the installation is performed normally in either state.
NoteWhen installing in a virtual environment, refer to Installing AMF Security > Virtual Machine System Requirements.
- Connect a monitor and a keyboard to the server.
- Power on the server and the monitor, then insert the AMF Security installation media into a DVD drive on the server.
Note
Refer to your server's documentation for instructions on how to set it up to boot from a DVD.
The AMF Security Installation Media does not support UEFI boot. Make sure that the server is using the legacy BIOS for system startup. - On the following screen, select "Install AT-SESC" and press Enter.
Note
Pressing Enter begins the installation process, which erases all the data on your server's hard drive.
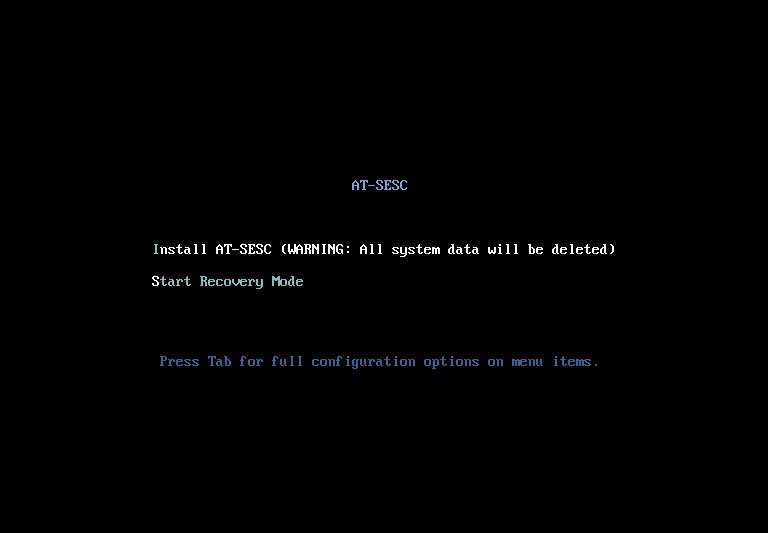
Selecting "Start Recovery Mode" here lets you go into the recovery mode, where you can perform operations such as deleting system configuration files or reconfigure IP Address. Please refer to Appendix > Recovery Mode for details.
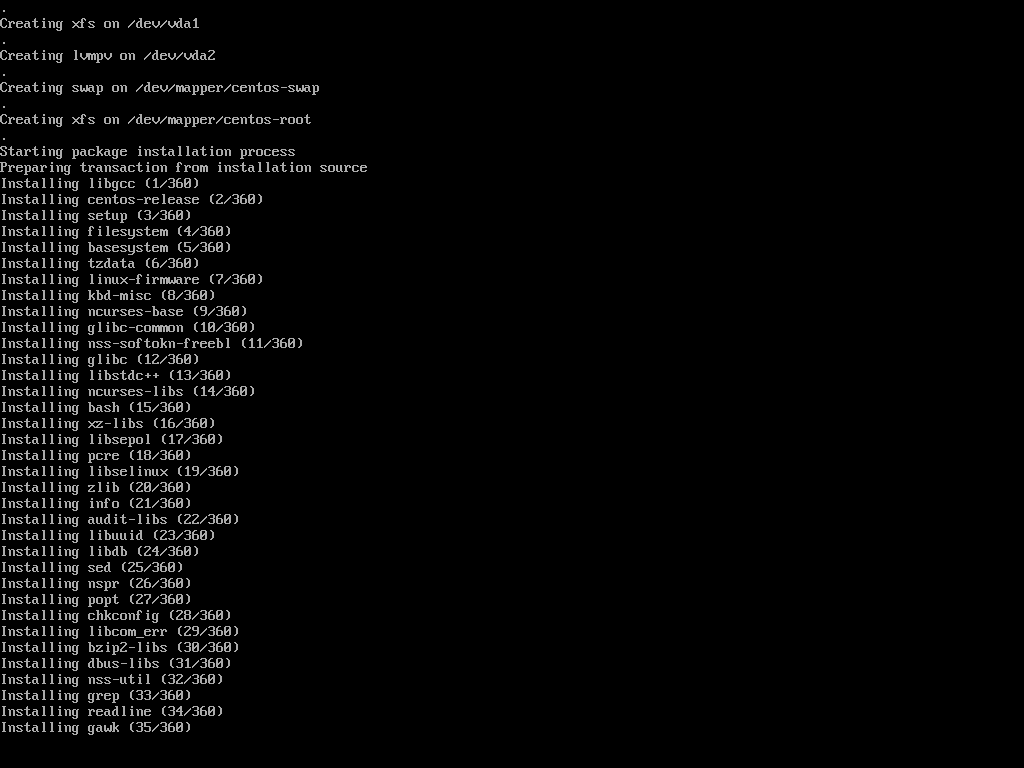
- Installation process begins and the screen shows its progress.
- The following screen asks you which interface to use for management traffic.
It lists all available interfaces on the server.
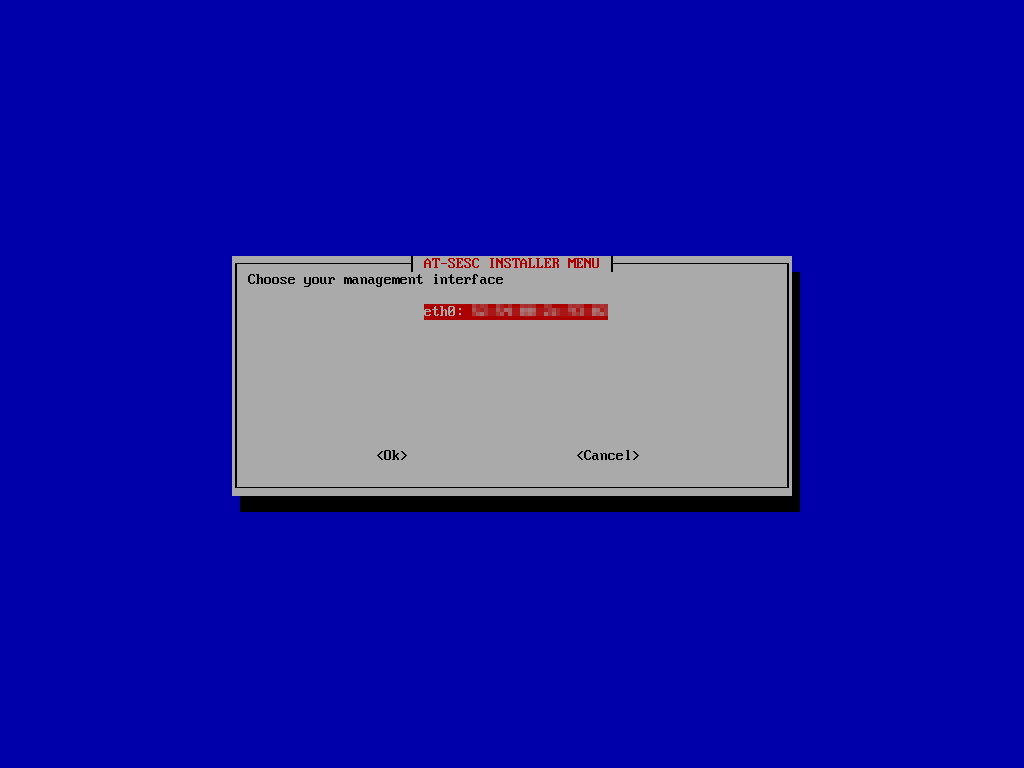
Choose a management interface and select "OK".
Note
If you select "Cancel" here, the system restarts without configuring any interfaces.You can configure other non-management interfaces once the installation process is complete.

The system also restarts if no interface is available.
- The next screen lets you assign an IP Address to the management interface.
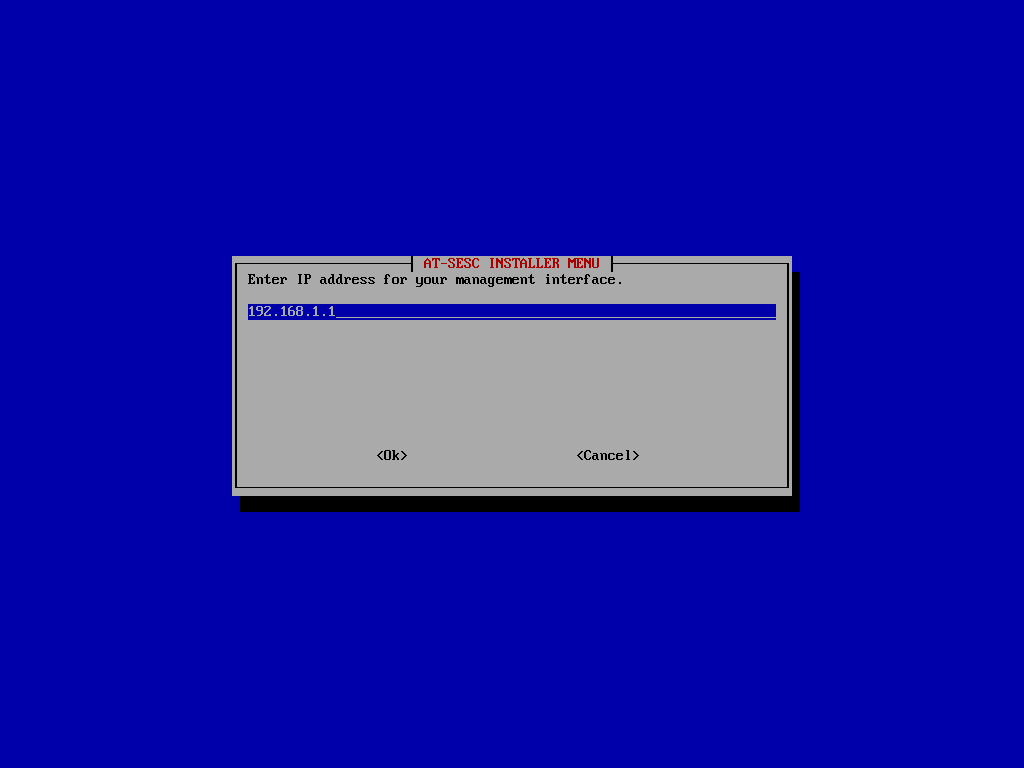
Enter an IP Address for the management interface and select "OK".
Selecting "Cancel" here takes you back to the interface selection screen.
Note
If you enter an address in a wrong format, you are brought back to the interface selection screen.
Note
Please make sure that the specified IP Address is not being used by any other device. If you reboot the server with the configured IP Address which is being used by another device, you are locked out of the AMF Security's GUI because the management interface is disabled due to the duplicate address. In such cases, you have to start over the whole installation process. Alternatively, you can reboot the server and go into the recovery mode to reconfigure the management IP Address.
- The next screen asks you to enter a subnet mask for the management interface.
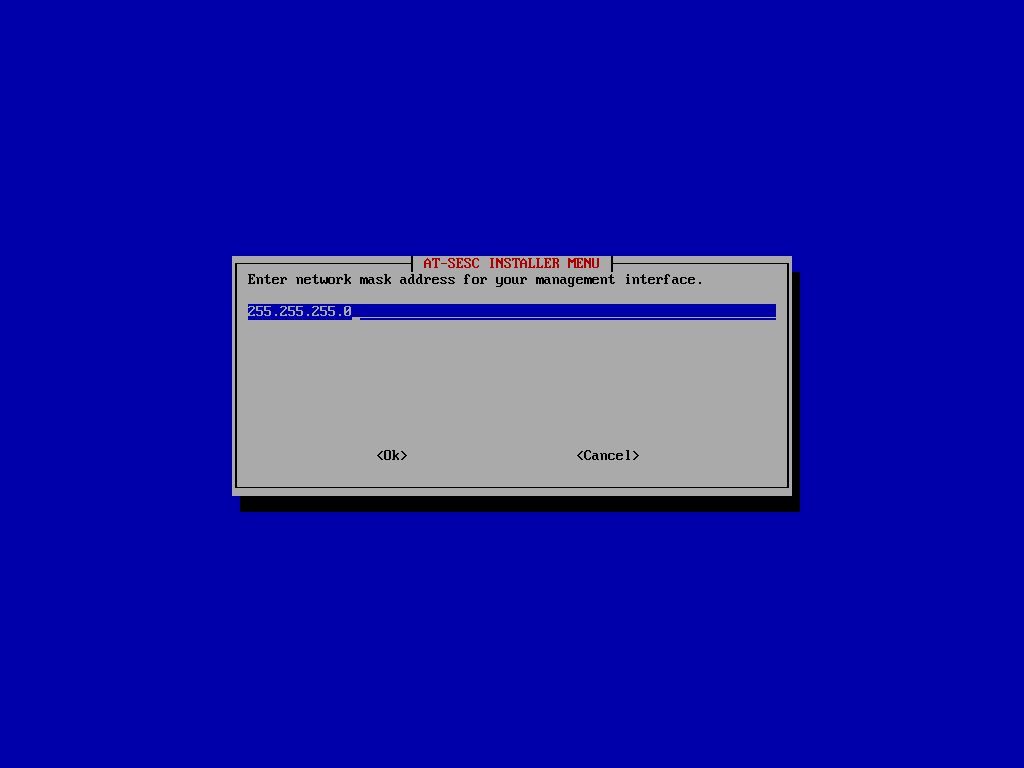
Enter a subnet mask and select "OK".
Selecting "Cancel" here takes you back to the interface selection screen.
Note
If you enter an address in a wrong format, you are brought back to the interface selection screen.
- The next screen asks you to enter a default gateway address.
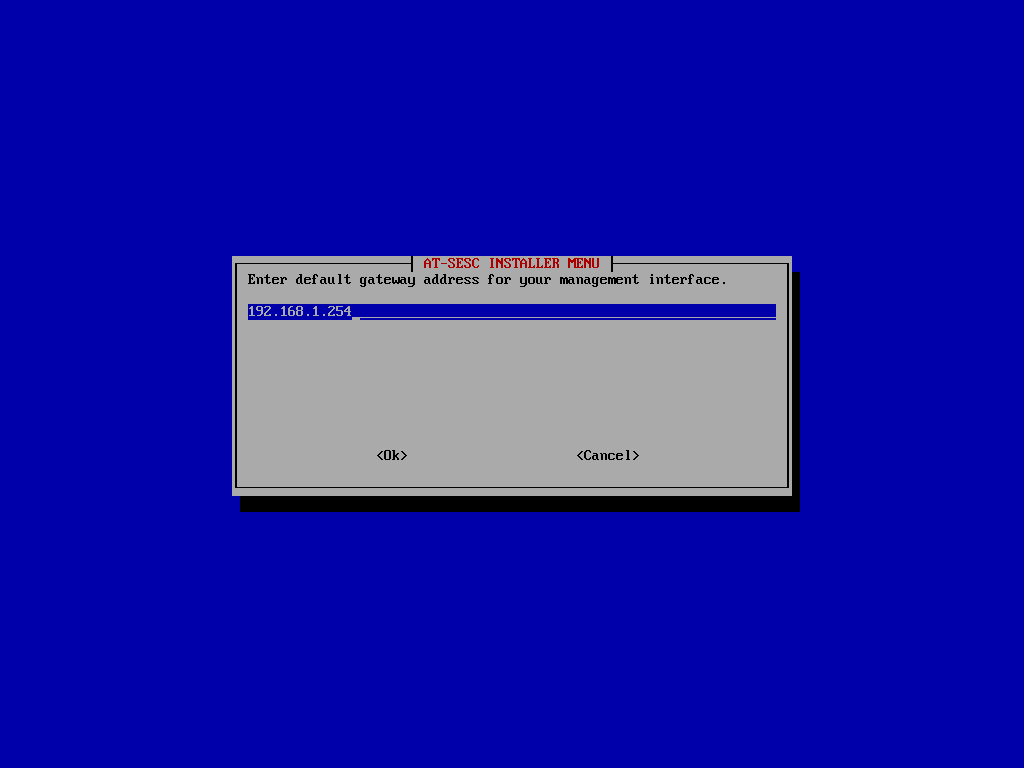
Enter a default gateway address and select "OK".
Selecting "Cancel" here takes you back to the interface selection screen.
Note
If you enter an address in a wrong format, you are brought back to the interface selection screen.
- The next screen asks you a primary DNS server address.
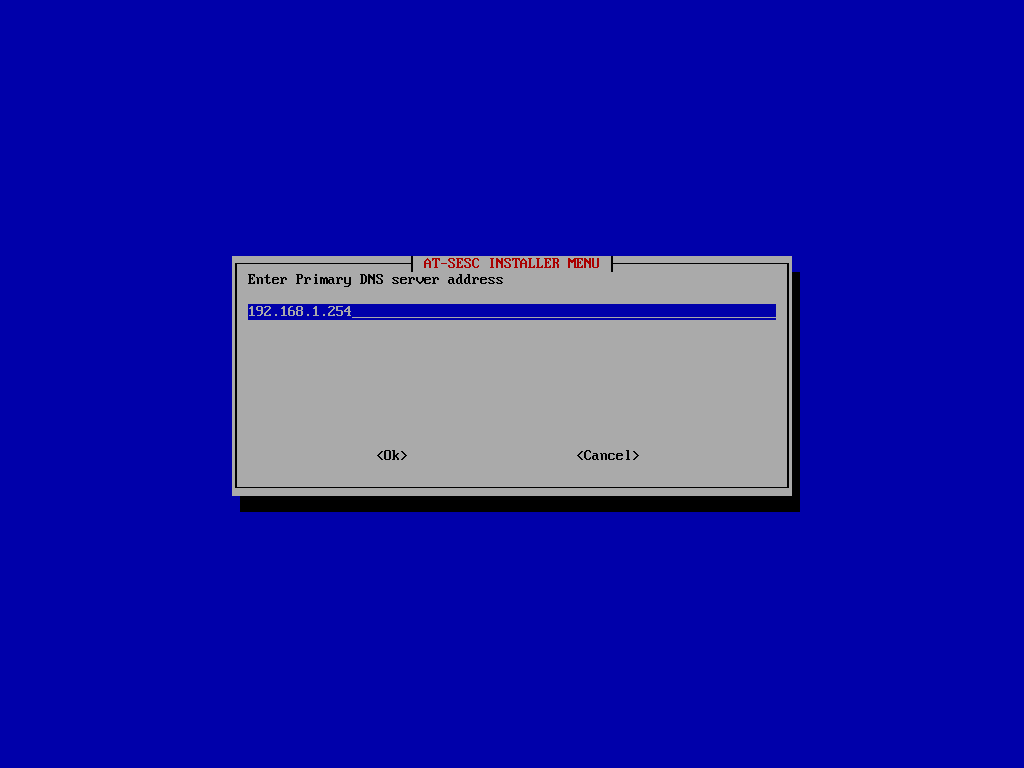
Enter a primary DNS server address and select "OK".
Selecting "Cancel" here takes you back to the interface selection screen.
Note
If you enter an address in a wrong format, you are brought back to the interface selection screen.
- The next screen asks you a secondary DNS server address.

Enter a secondary DNS server address and select "OK".
Selecting "Cancel" here takes you back to the interface selection screen.
Note
If you enter an address in a wrong format, you are brought back to the interface selection screen.
- The next screen shows you a summary of the configurations which you have chosen.
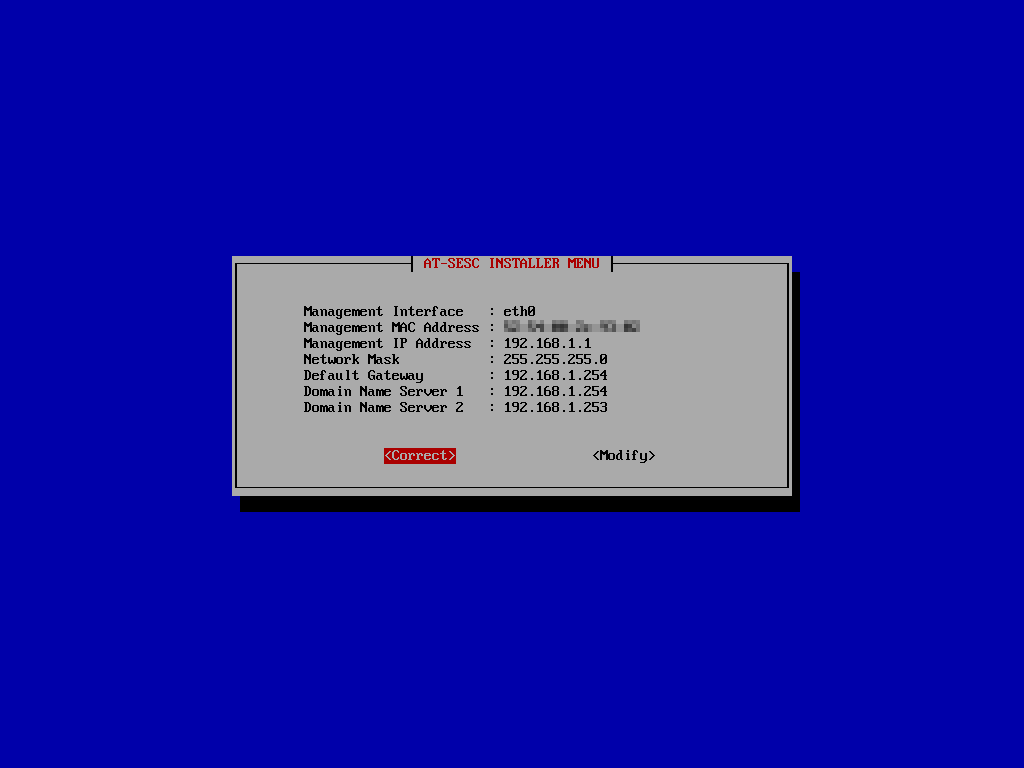
If you are okay with those configurations, select "Correct".
If you want to change some configurations, select "Modify" to go back to the interface selection screen.
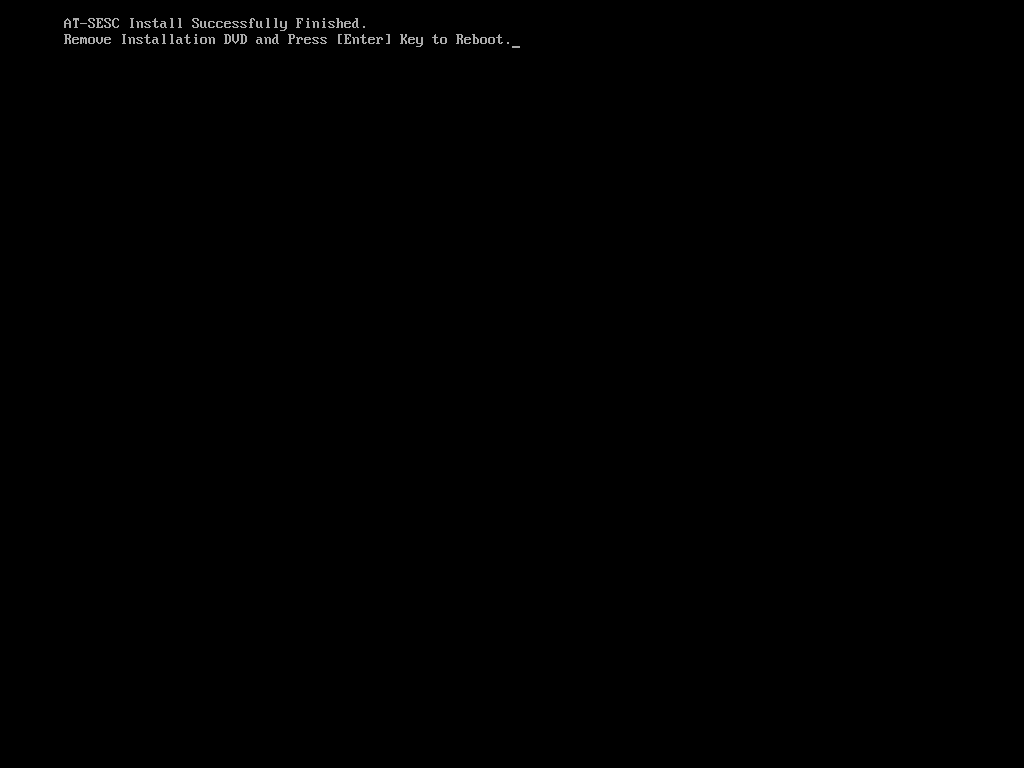
- The installation process is complete with the following screen.
Eject the AMF Security installation media, and then press Enter to reboot the server.
- The server restarts and boots into AMF Security operating system.
Hereafter, you can configure and manage AMF Security through its web interface by using a web browser on your management PC. Therefore the server no longer needs the keyboard and the monitor.
Note
Make sure that the server running AMF Security is installed in a secure location.
Virtual Machine System Requirements
When you install AMF Security on a virtualization platform, you have to prepare a virtual machine which meets the following system requirements.NoteThis content does not guarantee the operation.
VMware vSphere ESXi 6.5 (Hypervisor)
- OS: CentOS 4/5/6/7 (64bit)
- CPU Configuration: 2
- CPU Configuration (Cores per socket): 2
- Memory: 4GB or greater
- Harddisk Configuration: Thick Provisioning (Lazy Zeroed)
- NIC Configuration (NICs): 1 to 2
- Virtual Disk Size: 80GB or greater
- Network Adapter Configuration: VMXNET 3
VMware vSphere ESXi 6.7 (Hypervisor)
- OS:CentOS 7 (64bit)
- CPU Configuration: 2
- CPU Configuration (Cores per socket): 2
- Memory: 4GB or greater
- Harddisk Configuration: Thick Provisioning (Lazy Zeroed)
- NIC Configuration (NICs): 1 to 2
- Virtual Disk Size: 80GB or greater
- Network Adapter Configuration: VMXNET 3
VMware vSphere ESXi 7.0(Hypervisor)
- OS:CentOS 7 (64bit)
- CPU Configuration: 2
- CPU Configuration (Cores per socket): 2
- Memory: 4GB or greater
- Harddisk Configuration: Thick Provisioning (Lazy Zeroed)
- NIC Configuration (NICs): 1 to 2
- Virtual Disk Size: 80GB or greater
- Network Adapter Configuration: VMXNET 3
Microsoft Windows Server 2012 R2 Hyper-V
- Processor Configuration (Logical Processors): 2
- Initial Memory: 4096MB or greater
- Network Adapter Configuration: Network Adapter (must not be a legacy network adapter)
- Harddrive Configuration: variable size VHDX 80GB or greater
- Virtual Machine Generation: must be the 1st generation
Microsoft Windows Server 2016 Hyper-V
- Processor Configuration (Logical Processors): 2
- Initial Memory: 4096MB or greater
- Network Adapter Configuration: Network Adapter (must not be a legacy network adapter)
- Harddrive Configuration: variable size VHDX 80GB or greater
- Virtual Machine Generation: must be the 1st generation
Microsoft Windows Server 2019 Hyper-V
- Processor Configuration (Logical Processors): 2
- Initial Memory: 4096MB or greater
- Network Adapter Configuration: Network Adapter (must not be a legacy network adapter)
- Harddrive Configuration: variable size VHDX 80GB or greater
- Virtual Machine Generation: must be the 1st generation
13 Aug 2024 16:28