Starting Configuration
Supported Web Browsers
You can configure AMF Security through its web-based management interface.Make sure that your management PC has one of the following web browsers installed:
- Microsoft Edge
- Google Chrome
- Mozilla Firefox
NoteUse the latest released version.
NoteMicrosoft Edge is based on Chromium.
Also, Internet Explorer mode is not supported.
Logging In to the Management Web Interface
You can configure AMF Security through its web-based management interface.- Start a web browser and enter the IP Address set for AMF Security.
The IP Address is explained using 192.168.1.10.
https://192.168.1.10
Note
Communication between the web browser and AMF Security is over HTTPS.
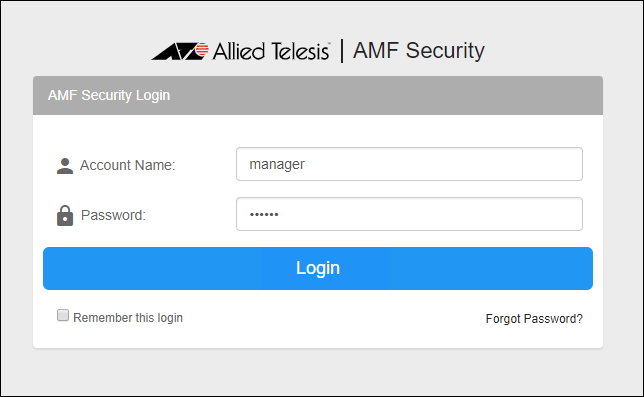
- The following login screen is displayed. Enter the default Account Name and Password and click the "Login" button.
Entered password is masked with bullets on the screen.
Note
The default Account Name is "manager" and the Password is "friend".
Note
If a security warning screen appears, follow the onscreen instructions to continue browsing the site.
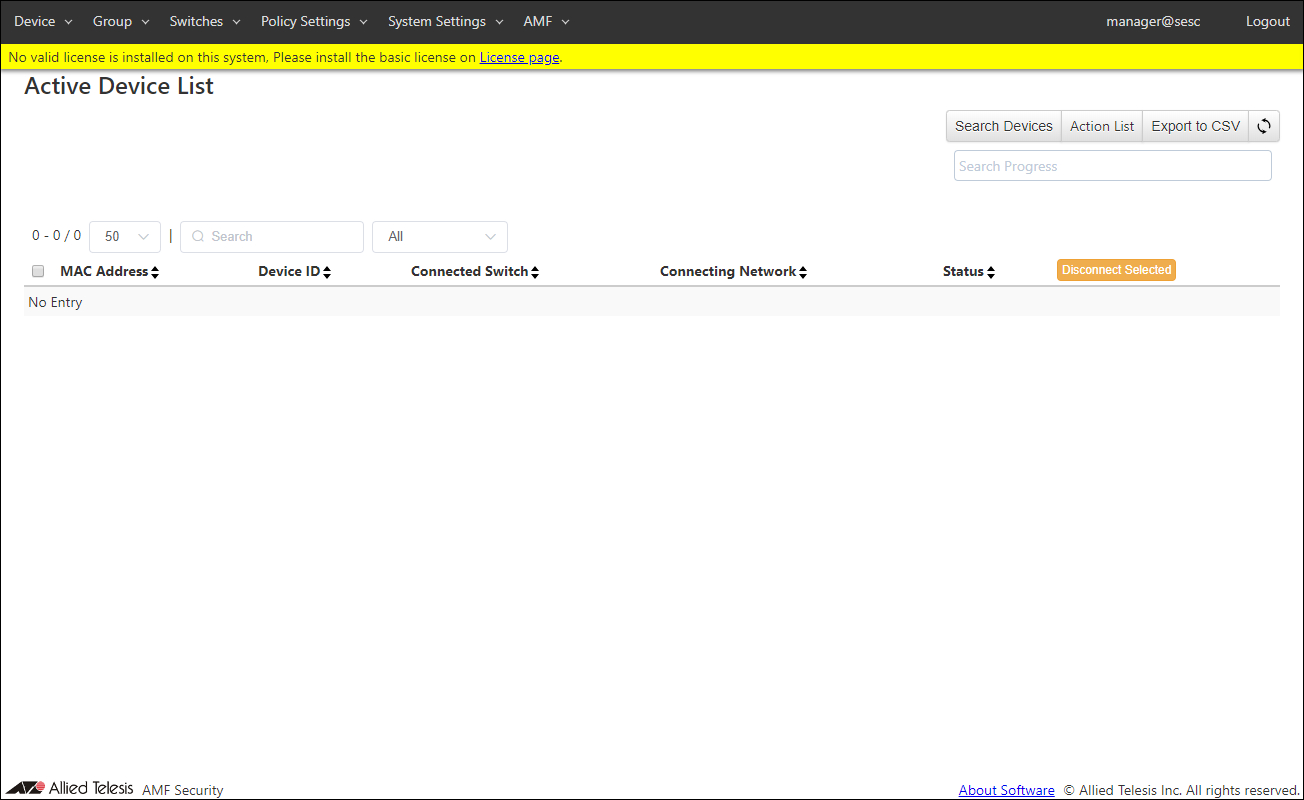
If you have a SSL server certificate issued by a trusted certification authority (CA), you can install the certificate on the Network Settings > System Information page's or the AMF > AMF Application Proxy Settings page's "SSL Certificate" section after logging in to the AMF Security. - After logging in, the Device > Active Device List page is displayed.
Note
A login session times out after 10 minutes of inactivity. The Login screen reappears when you perform any operation after the previous session has timed out.
If you check "Remember this login" on the login screen, you will remain logged in.
Installing Licenses
You have to install proper licenses before you start using AMF Security.There are two types of licenses: "Base" and "Addon".
- You always need the Base license to run AMF Security.
OpenFlow and AMF Application Proxy do not work until the base license is installed.
- The Addon license is for adding an OpenFlow switch. AMF Application Proxy works with a Base license only, no Addon license for nodes is required.
Although you can install Addon licenses before installing the Base license, AMF Security does not work until the Base license is installed.
NoteTo install the license, follow the steps:After registering the basic license, if you delete or add the basic license during operation of the OpenFlow and AMF Application Proxy network, OpenFlow and AMF Application Proxy may not operate normally.
Therefore, disconnect AMF security from the operating network before removing or adding a registered base license.
If the base license is removed or added during operation and AMF Application Proxy does not work properly, restart AMF security.
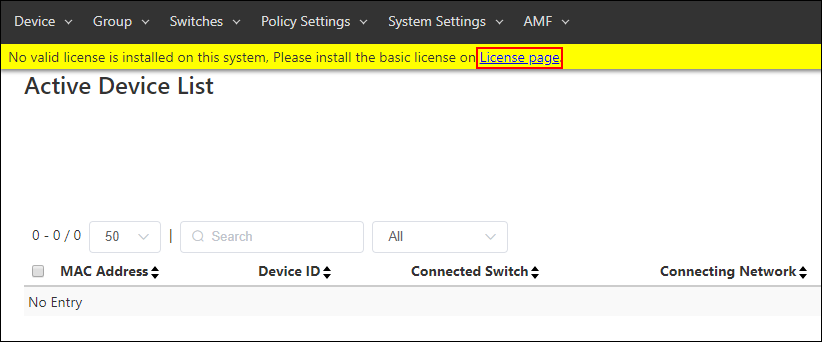
- Click the "License page" in the message displayed at the top of the setting screen.
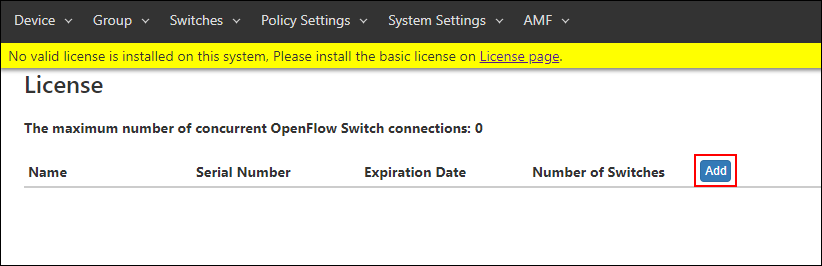
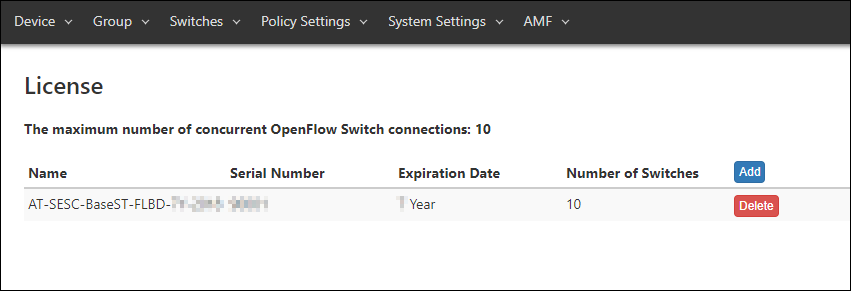
- The System Settings > License page is displayed. Click the "Add" button.
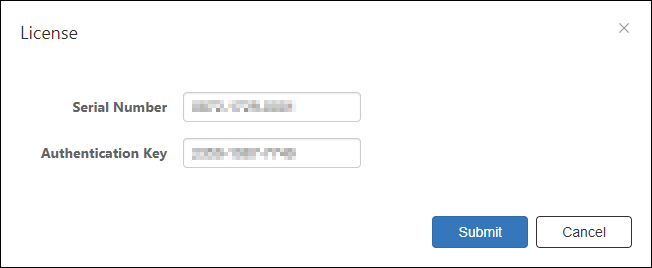
- The License dialog is displayed. Enter the "Serial Number" and "Authentication Key" shown on the license certificate and click the "Submit" button.
- If the "Name" and "Serial Number" of the registered license are displayed on the System Settings > License page, the installation is successful.
Setting the timezone
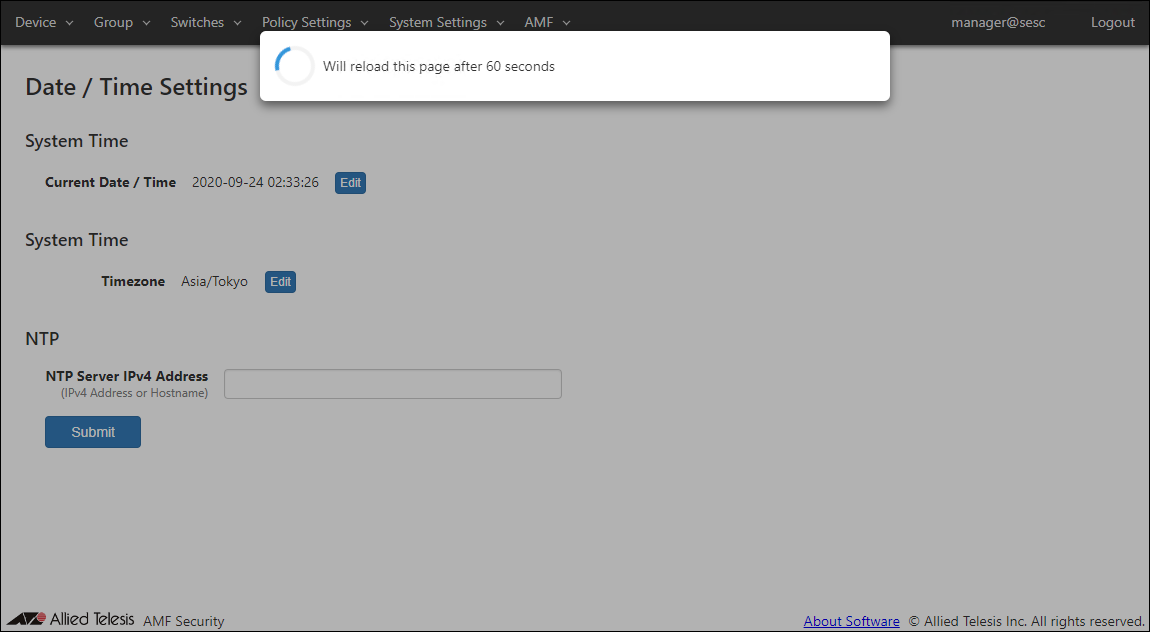
For example, to use Japan time (JST: 9 hours ahead of Coordinated Universal Time (UTC)), set according to the following procedure:NoteAfter changing the time zone setting, it is necessary to restart the device to reflect the timezone setting in the time of the AMF Security log. Reboot according to the message displayed after changing the timezone setting, or reboot the device from the System Settings > System Information page.
Example: Open the System Settings > System Information page. Click the "Reboot" button next to "Reboot this system".
After that, the timezone setting is retained.
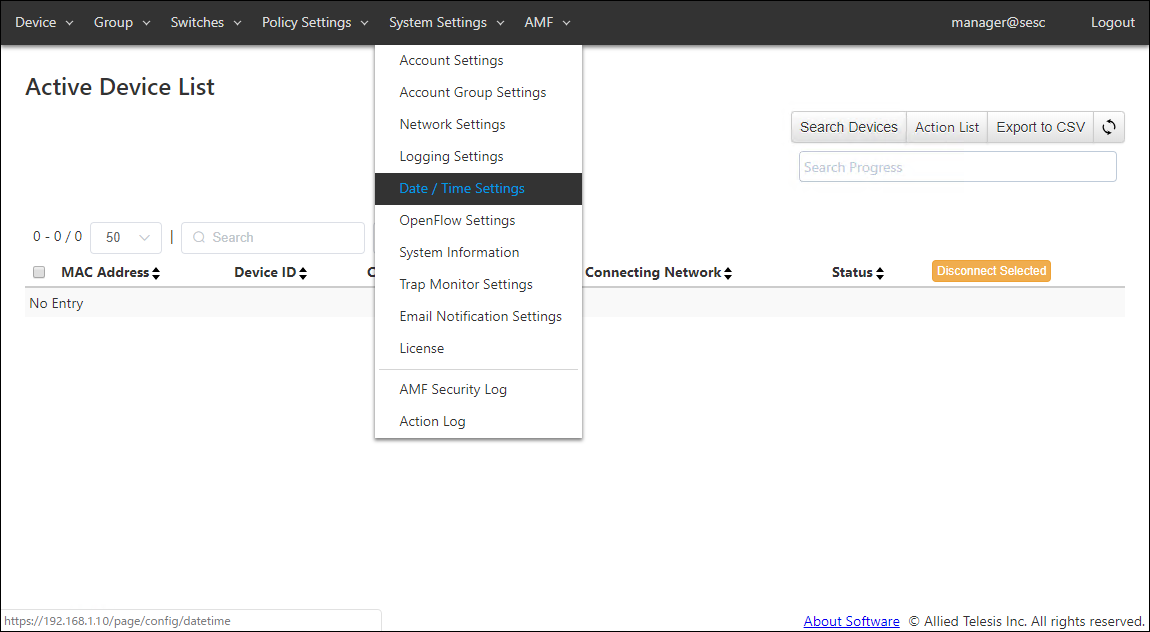
- Click the "System Settings" menu, then click the "Date / Time Settings" submenu.
- The System Settings > Date > Time Settings page is displayed. Click the "Edit" button in the Timezone item.
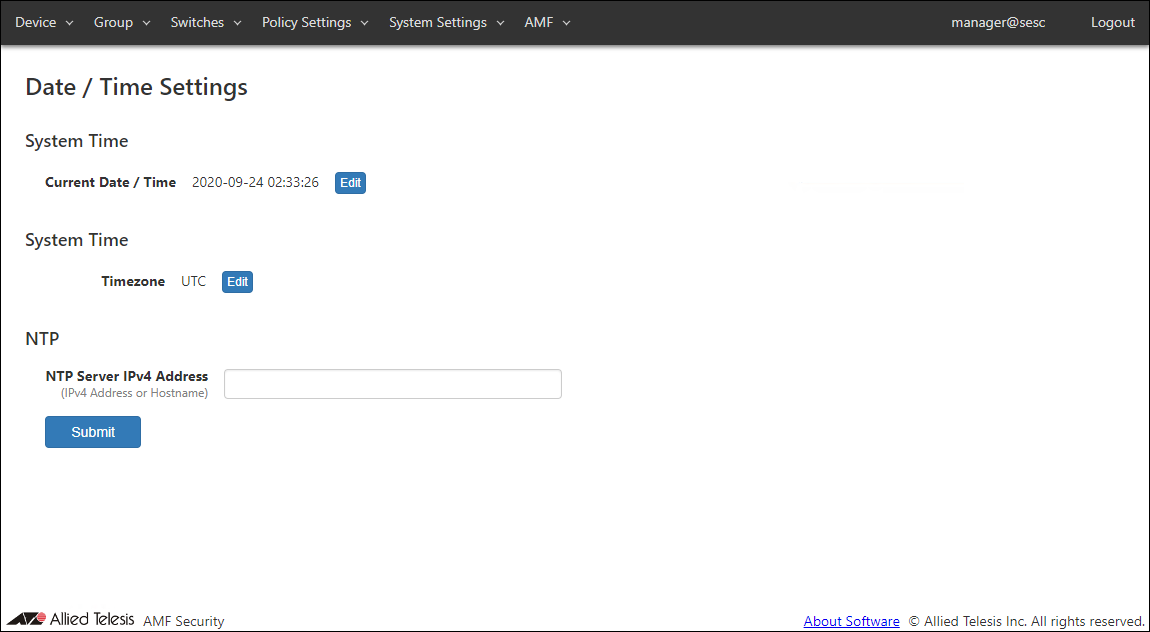
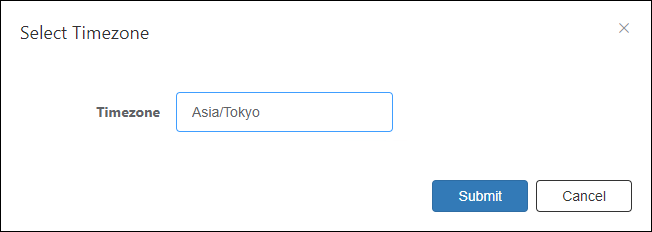
- The Select Timezone dialog is displayed. Select the "Asia/Tokyo" from the drop-down list and click the "Submit" button.
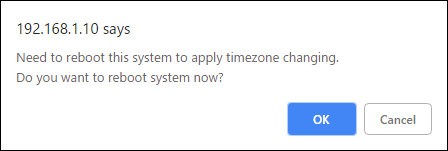
- Click the "OK" button.
Note
Even if you click "Cancel" here, the time zone will be set, but you need to restart the device to reflect the timezone setting in the time of the AMF Security log.
Example: Open the System Settings > System Information page. Click the "Reboot" button next to "Reboot this system". - After the message is displayed, AMF Security restarts and the login screen is displayed again.
After logging in, the System Settings > Date > Time Settings page is displayed.
13 Aug 2024 16:28