Add Subnets to Monitor
To monitor your network with SNMP Plug-in, you have to tell the plugin which subnets to monitor.
Once subnets are specified, the plugin performs auto discovery on those subnets and finds devices in the subnets.
You can also add devices manually.
NoteWith this product, the MAC address of the device is acquired from the dot1dBaseBridgeAddress of the standard MIB, and if it cannot be acquired, it is acquired from the ARP table of the other device detected during Auto Discovery.
Therefore, when registering a MAC address on a device that does not support dot1dBaseBridgeAddress, set the IP address of the device to a value larger than that of other devices so that the device can be detected later.
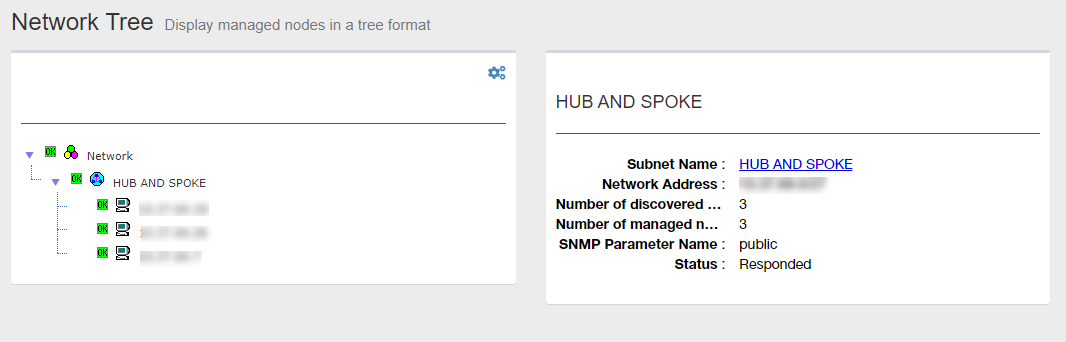
- Select "Network Tree" from the menu.
The Device Tree View page is displayed.
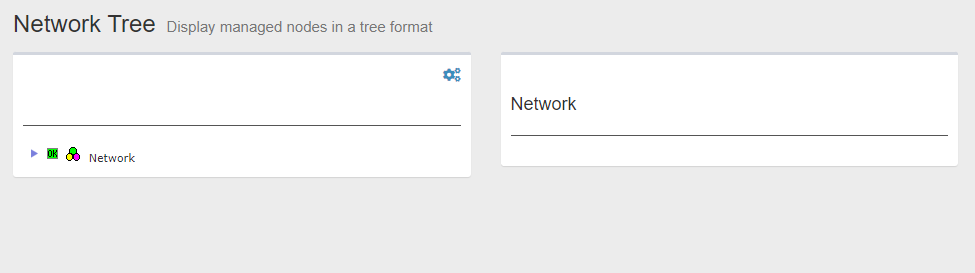
- Click "Network" in the Tree View to expand the tree.
There's no child nodes under the "Network" because there's nothing registered by default.
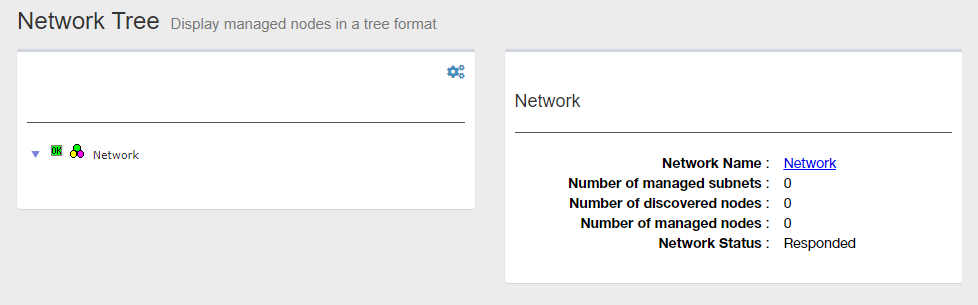
In the right side of the Content section, information about the selected node in the tree is displayed.
The name of the selected node is shown as the title. You can see the current title is "Network".
Under the title, the numbers of monitored subnets, detected devices and monitored devices are shown as zero.
- Click Gear icon at the top right of the Tree View.
A context menu for the selected node is displayed.
In this case, "Add Subnet" menu is displayed for the "Network".
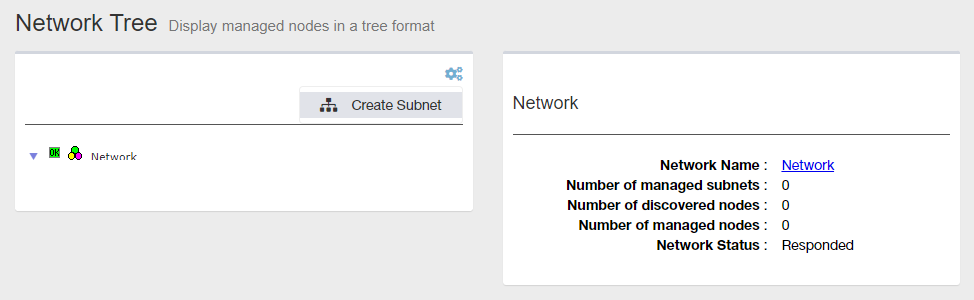
- Select "Add Subnet".
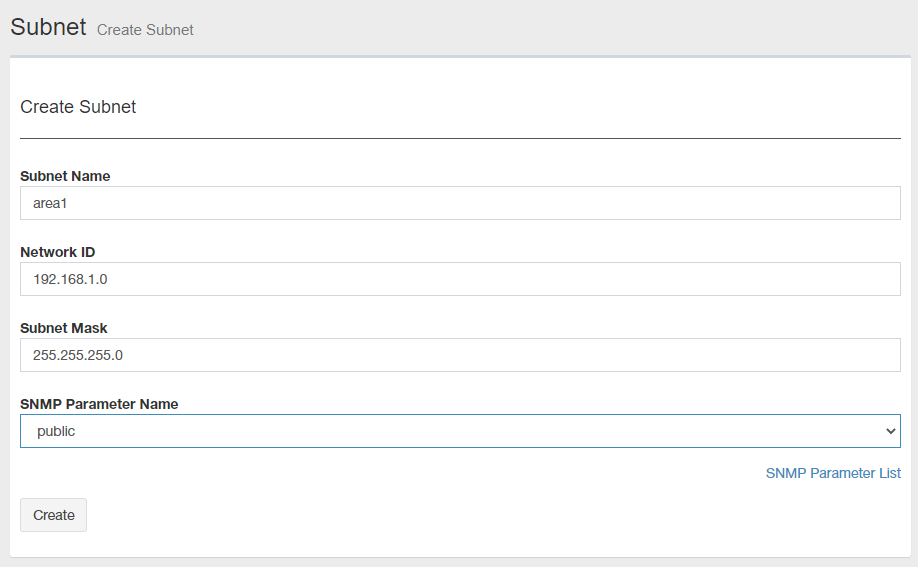
The Add Subnet page is displayed.
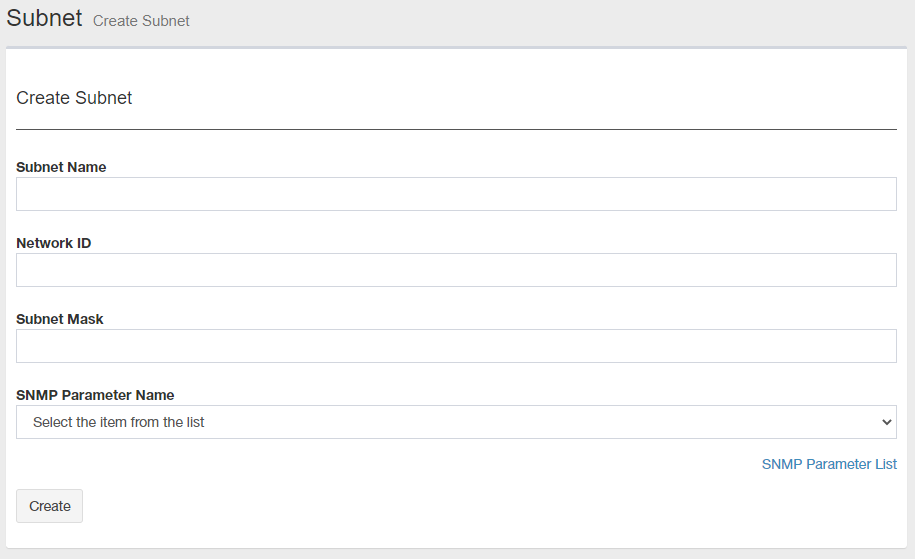
- Enter the name of the subnet, network ID, subnet mask, and community name to add to the management target.
- Name:
Enter a name for the subnet. You can specify any character string.
Note
The following symbos cannot be used for subnet name.
! ( ) * . ? # $ & @ / [ ] + = ' ; : , \Note
You cannot change the Subnet Name. To change the name, you have to delete and add it with a new name.
- Network ID:
Enter the network ID for the subnet (IPv4 network address such as 192.168.1.0).
- Subnet mask:
Enter the subnet mask for the subnet (for example, 255.255.255.0).
Note
Host mask (255.255.255.255 or /32) is not supported.
- Community Name
Enter the SNMP community name to use when discovering the device (for example, public).
- Name:
- Click "Add New".
The Device Tree View page is displayed.
If the new subnet is created normally, Auto Discovery starts.
You can see the empty subnet under the Network in the "Device Tree View" just after you added the subnet.
Note
The following points should be noted when creating a subnet (Auto Discovery).
-Click the "Add New" button only once.
-Auto Discovery is executed immediately after subnet creation, so manual Auto Discovery is not required.
-During Auto Discovery, do not perform Auto Discovery for the same subnet.
-After a while (about 10 minutes for a 24-bit mask), reload the web browser and check the status of the newly created subnet.Note
Time to finish auto discovery on the subnet depends on how big the subnet's address space is.
- When the auto discovery is done, reload the "Device Tree View".
Detected devices are added under the subnet node.
IP addresses are used for names of the general devices, while hostnames are used for PC.
The following image is an example of the display of subnets added to the Tree View.
19 Apr 2023 14:09