Policy Management
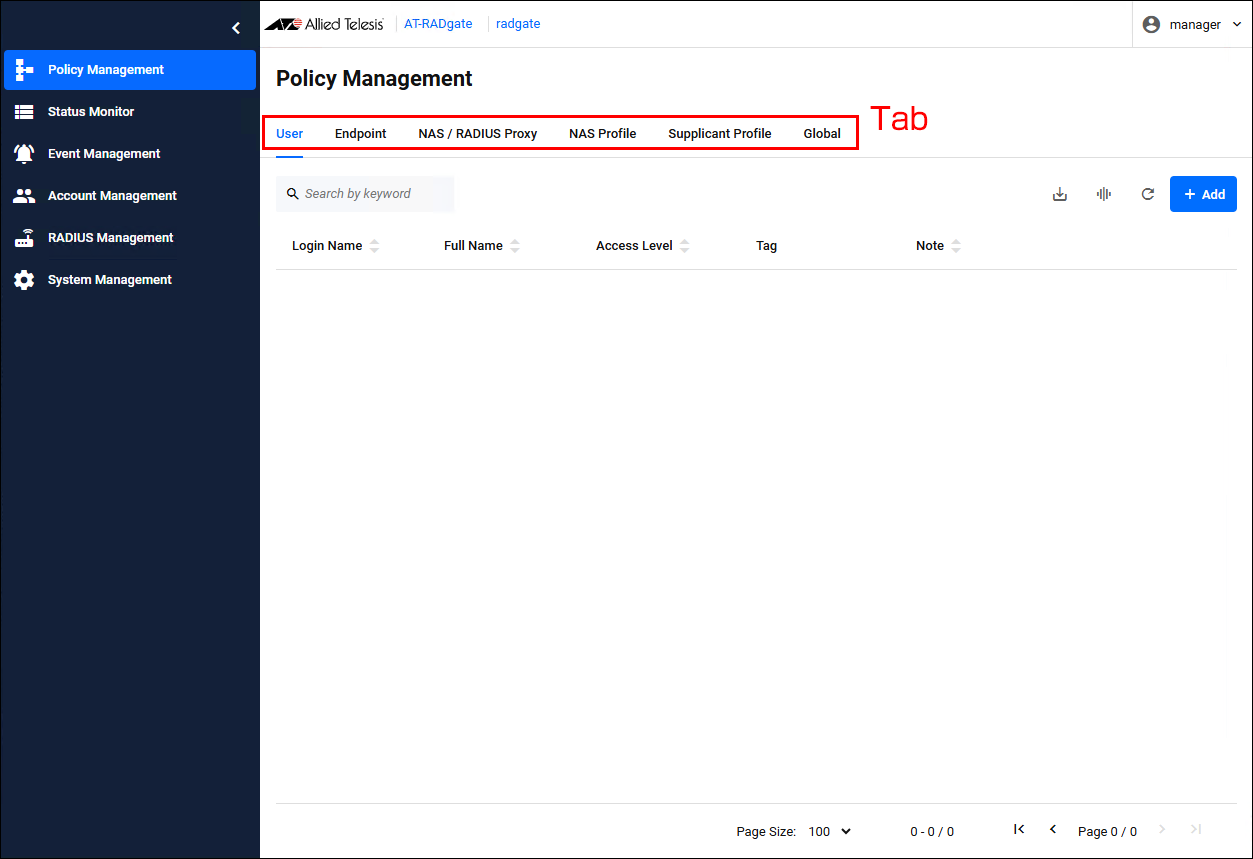
The "Policy Management" page allows you to manage policies for User, Endpoint, NAS, etc.
User
Policy Management > UserManages AT-RADgate User policies.
Clicking the "User" tab displays a list of User policies registered on AT-RADgate.
NoteFor User policy, register the MAC Address in the case of MAC Address-based Authentication (MAC-based Authentication, MAC Access Control). When registering a MAC Address on AT-RADgate, please make sure the format (login name and password) matches the format sent by the NAS.
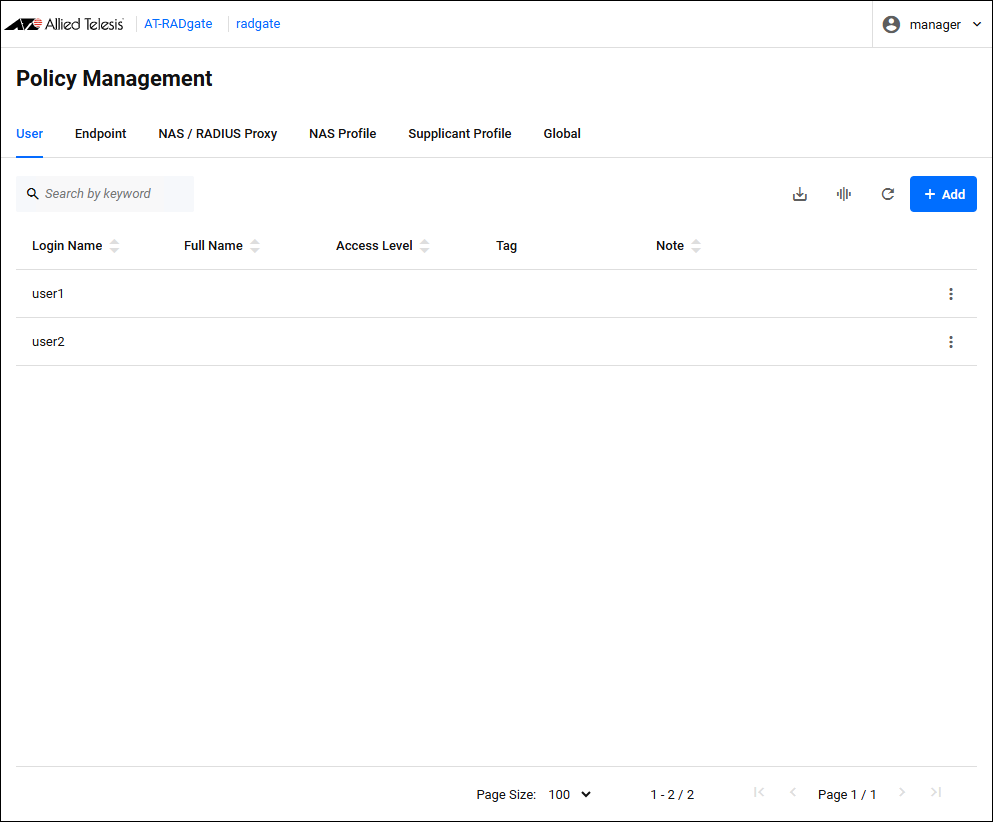
| Item Name | Display | Search | Sort | Description |
|---|---|---|---|---|
| Login Name | × | × | × | The user's account name. This value is used to identify the User policy and authenticate the supplicant. |
| Full Name | × | × | × | The user's full name. This value is not used to authenticate the supplicant. |
| Access Level | × | − | × | An integer value between 0 and 15 that represents the user's access level. A value of 0 means access is denied, any other value means access is allowed. A higher value indicates a higher level of access. |
| Tag | × | × | − | A list of tags assigned to the user. Used to categorize users into specific groups. |
| Note | × | × | × | A description of the user. This value is not used to authenticate the supplicant. |
| Button Name | Description |
|---|---|
 Export as CSV |
Download the currently registered User policies in CSV (comma separated values) format. For information about CSV files, refer to Appendix > CSV File. |
 Manage Columns |
Changes the visibility of each column in the table. |
 Reload |
Reload the User policy list. |
| Add | Add a User policy (the Add User dialog appears). |
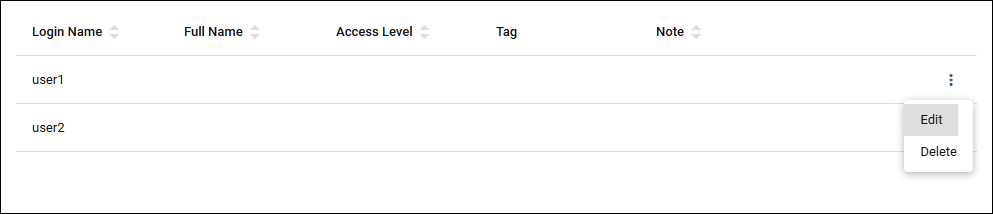
| Button Name | Description |
|---|---|
| "Edit" button | Update the User policy (the Update User dialog appears). |
| "Delete" button | Delete a User policy. |
Add User/Update User
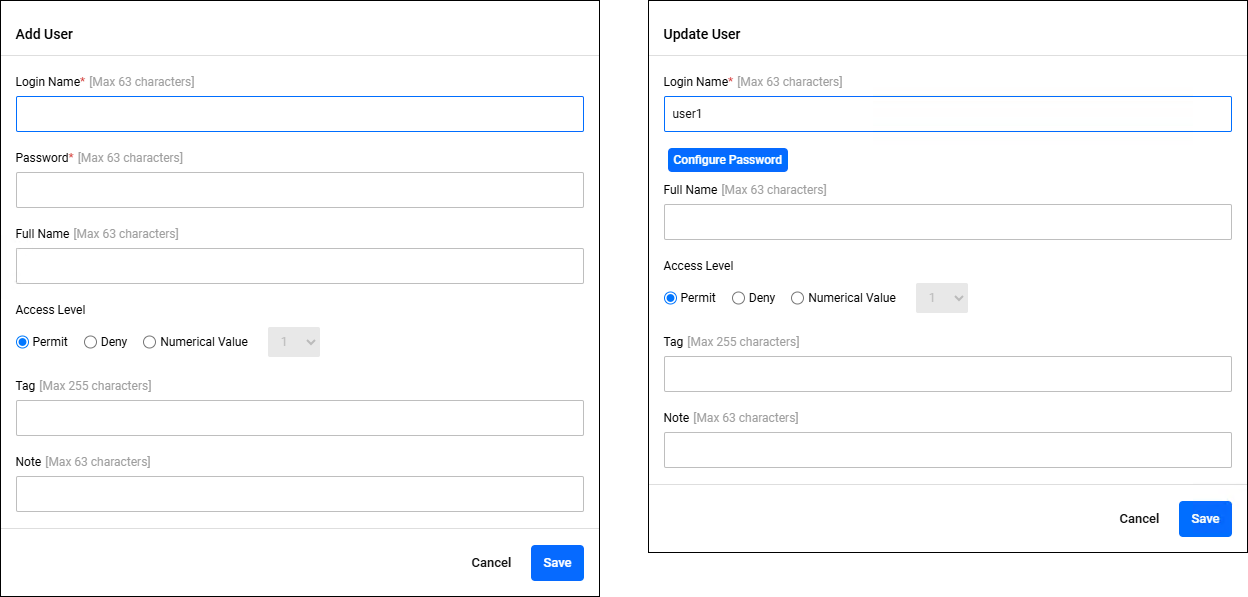
Policy Management > User > Add User/Update UserClicking the "Add" button in the upper right corner of the User page displays the Add User dialog, allowing you to add a new User policy. Additionally, if you click the "Edit" menu on the far right of a User policy that has already been registered, the Update User dialog appears, allowing you to edit the User policy.
The two dialogs share a common form.
| Item / Button Name | Mandatory | Format | Description |
|---|---|---|---|
| Login Name | × | Identifier | The user's account name. |
| "Configure Password" button | − | − | Only visible in the User Update dialog. Clicking this displays the "Password" items, allowing you to change your password. |
| Password | × | Password | The user's account password. Alphanumeric characters and symbols can be used. |
| Full Name | − | String (Max 63 characters) | The user's full name. |
| Access Level | − | Integer (0-15) (When "Numeric" is selected) |
The user's access level. Permit: Allow access. Deny: Denies access. Number: Set an integer value between 0 and 15. A value of 0 means access is denied, any other value means access is granted, with higher values representing higher levels of access. |
| Tag | − | Tag | A list of tags to assign to the user. If you specify multiple values, separate them with a space character. |
| Note | − | String (Max 63 characters) | A description of the user. |
| "Cancel" button | − | − | Cancels the policy addition or update. |
| "Save" button | − | − | Register new policy information or update policy information. |
Endpoint
Policy Management > EndpointManages AT-RADgate Endpoint policies.
Clicking the "Endpoint" tab displays a list of Endpoint policies registered on AT-RADgate.
An endpoint refers to a network interface installed in a device such as a PC or smartphone. If an endpoint has two interfaces, one wired and one wireless, you need to register two Endpoint policies to manage all interface connections on that endpoint.
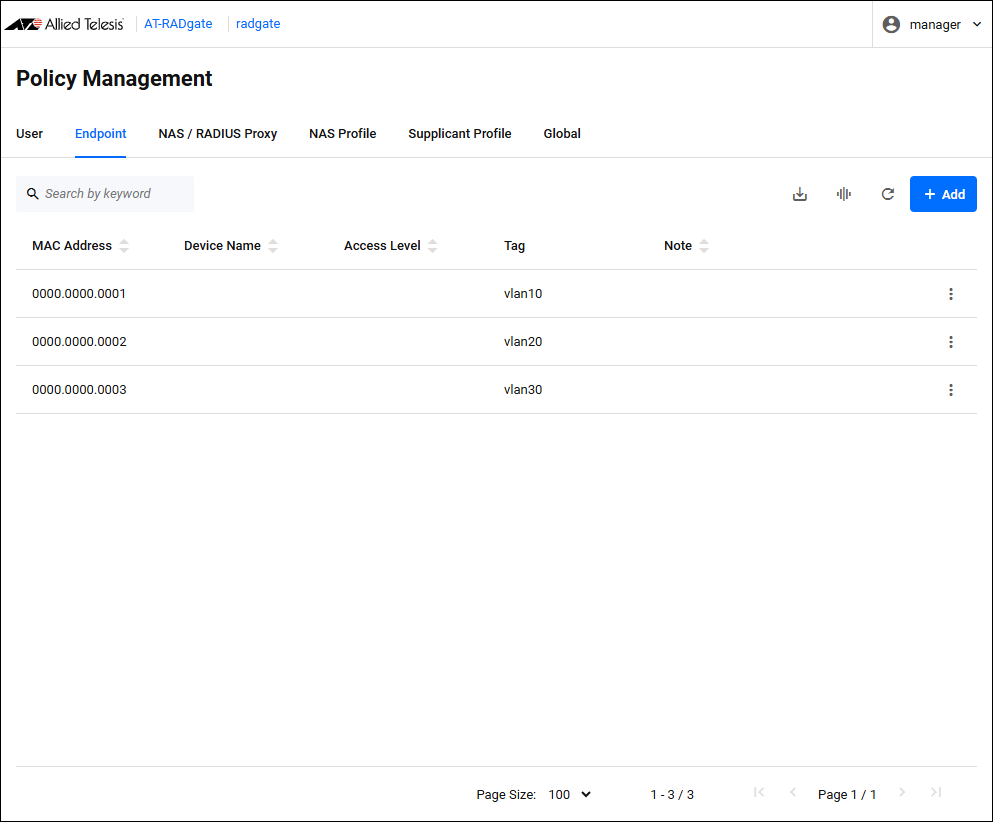
The contents of each column in the table are as follows:
| Item Name | Display | Search | Sort | Description |
|---|---|---|---|---|
| MAC Address | × | × | × | The endpoint's MAC Address. This value is used to identify the station policy and authenticate the supplicant. |
| Device Name | × | × | × | The device name of the device. You can assign the same device name to multiple devices. Multiple devices with the same device name represent the same device having multiple network interfaces. This value can be used as a condition for applying the Supplicant Profile when authenticating a supplicant. |
| Access Level | × | − | × | An integer value between 0 and 15 that represents the user's access level. A value of 0 means access is denied, any other value means access is allowed. A higher value indicates a higher level of access. |
| Tag | × | × | − | A list of tags assigned to the device. Used to categorize devices into specific groups. |
| Note | × | × | × | A description of the device. This value is not used to authenticate the supplicant. |
| Button Name | Description |
|---|---|
Export as CSV |
Download the currently registered Endpoint policies in CSV (comma separated values) format. For information about CSV files, refer to Appendix > CSV File. |
Manage Columns |
Changes the visibility of each column in the table. |
Reload |
Reload the Endpoint policy list. |
| Add | Add an Endpoint policy (the Add Endpoint dialog appears). |
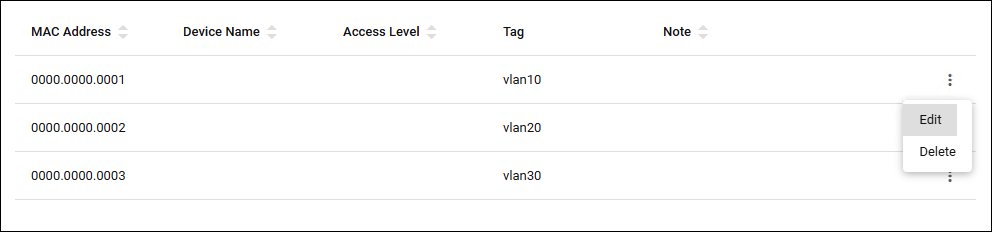
| Button Name | Description |
|---|---|
| "Edit" button | Update the contents of the Endpoint policy (the Update Endpoint dialog appears). |
| "Delete" button | Delete the Endpoint policy. |
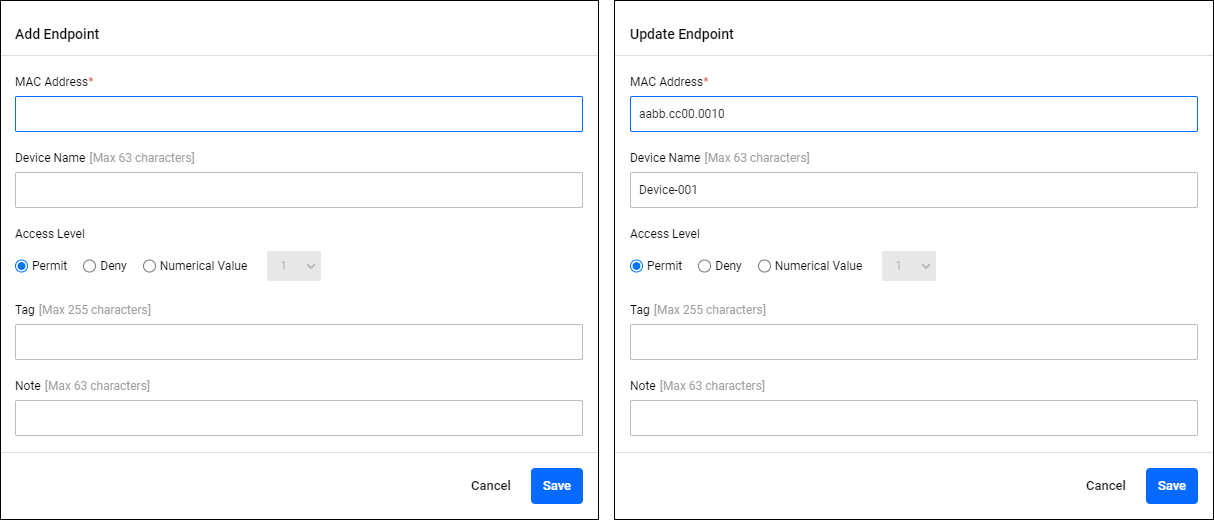
Add Endpoint/Update Endpoint
Policy Management > Endpoint > Add Endpoint/Update EndpointClicking the "Add" button in the upper right corner of the Endpoint page displays the Add Device dialog, allowing you to add a new Endpoint policy. Additionally, if you click the "Edit" menu for an Endpoint policy that has already been registered, the Update Endpoint dialog is displayed, allowing you to edit the Endpoint policy.
The two dialogs share a common form.
| Item / Button Name | Mandatory | Format | Description |
|---|---|---|---|
| MAC Address | × | MAC Address | The endpoint's MAC Address. |
| Device Name | × | Identifier | The device name of the device. |
| Access Level | − | Integer (0-15) | The access level of the endpoint. |
| Tag | − | Tag | A list of tags to assign to the endpoint. If you specify multiple values, separate them with a space character. |
| Note | − | String (Max 63 characters) | A description of the device. |
| "Cancel" button | − | − | Cancels the policy addition or update. |
| "Save" button | − | − | Register new policy information or update policy information. |
NAS / RADIUS Proxy
Policy Management > NAS > RADIUS ProxyManages AT-RADgate's NAS policies and RADIUS Proxy policies.
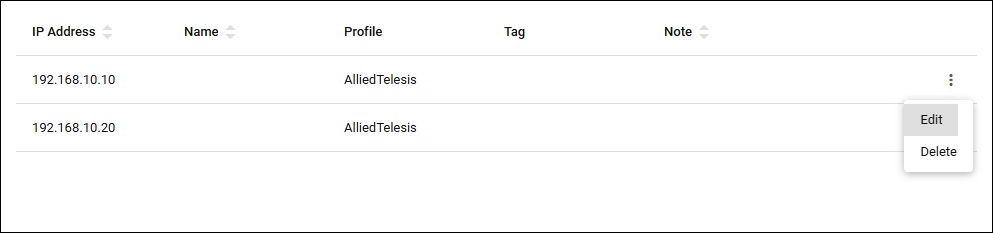
Clicking the "NAS / RADIUS Proxy" tab displays a list of NAS policies and RADIUS Proxy policies registered on AT-RADgate.
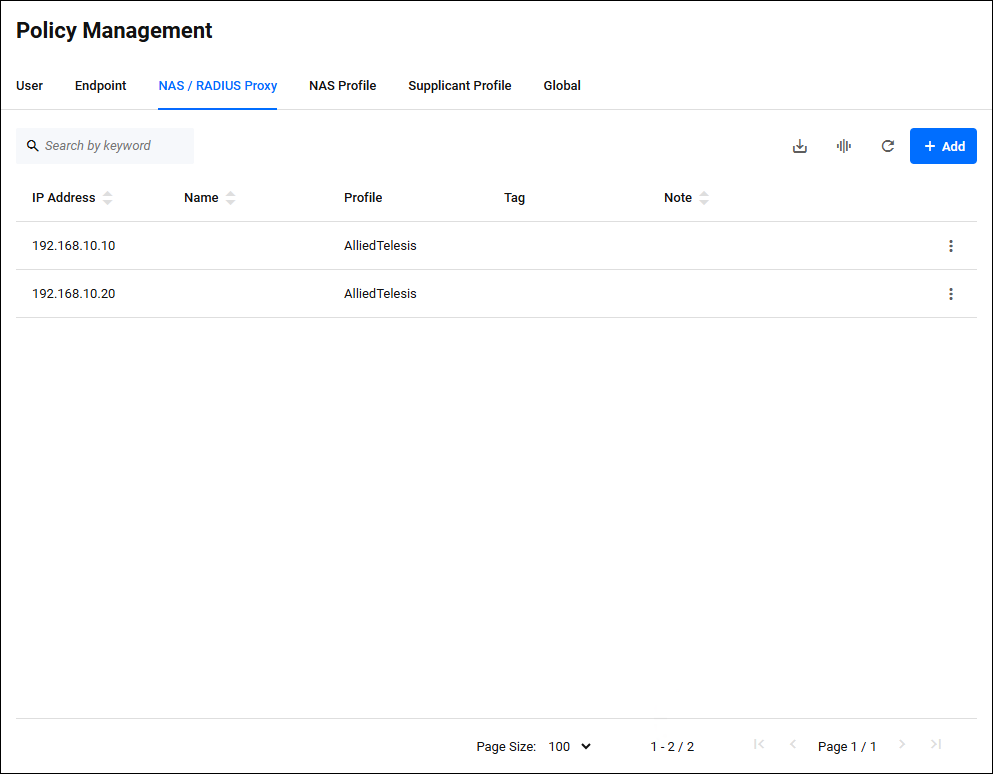
The contents of each column in the table are as follows:
| Item Name | Display | Search | Sort | Description |
|---|---|---|---|---|
| IP Address | × | × | × | NAS / RADIUS Proxy IP Address. This value is used to identify the NAS policy and authenticate the supplicant. |
| Name | × | × | × | NAS / RADIUS Proxy name. This value is not used to authenticate the supplicant. |
| Profile | × | − | − | The profile name assigned to this NAS / RADIUS Proxy. A profile is data that stores NAS / RADIUS Proxy settings and is useful when you need to apply the same settings to multiple NAS / RADIUS Proxy devices. If this value is empty, the default profile is assigned. For information about the default profiles, refer to Default NAS Profile. |
| Tag | × | × | − | This is a list of tags assigned to the NAS / RADIUS Proxy. Used to classify NAS into specific groups. |
| Note | × | × | × | A description of the NAS / RADIUS Proxy. This value is not used to authenticate the supplicant. |
| Button Name | Description |
|---|---|
Export as CSV |
Download the currently registered NAS / RADIUS policies in CSV (comma separated values) format. For information about CSV files, refer to Appendix > CSV File. |
Manage Columns |
Changes the visibility of each column in the table. |
Reload |
Reloads the NAS / RADIUS Profile policy list. |
| Add | Add a NAS / RADIUS Proxy policy (the Add NAS > RADIUS Proxy dialog appears). |
| Button Name | Description |
|---|---|
| "Edit" button | Updates the contents of the NAS / RADIUS Proxy policy (the Update NAS > RADIUS Proxy dialog appears). |
| "Delete" button | Delete the NAS / RADIUS Proxy policy. |
Add NAS / RADIUS Proxy/Update NAS / RADIUS Proxy
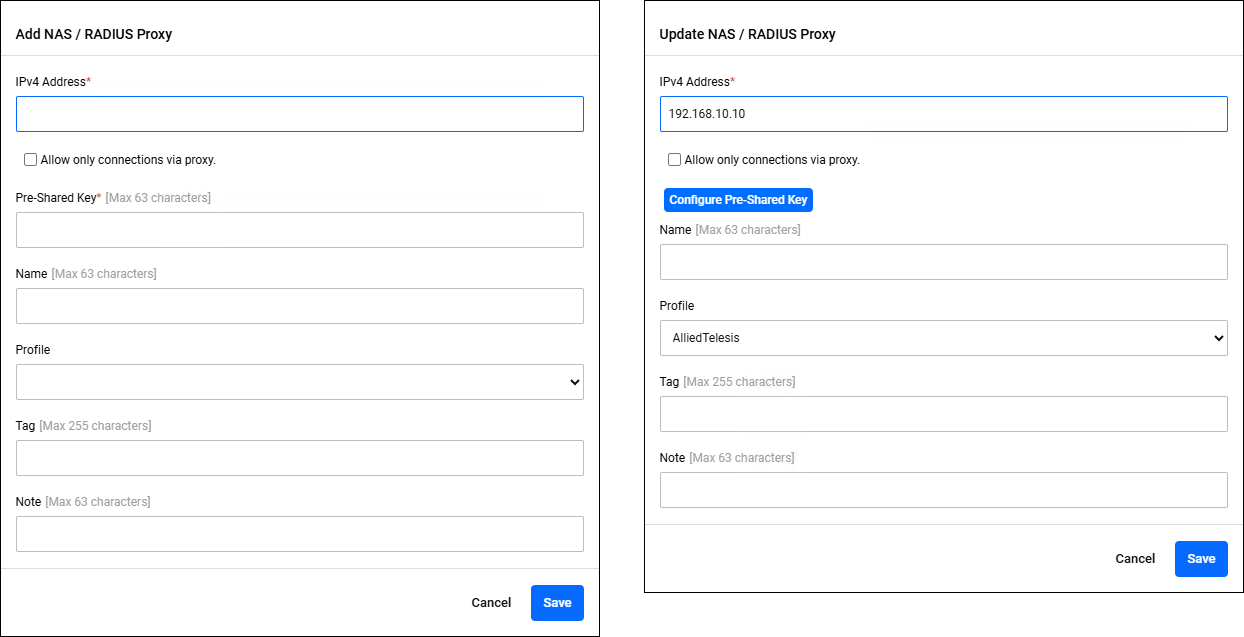
Policy Management > NAS > RADIUS Proxy > Add NAS > RADIUS Proxy > Update NAS > RADIUS ProxyClicking the "Add" button in the upper right corner of the NAS > RADIUS Proxy page displays the Add NAS > RADIUS Proxy dialog, allowing you to add a new NAS policy. In addition, if you click the "Edit" menu on the far right of a NAS policy that has already been registered, the Update NAS > RADIUS Proxy dialog is displayed, allowing you to edit the NAS policy.
The two dialogs share a common form.
| Item / Button Name | Mandatory | Format | Description |
|---|---|---|---|
| IPv4 Address | × | IPv4 Address | NAS / RADIUS Proxy IP Address. |
| Allow only connections via proxy. | − | Check box | Check the checkbox to omit entering the pre-shared key. With this setting, authentication requests sent by this NAS / RADIUS Proxy are only accepted if they are routed through other RADIUS Proxies. |
| "Configure Pre-Shared Key" button | − | − | Only visible in the Update NAS > RADIUS Proxy dialog. Clicking this displays the "Pre-shared Key (PSK)" item, allowing you to change the pre-shared key.
|
| Pre-Shared Key | × | Password | The pre-shared key for the NAS / RADIUS Proxy. |
| Name | × | Identifier | NAS / RADIUS Proxy name. |
| Profile | − | − | The profile name. Select the profile you registered in NAS Profile. |
| Tag | − | Tag | A list of tags to be assigned to the NAS / RADIUS Proxy. If you specify multiple values, separate them with a space character. |
| Note | − | String (Max 63 characters) | A description of the NAS / RADIUS Proxy. |
| "Cancel" button | − | − | Cancels the policy addition or update. |
| "Save" button | − | − | Register new policy information or update policy information. |
NAS Profile
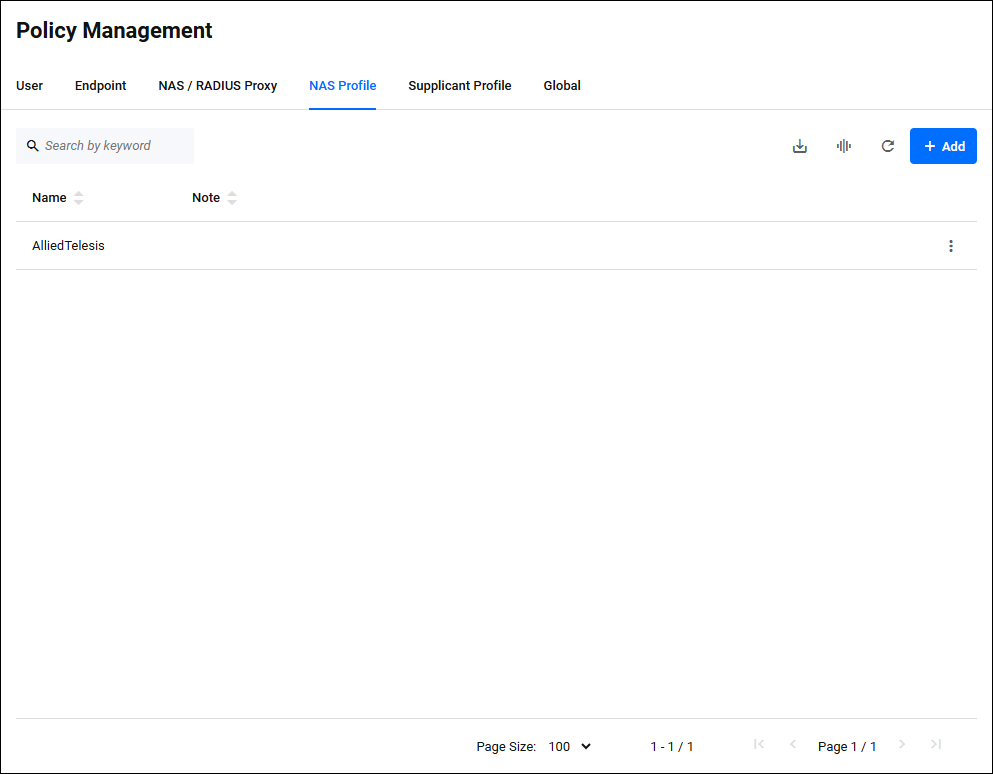
Policy Management > NAS ProfileManages AT-RADgate's NAS Profile policies.
Clicking "NAS Profile" displays a list of NAS Profile policies registered on AT-RADgate.
The contents of each column in the table are as follows:
| Item Name | Display | Search | Sort | Description |
|---|---|---|---|---|
| Name | × | × | × | NAS Profile name. |
| Note | × | × | × | A description of the NAS Profile. |
| Button Name | Description |
|---|---|
Export as CSV |
Download the currently registered NAS Profile policies in CSV (comma separated values) format. For information about CSV files, refer to Appendix > CSV File. |
Manage Columns |
Changes the visibility of each column in the table. |
Reload |
Reloads the NAS Profile policy list. |
| Add | Add a NAS Profile policy (the Add NAS Profile dialog appears). |
| Button Name | Description |
|---|---|
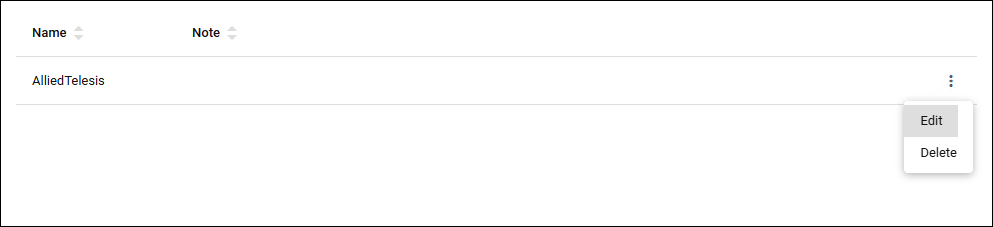
| "Edit" button | Updates the contents of the NAS Profile policy (the Update NAS Profile dialog appears). |
| "Delete" button | Delete a NAS Profile policy. |
Add NAS Profile/Update NAS Profile
Policy Management > NAS Profile > Add NAS Profile/Update NAS ProfileClicking the "Add" button in the upper right corner of the NAS Profile page displays the Add NAS Profile dialog, allowing you to add a new NAS Profile policy. In addition, if you click the "Edit" menu on the far right of an already registered NAS policy, the Update NAS Profile dialog is displayed, allowing you to edit the NAS Profile policy.
The two dialogs share a common form.

| Item / Button Name | Mandatory | Format | Description |
|---|---|---|---|
| Name | × | Identifier | NAS Profile name. |
| Note | − | String (Max 63 characters) | A description of the NAS Profile. |
| Enable device authentication, in addition to user authentication. | − | Check box | If you check the check box, and a MAC Address is stored in the User Name attribute of a received authentication request message, endpoint authentication is performed by MAC Address in addition to authentication by user name. |
| Enable MAC based authentication. | − | Check box | If you check the check box, and a MAC Address is stored in the User-Name attribute of the received authentication message, endpoint authentication is performed using the MAC Address instead of user authentication. The process of determining whether the string stored in the user name is a MAC address is performed after the realm (domain) portion is removed by the User-Name Attribute Settings. If you have added realm (domain) information to the MAC Address for RADIUS Proxy processing, you must perform the User-Name Attribute Settings and delete that information. NoteWhen using MAC-based authentication through a RADIUS Proxy, a NAS profile must be assigned to the NAS connected to the supplicant. |
| "Cancel" button | − | − | Cancels the policy addition or update. |
| "Save" button | − | − | Register new policy information or update policy information. |
Default NAS Profile
If you do not explicitly assign a profile to a NAS policy, the default NAS Profile is applied to that NAS. The default NAS Profile settings are as follows:| Setting items | Default value |
|---|---|
| Enable device authentication, in addition to user authentication. | Unselected state |
| Enable MAC based authentication. | Unselected state |
Supplicant Profile
Policy Management > Supplicant ProfileManages Supplicant Profile policies for AT-RADgate.
Clicking "Supplicant Profile" displays a list of Supplicant Profile policies registered in AT-RADgate.
NoteIf you do not register Supplicant Profile policy, the default policy is applied to the supplicant. Refer to Default Supplicant Profile policy.
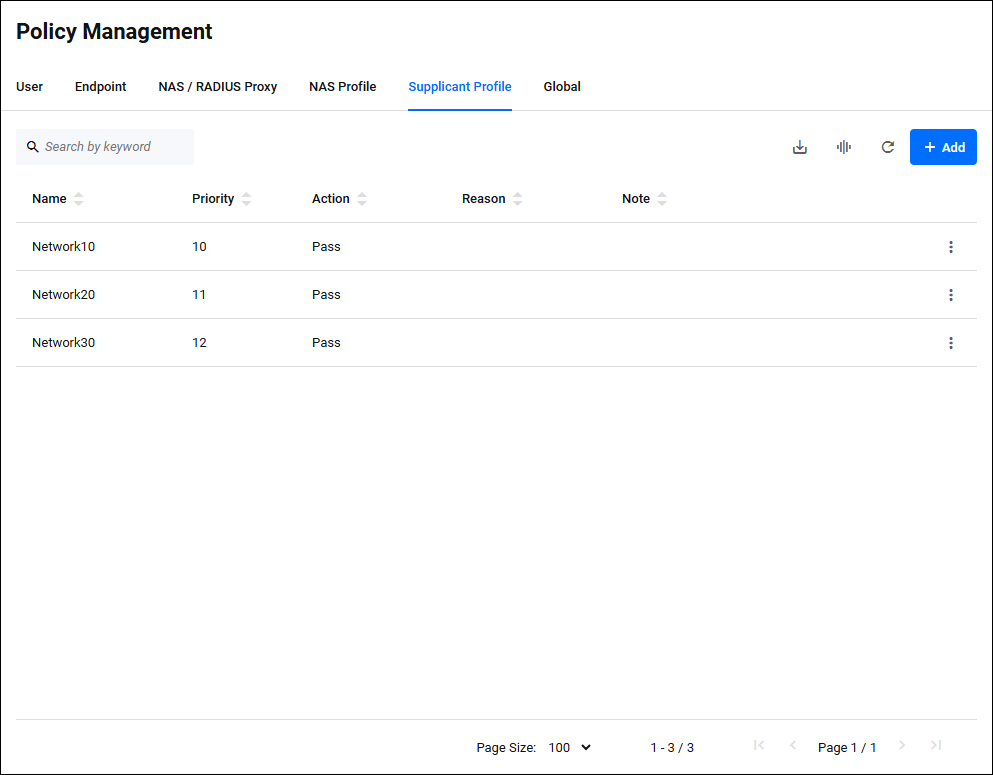
| Item Name | Display | Search | Sort | Description |
|---|---|---|---|---|
| Name | × | × | × | Supplicant Profile name. |
| Priority | × | − | × | The priority for applying the Supplicant Profile. The lower the value, the higher the priority. |
| Action | × | − | × | The action to be applied to the supplicant. |
| Reason | × | × | × | This is the reason why this action was registered. |
| Note | × | × | × | A description of the Supplicant Profile. |
| Button Name | Description |
|---|---|
Export as CSV |
Downloads the currently registered Supplicant Profile policies in CSV (comma separated values) format. For information about CSV files, refer to Appendix > CSV File. |
Manage Columns |
Changes the visibility of each column in the table. |
Reload |
Reloads the Supplicant Profile policy list. |
| Add | Add Supplicant Profile policy (the Add Supplicant Profile dialog appears). |
| Button Name | Description |
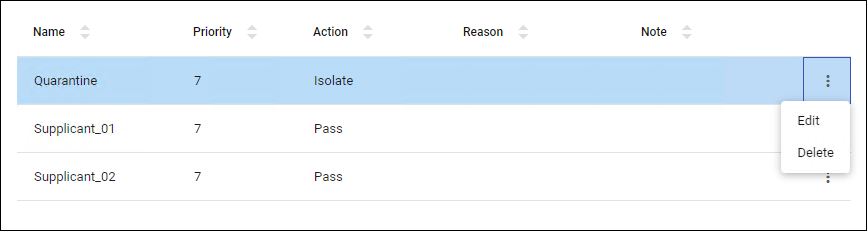
|---|---|
| "Edit" button | Update the contents of the Supplicant Profile policy (the Update Supplicant Profile dialog appears). |
| "Delete" button | Delete the Supplicant Profile policy. |
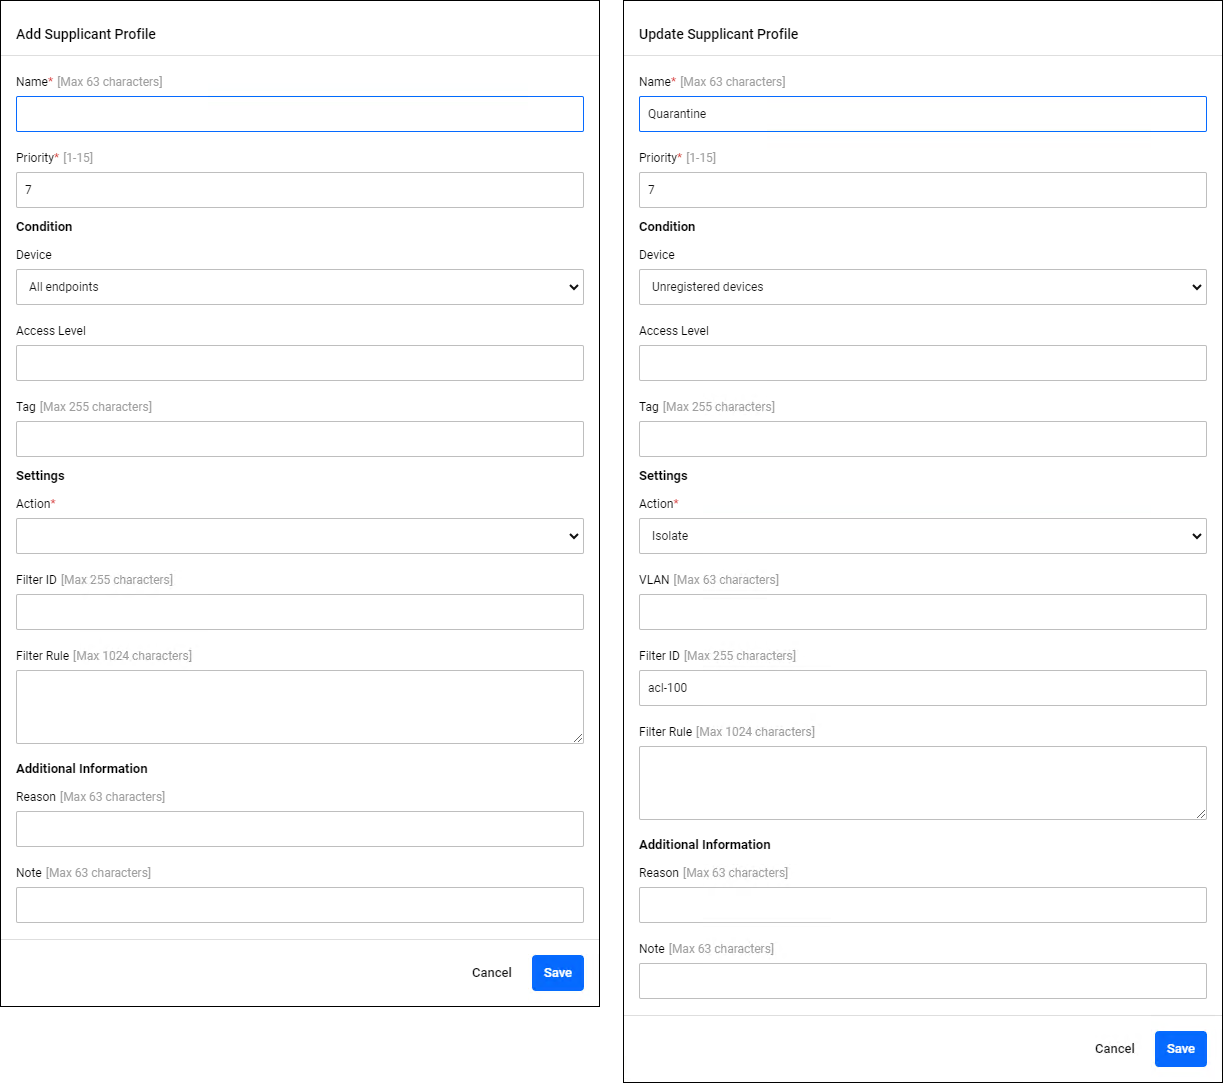
Add Supplicant Profile/Update Supplicant Profile
Policy Management > Supplicant Profile > Add Supplicant Profile/Update Supplicant ProfileClicking the "Add" button in the upper right corner of the Supplicant Profile page displays the Add Supplicant Profile dialog, allowing you to add a new Supplicant Profile. Additionally, if you click the "Edit" menu on the far right of an already registered Supplicant Profile, the Update Supplicant Profile dialog is displayed, allowing you to edit the Supplicant Profile.
The two dialogs share a common form.
| Item / Button Name | Mandatory | Format | Description |
|---|---|---|---|
| Name | × | Identifier | Supplicant Profile name. |
| Priority | × | Integer (0-15) | The priority for applying the profile. |
| Condition | − | − | Set the conditions for the supplicants for which this profile applies. Refer to Conditions for details. |
| Value | − | − | Configure the parameters that is applied to supplicants that meet the conditions of this profile. Refer to Settings for detail. |
| Additional Information | − | − | Set any additional information for this profile. Refer to Additional Information for details. |
| "Cancel" button | − | − | Cancels the policy addition or update. |
| "Save" button | − | − | Register new policy information or update policy information. |
Condition
| Item Name | Mandatory | Format | Description |
|---|---|---|---|
| Device | − | − | These are conditions related to the supplicant's endpoint information. Refer to Device Condition for details. |
| Access Level | − | String | Match condition for the supplicant's access level. Refer to Access Level Condition for details. |
| Tag | − | String (Max 255 characters) | Matching criteria for the supplicant's tag. Refer to Tag Conditions for details. |
Device Condition
For Device Condition, select "All endpoints," "Registered devices," "Unregistered devices," "Specified MAC address," or "Specified by name." The operation of each parameter is as follows:| Device Condition Name | Behavior |
|---|---|
| All endpoints | Matches all supplicants. |
| Registered devices | The MAC Address matches the supplicant registered in AT-RADgate as the Endpoint policy. |
| Unregisterd devices | The MAC Address matches the supplicant that unregistered in AT-RADgate as the Endpoint policy. |
| Specified by MAC address | Matches supplicants whose MAC Address matches the configured address. If you select this condition, an additional field appears where you can enter the MAC Address. |
| Specified by name | Matches supplicants whose device name matches the configured device name. If you select this condition, an additional field appears where you can enter the device name. |
| Additional Field Name | Mandatory | Format | Description |
|---|---|---|---|
| MAC Address | × | MAC Address | This is displayed when "Specified MAC address" is selected as the Device Condition.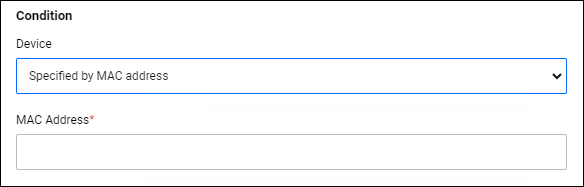
|
| Device Name | × | Identifier | This is displayed when "Specified by name" is selected as the Device Condition.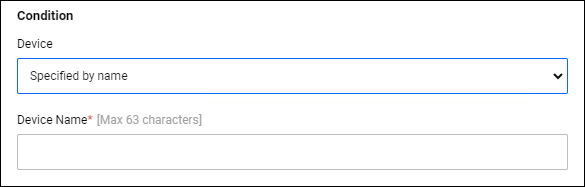
|
Access Level Condition
The Access Level Condition is written in the following format:| Name | Format | Examples | Behavior |
|---|---|---|---|
| Value specification | NUM | 3 | NUM represents an integer value. Matches supplicants with a value equal to the specified numeric value. |
Tag Condition
The Tag Condition is specified in the following format:| Tag Condition Name | Behavior |
|---|---|
| Specified by name | Matches supplicants with the specified Tag Condition Name. |
Value
| Item Name | Mandatory | Format | Description |
|---|---|---|---|
| Action | × | − | The action to be applied to the supplicant. Refer to Actions for details. |
| Filter ID | − | String (Max 255 characters) | The ID of the packet filter to be applied to the supplicant. Refer to Packet Filters for details. |
| Filter Rule | − | String (Max 1024 characters) | The packet filter rules that are applied to the supplicant. Refer to Packet Filters for details. |
Action
Action settings are basically used in conjunction with functions such as port authentication that mainly control the network connection of user endpoints (supplicants), and specify the control that the network switch that accommodates the user endpoint performs on packets sent by the user endpoint. In all other cases, set the action to "Pass" and leave the VLAN blank.In the Action Setting field, select either "Pass", "Drop", "Isolate", "Undecided", or "Notice". The operation of each parameter is as follows:
| Action Name | Behavior |
|---|---|
| Pass | It forwards packets sent by the supplicant to the appropriate network segment. If you select this condition, an additional field appears where you can enter the destination VLAN name. If a VLAN name is set, the packet is forwarded to the specified VLAN. If not set, it is forwarded to the base VLAN. |
| Drop | Discards packets sent by the supplicant. |
| Quarantine | It forwards packets sent by the supplicant to the isolated network segment. If you select this condition, an additional field appears where you can enter the destination VLAN name. If a VLAN name is set, the packet is forwarded to the specified VLAN. If not set, the traffic is forwarded to the VLAN set in the "Default Quarantine VLAN" in the General policy. If the "default isolated VLAN" is also not set, traffic is forwarded to the base VLAN. |
| Undecide | Sets the supplicant connection state to undetermined. If you select this condition, an additional field appears where you can enter the destination VLAN name. If a VLAN name is set, the packet is forwarded to the specified VLAN. If it is not set, it is discarded. NoteDo not select this as it is not supported in this version. |
| Notice | Outputs the event log. When a profile with this action configured is applied to a supplicant, other configuration parameters do not apply to the supplicant, they are ignored and the evaluation of lower priority profiles continues to determine the action that should be applied to the supplicant. |
Packet Filter
Packet filter settings are basically used in conjunction with functions that control the network connection of user endpoints (supplicants), such as port authentication, and specify additional filter processing that the network switch that accommodates the user endpoint performs on packets sent by the user endpoint. Do not configure this setting in any other cases.| Item Name | Format |
|---|---|
| Filter ID | Specify the filter name (ACL name) that has already been set in the network switch. Multiple filters can be specified by separating them with a space character. |
| Filter Rule | Specifies the filter rule to be set on the network switch. Filter rules are written according to the grammar defined by the network switch to which the settings are applied. Multiple rules can be specified by separating them with line breaks. |
Additional Information
| Field Name | Mandatory | Format | Description |
|---|---|---|---|
| Reason | − | String (Max 63 characters) | A description of the NAS Profile. |
| Note | − | String (Max 63 characters) | A description of the NAS Profile. |
Default Supplicant Profile policy
In AT-RADgate, the following Supplicant Profile policies are pre-configured with a lower priority than the profile set by the user. If a user does not match any of the registered Supplicant Profile policies, these policies are applied to the supplicant in order of decreasing priority.| Priority | Condition | Action |
|---|---|---|
| 1 | Unregistered devices | Drop |
| 2 | Access Level 0 | Drop |
| 3 | Access Level 1 or higher | Pass |
Global
Policy Management > GlobalManages general policy settings for AT-RADgate.
Clicking the General tab displays the current general policy settings for AT-RADgate.
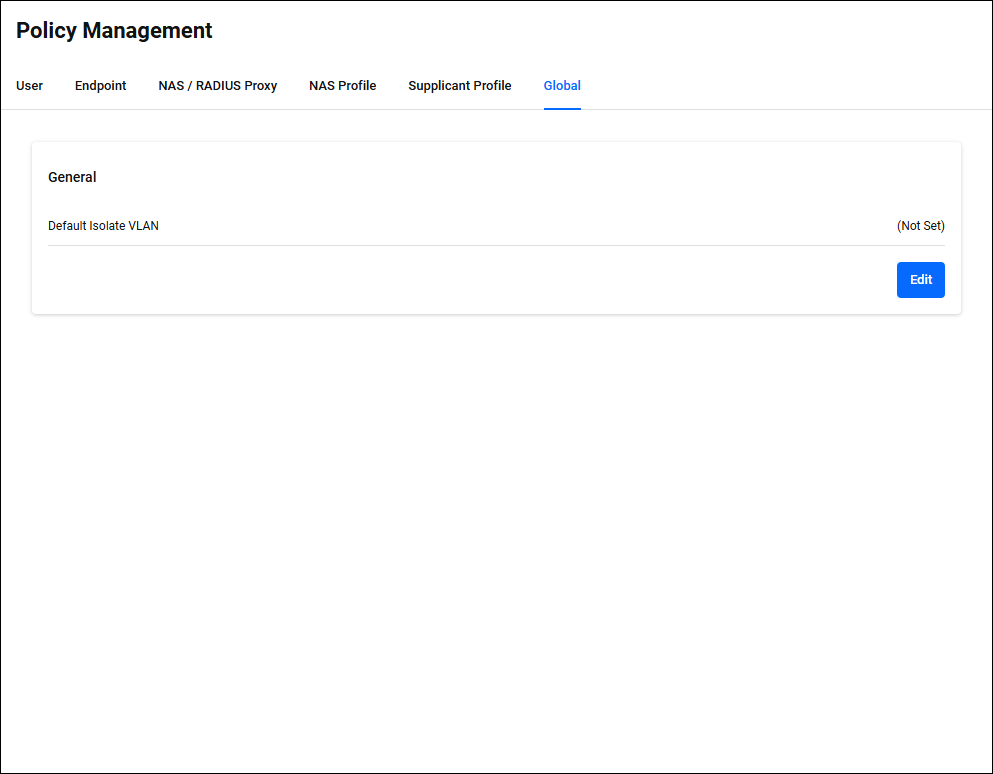
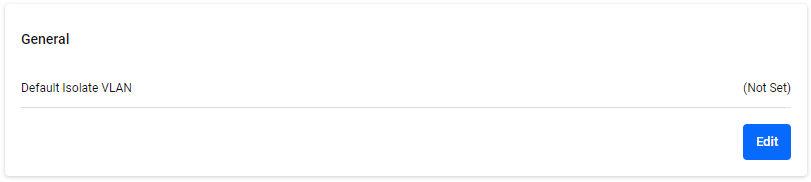
General
Policy Management > Global > GeneralIn General, you can set the default isolated VLAN. Click the "Edit" button at the bottom right to enter edit mode.
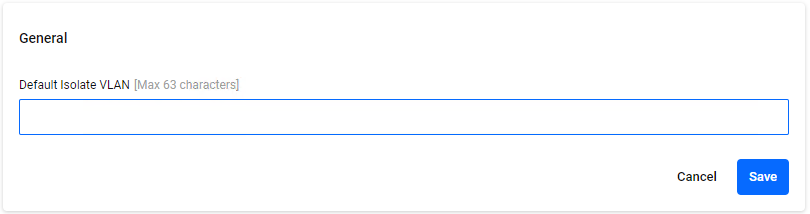
◼ Edit mode
| Item / Button Name | Mandatory | Format | Description |
|---|---|---|---|
| Default Isolate VLAN | − | Identifier | This is the quarantine destination VLAN name that is sent to the NAS when a quarantine action without a VLAN specification is configured in the Supplicant Profile. If not set, the device is isolated to the base VLAN. The default is no setting. |
| "Edit" button | − | − | Enter edit mode to configure the default quarantine VLAN. |
| "Cancel" button | − | − | Cancel the default quarantine VLAN configuration. |
| "Save" button | − | − | Register or update the default isolation VLAN settings. |
03 Jul 2025 16:04