Configure the AWC Plug-in
Register the TQ6702 GEN2-R (wireless AP router) configured as a wireless LAN router to the AWC Plug-in.
Please note that in order to create AP common settings and assign reading permission to specific user accounts, it is necessary to create a management group and an account in advance. To create a management group and a account according to your environment, please refer to Quick Tour > Configure Multi-channel Wireless Network > Create Management Group to Quick Tour > Configure Multi-channel Wireless Network > Create Account.
Create AP Profile
First, let's create an AP profile for TQ6702 GEN2-R.- Select "Wireless Configuration" > "AP Profile" from the AWC Plug-in menu.
The AP Profile list screen will appear.
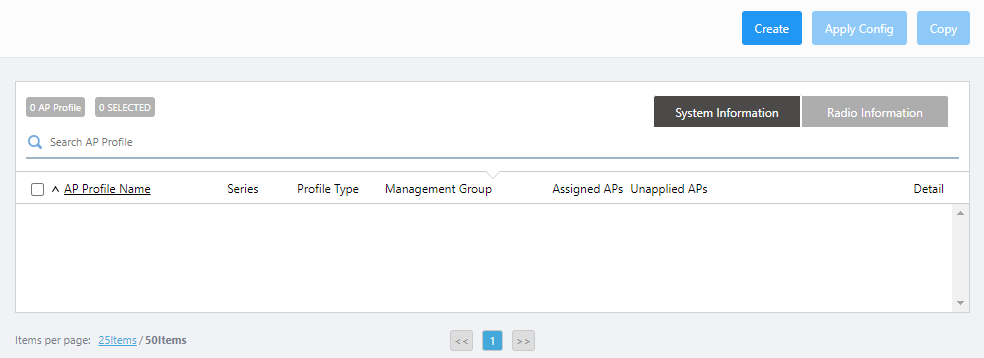
- Click "Create" at the top right of the screen.
The "Select Country, AP Series and Profile Type" dialog box will appear.
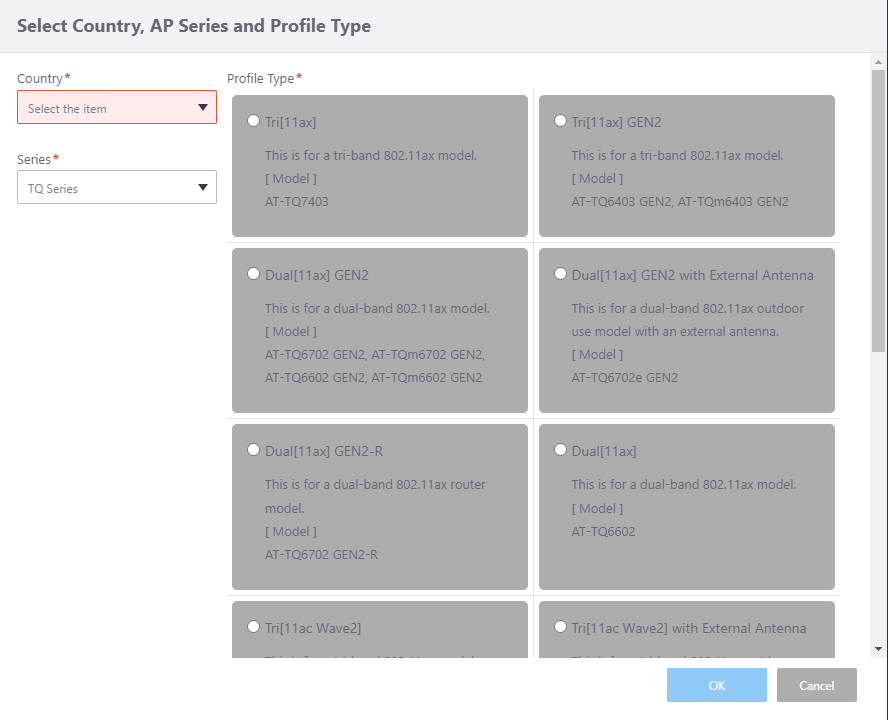
- Select a Country.
If the default country code for the currently logged in user is configured, it is selected by default.
- Select "TQ Series" from "Series".
- Select "Profile Type".
There are several options for this item, depending on the supported feature set of the AP model.
Select "Dual[11ax] GEN2-R", which is suitable for TQ6702 GEN2-R.
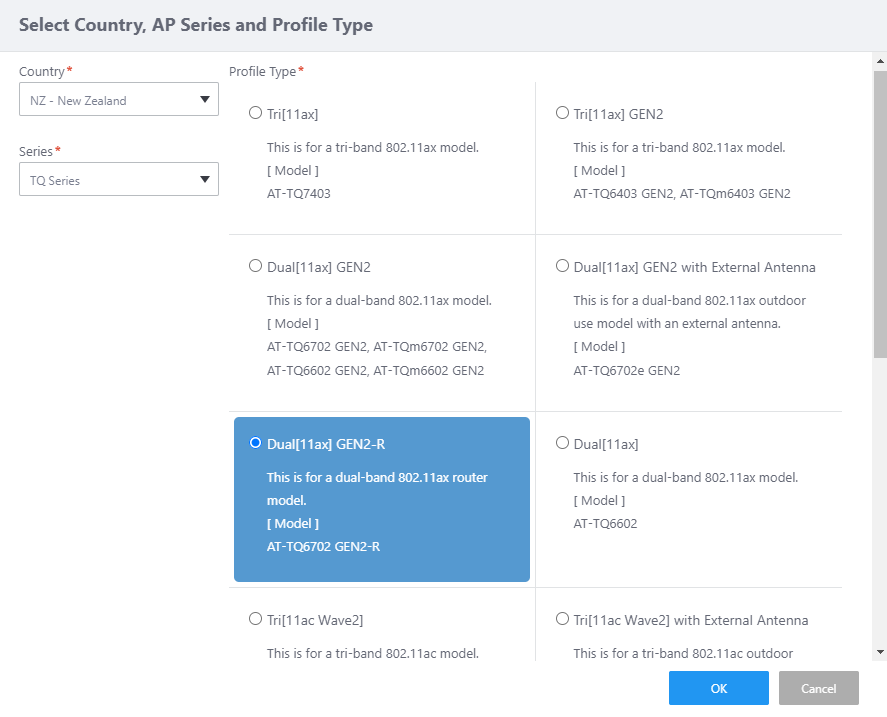
- Click "OK".
The AP profile configuration screen will appear.
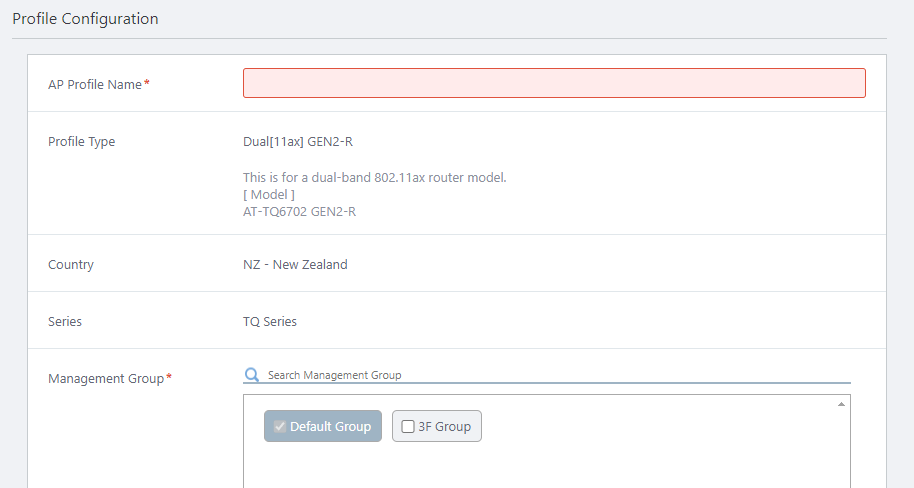
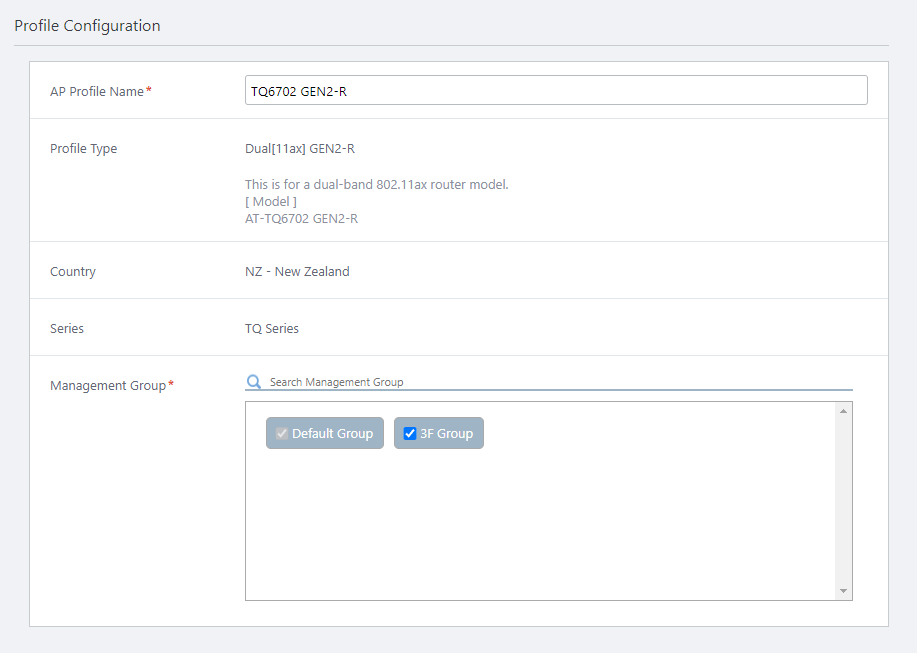
- Configure general parameters in the "Profile Configuration" section.
Enter "TQ6702 GEN2-R" in "AP Profile Name".
The "Profile Type", "Country" and "Series" fields show the options selected in the earlier "Select Country, AP Series and Profile Type" dialog box.
Select the Management Groups that you want this AP Profile to belong to.
An AP Profile can be used in multiple Management Groups by selecting those groups in this dialog box.
Note that you cannot uncheck the "Default Wireless Group".
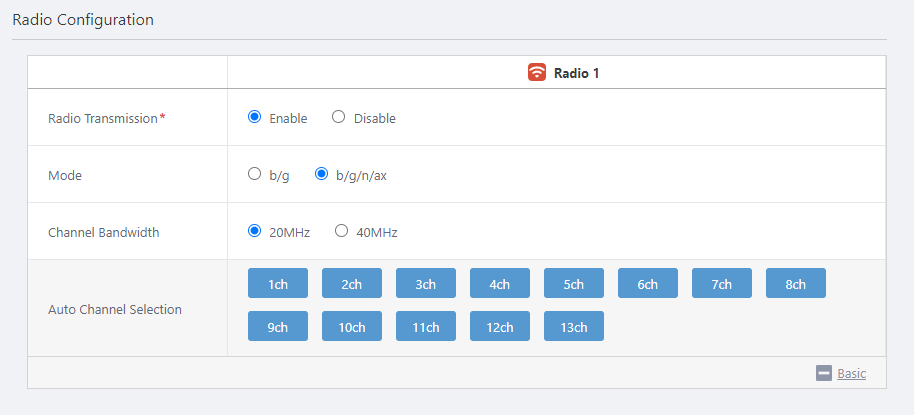
- You can specify configuration parameters for radio waves in the "Radio Configuration" section.
Unlike conventional wireless APs, what is actually configured in the wireless AP router is the configuration made in the CLI or Web GUI of the router itself. Here, in order to monitor the radio through the AWC function, the same radio settings must be used as were applied on the wireless router itself.
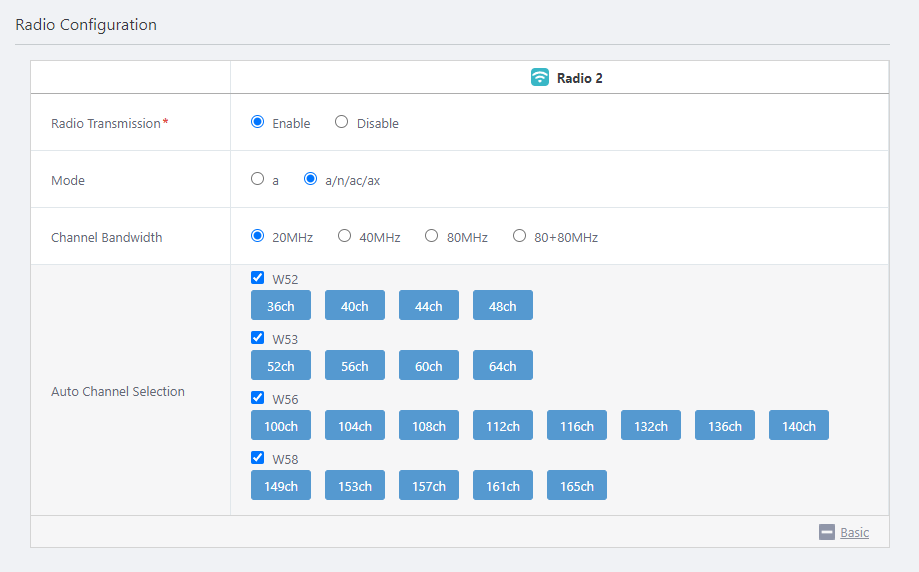
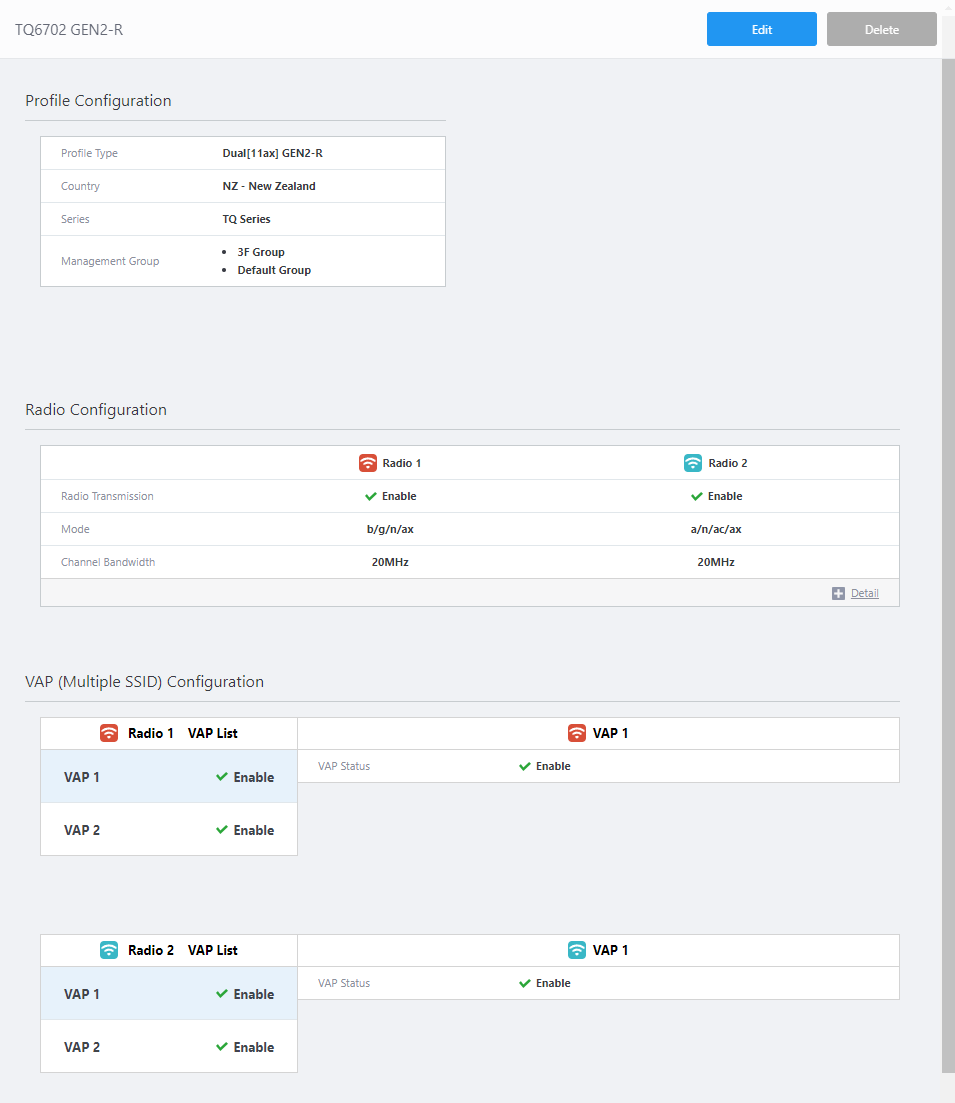
In this quick tour, no special settings are made for the wireless configuration from the CLI. Leave the default settings for both Radio 1 and Radio 2.
Table 1: TQ6702 GEN2-R Radio Configuration Item Name Value Description Radio 1 Radio 2 Radio Transmission Enable Enable Specify whether to transmit and receive radio waves in the selected frequency band. Mode b/g/n/ax a/n/ac/ax Specify the wireless modes (protocols) to use. Bandwidth 20MHz 20MHz Specify the bandwidth to use. IEEE 802.11ax, IEEE 802.11ac and IEEE 802.11n can aggregate two or four adjacent channels to make a large 40MHz or 80MHz channel. Auto Channel Selection All All Specify the channels to use. All channels are selected by default.
◼ Radio 1
◼ Radio 2
- Configure VAPs in the "VAP (Multiple SSID) Configuration" section.
As with "Radio Configuration", in this section, create the same number of VAPs for each radio band as the VAPs configured in the CLI or Web GUI of the wireless router itself.
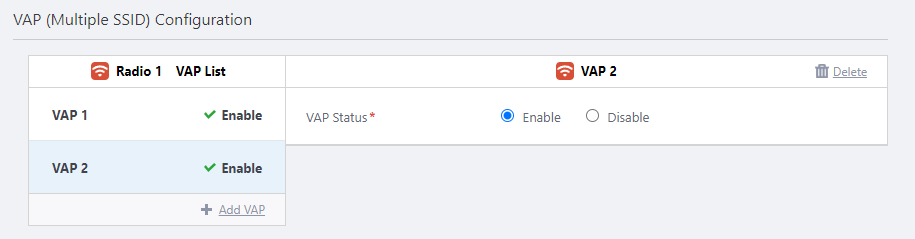
- Radio 1
- Check that the VAP Status of VAP 1 (equivalent to vap 0 in the CLI of the wireless router) is "enabled".
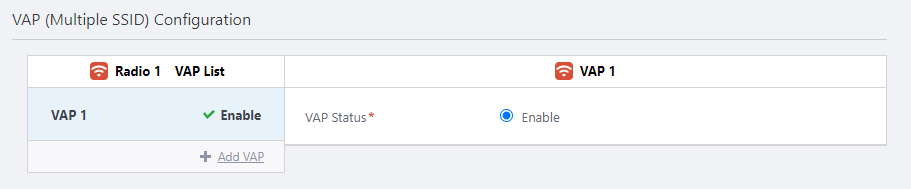
- Click on "Add VAP" to create VAP 2 (equivalent to vap 1 in the wireless router CLI).
Ensure that VAP 2 also has a VAP Status of "Enabled".
- Check that the VAP Status of VAP 1 (equivalent to vap 0 in the CLI of the wireless router) is "enabled".
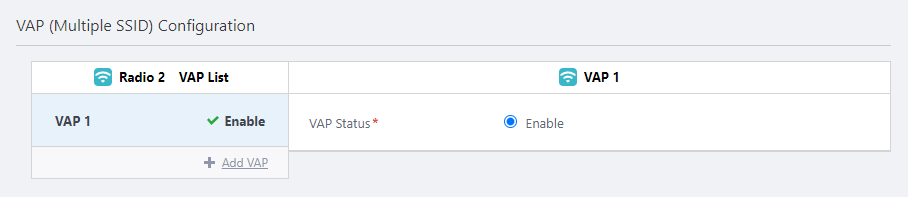
- Radio 2
- Check that the VAP Status of VAP 1 (equivalent to vap 0 in the CLI of the wireless router) is "enabled".
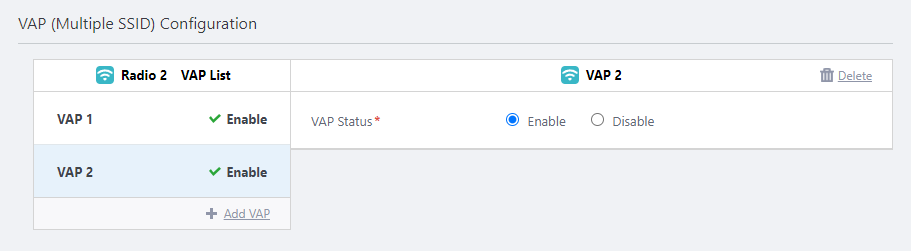
- Click on "Add VAP" to create VAP 2 (equivalent to vap 1 in the wireless router CLI).
Ensure that VAP 2 also has a VAP Status of "Enabled".
- Check that the VAP Status of VAP 1 (equivalent to vap 0 in the CLI of the wireless router) is "enabled".
- Radio 1
- Click "Add" at the top right of the screen.
The settings of the AP Profile "TQ6702 GEN2-R" will be displayed.
Register AP
Register the wireless AP router under the control of the AWC Plug-in.When registering the wireless router to the AWC plug-in, only IP manual configuration is supported. Automatic configuration via DHCP is not supported.
Also note that the wireless router can be an AMF node, but not an AMF guest node, thus the AWC Plug-in cannot detect the wireless router from the AMF guest node information.
NoteWhen registering the wireless AP router under the management of the AWC plug-in, use eth1 port for the connection to the AMF network. You cannot register the router via eth2 port.
From the "AP Settings" screen, select "Manual Registration" and specify the IP address and MAC address of the TQ6702-GEN2-R.
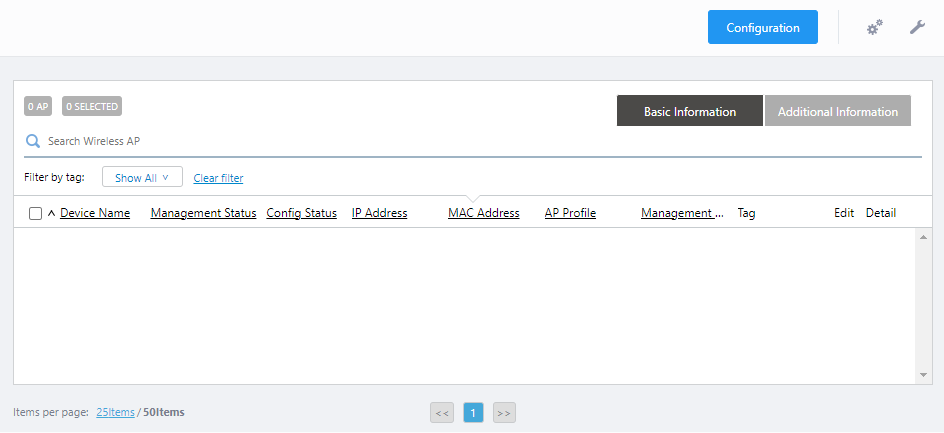
- Select "Wireless Configuration" > "AP Settings" from the AWC Plug-in menu.
The AP list screen will appear.
- Place the mouse cursor on the gear icon at the top right of the screen and select "Manual Registration" from the submenu.
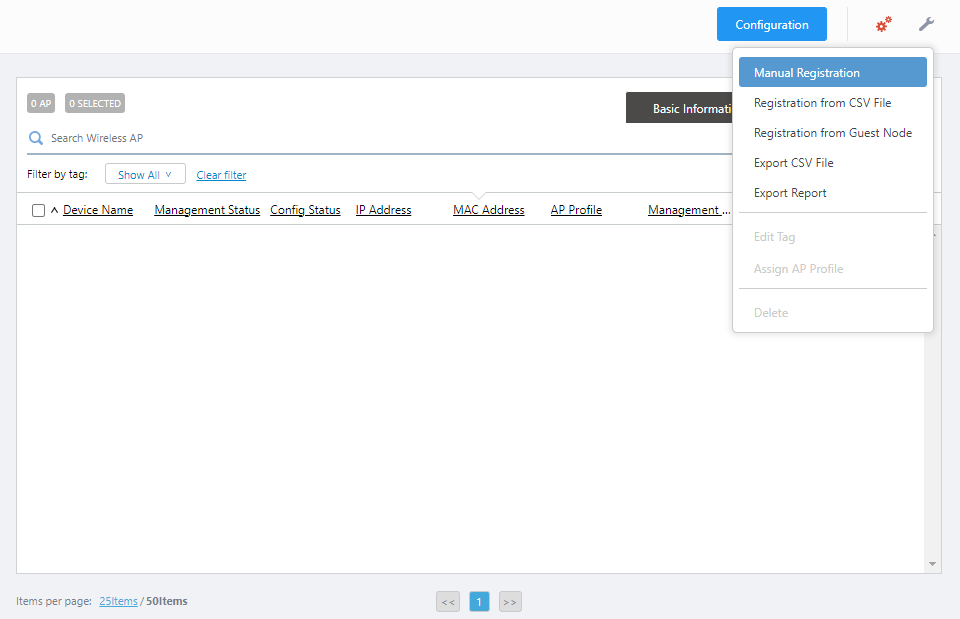
The "Wireless AP Registration" dialog box will appear.
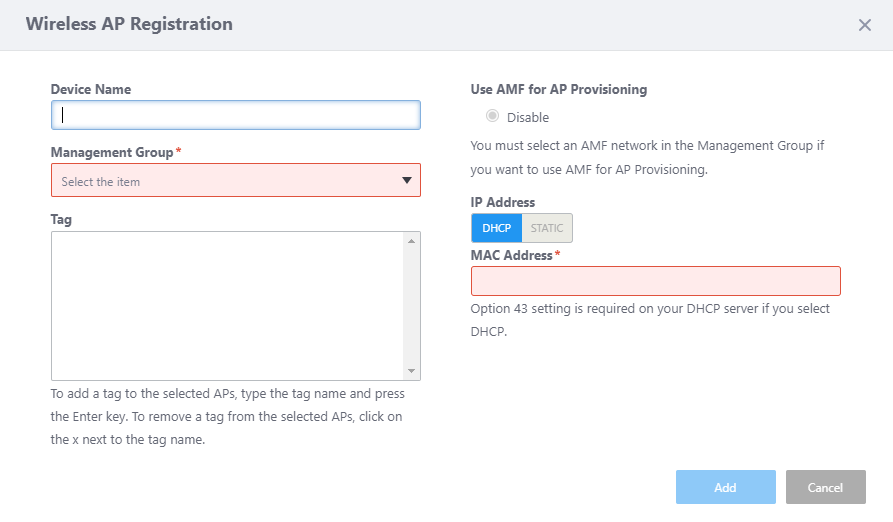
- Enter an administrative name for the AP you want to register, in the "Device Name" field.
Here we enter the name "TQR-3F-1".
- Specify the Management Group that you want the AP to belong to.
If "AMF Network" and "AMF Area" are selected in the pre-created management group, "Enable" will be displayed as the option for Use AMF for AP Provisioning.
- Select Enable or Disable in "Use AMF for AP Provisioning".
- If "Use AMF for AP Provisioning" is disabled, the AWC Plug-in requires the AP's IP and MAC addresses for management.
In this case, you have to preconfigure the AP's IP address via its management web interface, or assign the one via DHCP.
Note
When registering the wireless AP router to the AWC Plug-in, only manual IP configuration is supported; IP address assignment by a DHCP server is not available.
- If "Use AMF for AP Provisioning" is enabled, the AWC Plug-in can detect conventional wireless Aps by using the AP’s AMF guest device information (AMF network, area, parent device, and the port to which the AP is connected). However, the wireless AP router cannot be an AMF guest node, therefore cannot be detected this way.
- If "Use AMF for AP Provisioning" is disabled, the AWC Plug-in requires the AP's IP and MAC addresses for management.
- Specify the "IP Address" of the AP "TQR-3F-1".
If you know the AP's IP address in advance, because you have statically configured the AP's IP address via its interface or you have set up a DHCP server to statically assign the IP address to the AP's MAC address, select "STATIC" and enter the IP address of the AP.
If you want a DHCP server to assign an IP address to the AP via the AWC Plug-in dynamically, select "DHCP".
As we already know that "TQR-3F-1" has a statically configured IP address "192.168.1.200", here we select "STATIC" and enter "192.168.1.200".
- Enter the "MAC Address" of the AP to be added as "TQR-3F-1".
Here we enter a MAC address of "00:00:5e:00:53:00".
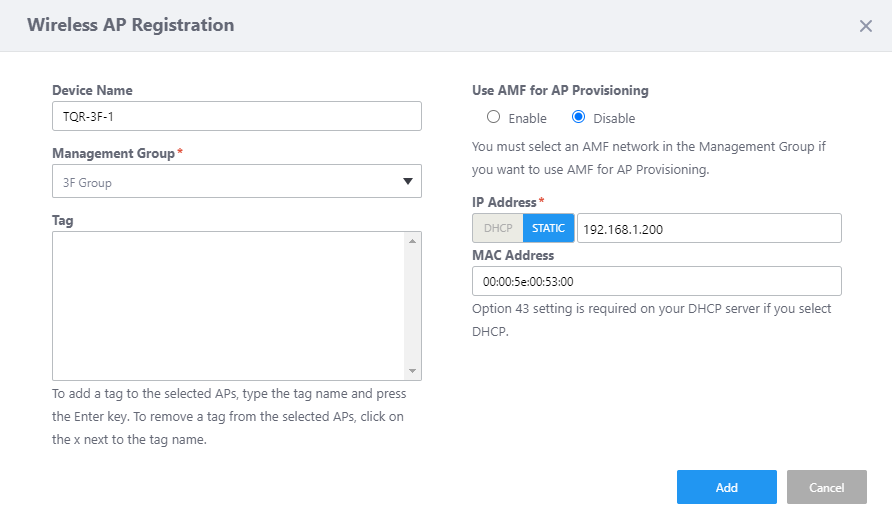
- Click "Add".
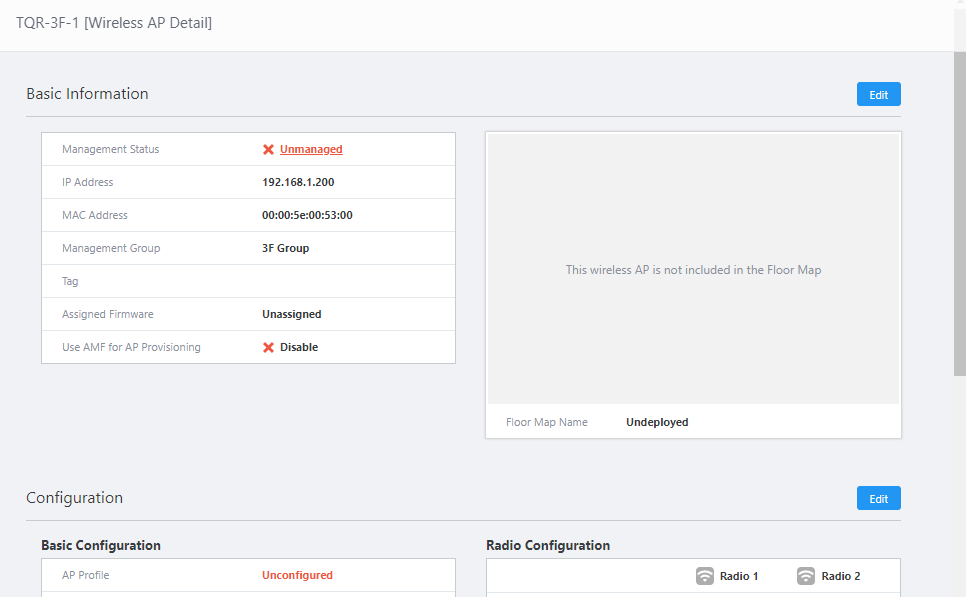
The "Wireless AP Detail" screen will appear.
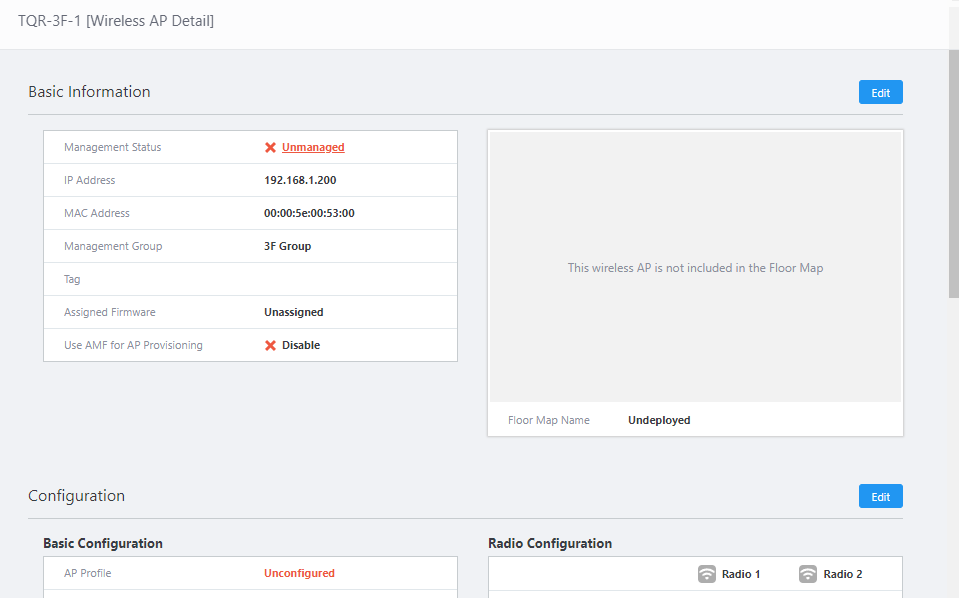
- Now you can see the newly added AP "TQR-3F-1". At this stage, the "Management Status" is "Unmanaged" and the "AP Profile" is "Unconfigured".
With the "Wireless AP Detail" screen open, move on to the next section, "Apply AP Profile".
Apply AP Profile
- In "Wireless AP Detail", click on the "Edit" button in the top right-hand corner of the "Configuration" section.
The "AP Profile Assignment" dialog box will appear.
- Select an AP Profile from the profile list on the left side.
Here we select "TQ6702 GEN2-R" and click "Select".

The "Wireless AP Individual Configuration" page will appear.
For the wireless router, nothing can be done on the "Wireless AP Individual Configuration" screen other than selecting the AP Profile.
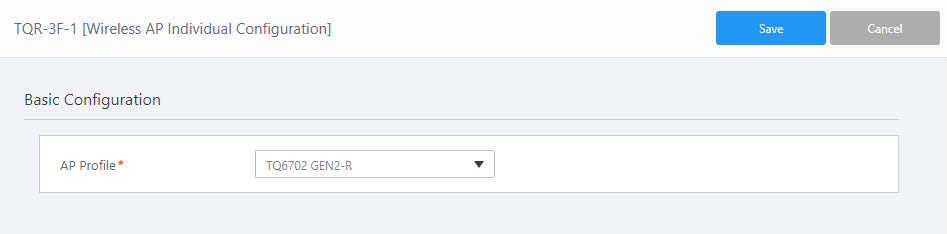
- Click "Save".
The "Wireless AP Detail" screen will appear. The "Management Status" displays "Searching" and the "AP Profile" displays "TQ6702 GEN2-R" selected in the above procedure.
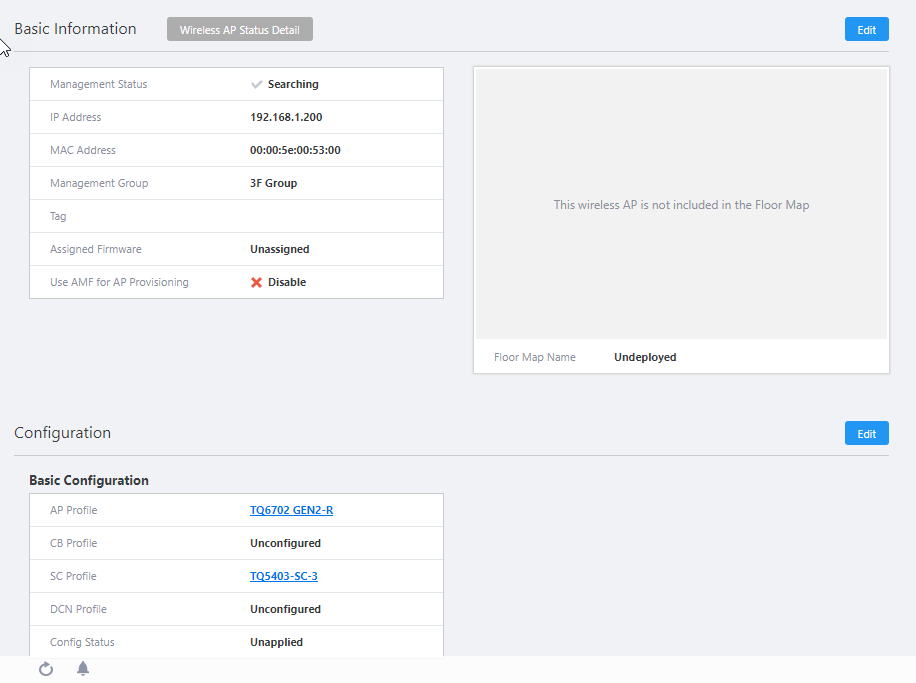
Usually, the management status will change to "Applying" or "Managing" when you return to the "AP Settings" screen again after a while.
12 Jul 2024 09:32