Subnet
You can list, create, view details, and change settings for subnets.
Add Subnet
When you start Trap Receiver for the first time, the Add Subnet page is displayed. If you have not registered (it is "unused"), click the "+" icon at the right end to display the Add Subnet page.If you have already registered the subnet, you can edit the settings by clicking the setting icon on the far right.
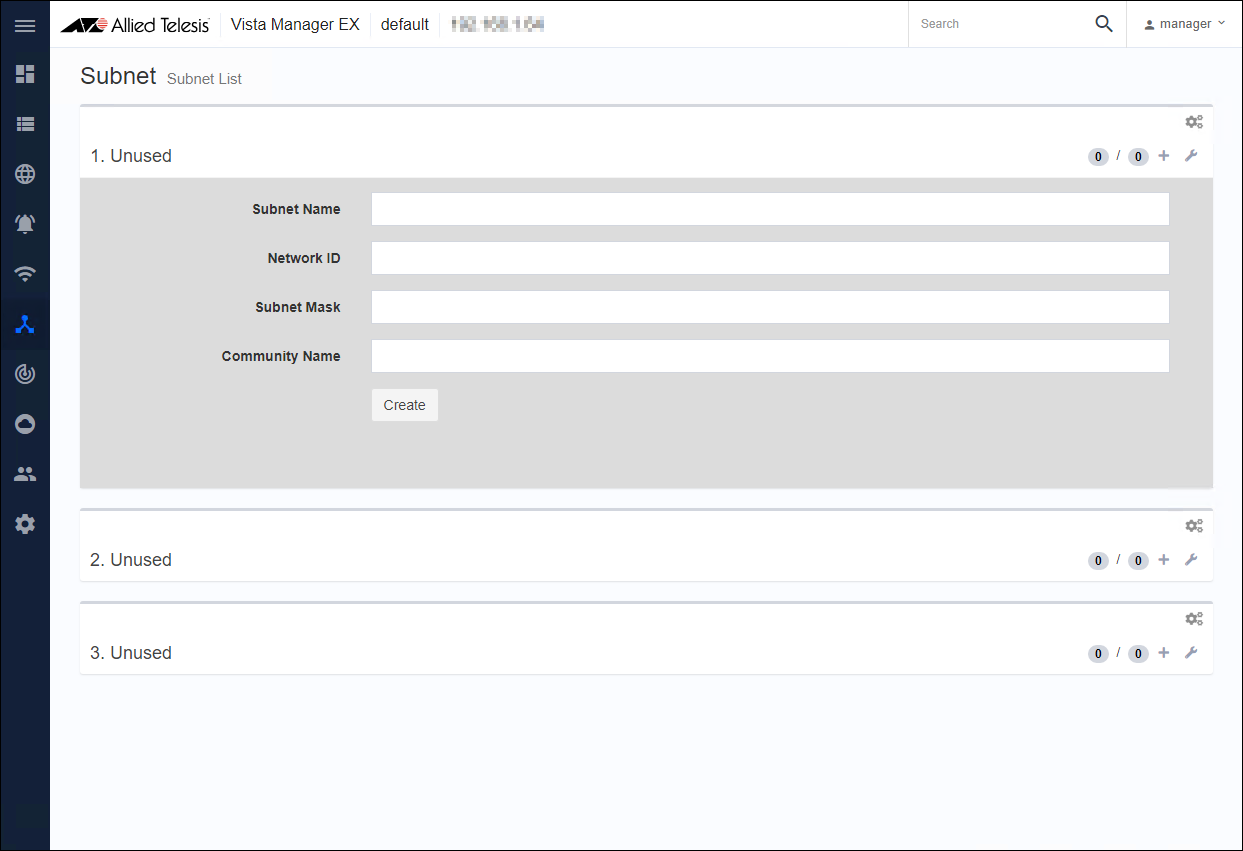
| Subnet Name | Enter the subnet name (for example, 192.168.1.0). You can specify any character string. |
| Network ID | Enter the network ID for the subnet (IPv4 network address such as 192.168.1.0). |
| Subnet Mask | Enter the subnet mask for the subnet (for example, 255.255.255.0). |
| Community Name | Enter the SNMP community name to use when discovering the device (for example, public). |
| "Create" button | Register a new subnet. |
| "Delete" button | Delete the subnet. Click the "Yes" button in the confirmation dialog. |
NoteThe following points should be noted when creating a subnet (Auto Discovery).
-Click the "Add New" button only once.
-Auto Discovery is executed immediately after subnet creation, so manual Auto Discovery is not required.
-During Auto Discovery, do not perform Auto Discovery for the same subnet.
-After a while (about 10 minutes for a 24-bit mask), reload the web browser and check the status of the newly created subnet.
NoteYou cannot change the Subnet Name. If you want to change it, you need to delete the subnet and the nodes under it and create a new subnet.
NoteSet the subnet to a value larger than the 22-bit mask (255.255.252.0) (set the number of IP addresses to be 1,024 or less).
Example:
22-bit mask (255.255.252.0), Number of IP addresses: 1,024
23-bit mask (255.255.254.0), Number of IP addresses: 512
24-bit mask (255.255.255.0), Number of IP addresses: 256
Subnet Details
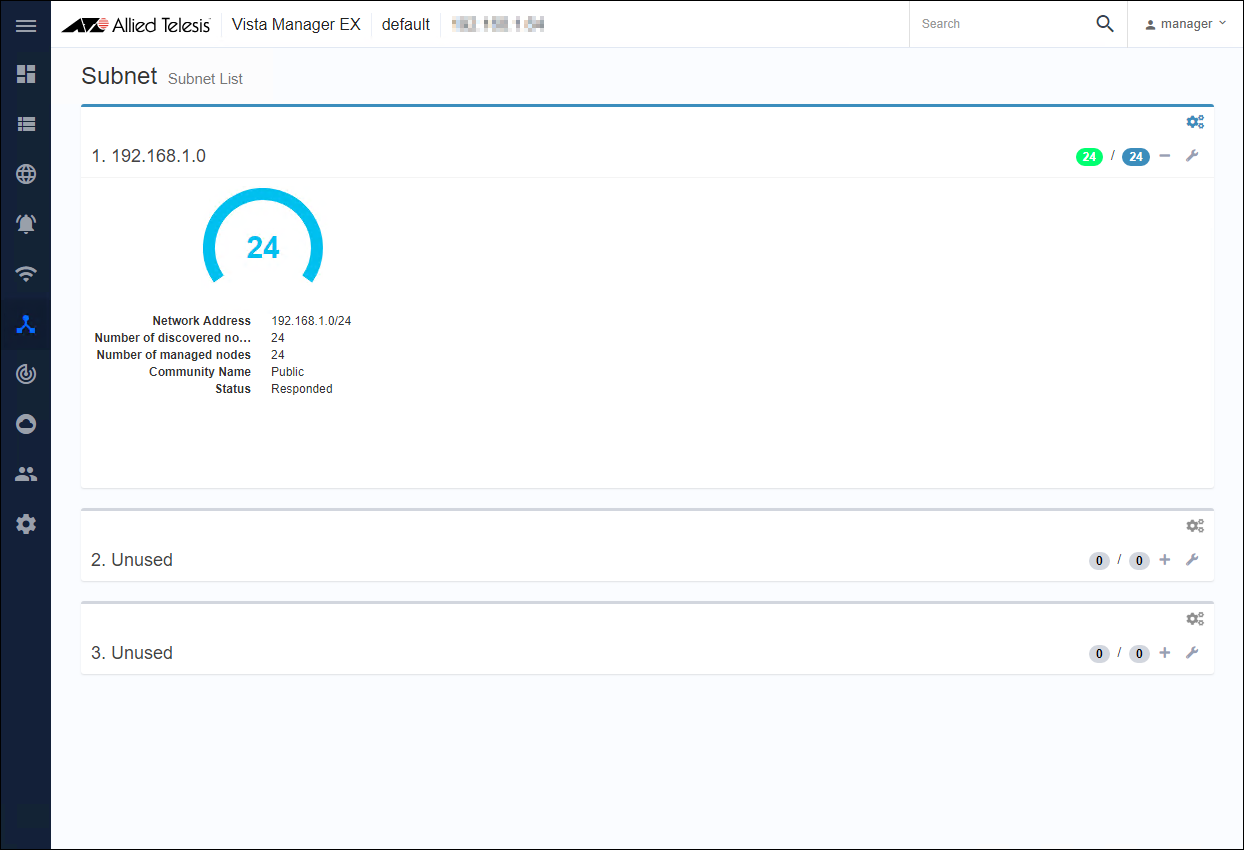
When the subnet is registered and the SNMP device search is completed, the node attributes of the corresponding subnet are displayed.NoteTrap Receiver manages the status of all the nodes detected by creating a subnet by performing periodic monitoring every 10 minutes.
Therefore, the status of the monitored node is updated at the timing of periodic monitoring.
NoteTo change the registered subnet (add or delete devices), actually add or delete devices on the target subnet, and then manually execute Auto Discovery.
NoteIf a node device is replaced on the registered subnet, the icon of the target node is duplicated on the Vista Manager Network Map.
Therefore, when you replace the device, manually execute Auto Discovery of the subnet to which the target node belongs to update the information of Trap Receiver.
NoteIf the IP address of the monitored node is changed, the status of the monitored node is down on the Vista Manager Network Map.
Therefore, when you change the IP address, manually execute Auto Discovery of the subnet to which the target node belongs to update the information of Trap Receiver.
NoteIf Trap Receiver detects a node that is managed by the Vista Manager or AWC Plug-in and the SNMP settings are not enabled, the icon is duplicated on the Vista Manager Network Map. To integrate the icons, enable the SNMP settings on the node side.
| "Gear" icon | Clicking "Gear" icon shows the "Auto Discovery" submenu for the subnet. When Auto Discovery is executed, the nodes under the subnet are added. |
| Subnet Name | Shows the user-defined subnet name. If it is not registered, "Unused" is displayed. |
| Network Address | IPv4 address and prefix length (xxx.xxx.xxx.xxx/xx format) |
| Number of discovered nodes | Number of devices detected by Auto Discovery (SNMP agent and IP node) |
| Number of managed nodes | Number of devices monitored as a result of Auto Discovery (SNMP agent and IP node) |
| Community Name | Shows user-defined community names. |
| Status | Shows the status of the subnet. |
| Number of discovered nodes / Number of managed nodes | The number of detected devices is displayed as a white number with a green background, and the number of managed nodes is displayed as a white number with a blue background. |
| "+" icon | Hides the Add Subnet page or the Subnet Details page. |
| "-" icon | Display the Add Subnet page or the Subnet Details page. |
| Settings icon | Click to display or hide the Add Subnet page. |
NoteThe following points should be noted when perform Auto Discovery in the "Auto Discovery" submenu.
-Click the "Auto Discovery" submenu only once.
-During Auto Discovery, do not perform Auto Discovery for the same subnet.
-After a while (about 10 minutes for a 24-bit mask), reload the web browser and check the status of the newly created subnet.
NoteIn this version, the device registration method is only execution of Auto Discovery, so the number of detected devices and the number of monitoring devices always match.
20 Sep 2021 14:30