Access Control using MAC Address Collecting Network
The AWC-SDF (AWC-Sky Defender) manages wireless clients that can be connected based on their MAC addresses to Vista Manager mini, a browser-based GUI that configures the wireless LAN controller functions of AlliedWare Plus devices.
It can collect MAC addresses from wireless clients connected to a Network (VAP), and configure the collected MAC addresses as MAC address filters for APs under the control of the wireless LAN controller.
NoteRegister the wireless LAN controller with the AWC plug-in remote monitor. When using the remote monitor feature, direct management of APs by the AWC Plug-in is not supported.
Terminology
In this section, the terms are used according to each systems, Vista Manager mini and the AWC Plug-in.- Network:
Equivalent to "VAP" or "Multiple SSID" in the AWC Plug-in.
Vista Manager mini defines a "Network" as a collection of an SSID, security methods to be used, and other settings.
- Profile:
Equals to "Profile" in the AWC Plug-in.
Vista Manager mini creates a "Profile" as a collection of settings for managing wireless APs. This profile can have multiple "Networks" associated with, which are described earlier.
Unlike the AWC Plug-in, it is not divided into AP profile and CB profile, but can be configured to provide channel blankets for one or some of the Networks it is associated with.
- Trigger:
In Vista Manager mini, you can register "Triggers" to enable/disable the network by the AWC Plug-in.
By assigning this Trigger when creating a network, it can be enabled or disabled from AWC-SDF as a dedicated VAP that is used only for collecting MAC addresses.
Note
When the network is enabled/disabled by the trigger, the wireless communication of the wireless AP will be briefly stopped.
Requirements
AWC-Sky Defender Server Software
To use AWC-SDF, install AWC-SDF separately on the server PC where AT-Vista Manager EX is installed and register it with the AWC Plug-in.For details, see the installation procedure in the AT-Vista Manager EX Installation Guide.
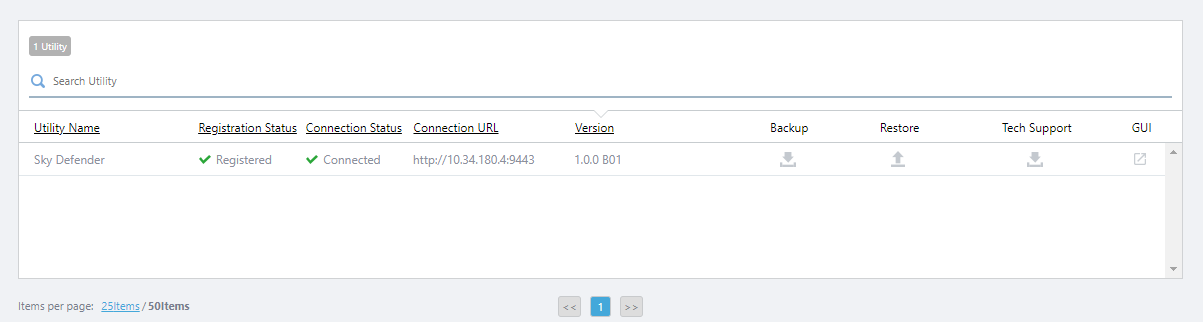
When the AWC Plug-in and AWC-SDF are working together normally, "Utilities" group, "Sky Defender" menu, and "Utility Settings" menu will be added to the AWC Plug-in menu. In addition, "Sky Defender" will be registered in the "Utility Settings" screen, and the connection status will be displayed as "Connected".
Wireless LAN Controller
You will need the Wireless LAN Controller "Vista Manager mini" registered in the Remote Monitor screen of the AWC Plug-in.It supports the following devices that are compatible with Vista Manager mini and the AlliedWare Plus version 5.5.1-1.1 or later firmware is applied.
- SwitchBlade x908 GEN2
- x950 Series
- x930 Series
- x550 Series
- x530 Series
- AR4050S / AR3050S / AR2050V / AR2010V
For details, please refer to the user's manual and the command reference of the relevant product on our website.
Wireless Access Points
The following wireless APs can be used under the Wireless LAN Controller.- TQ6602 firmware version 7.0.1-1.1 or later
- TQ5403 / TQ5403e / TQm5403 firmware version 6.0.1-6.2 or later
- TQ1402, TQm1402 firmware version 6.0.1-7.1 or later
Change AWC-SDF Server IP Address
If you wish to separate the IP subnets of the Vista Manager EX management network and the network managed by AWC-SDF, you can change the IP address of the AWC-SDF server using the following procedure.This operation is not required if you do not want to separate IP subnets.
- Right-click on [Vista Manager EX installation directory]\Plugins\Utilities\AWC-Sky Defender\tools\change_server_ip_address\change_server_ip_address.bat] and click "Run as administrator".
- The "Server IP address change" tool will launch. Select the IP address you wish to change from the drop-down list, or select "Manual Input" and enter the IP address or FQDN in the input field below, then click "Change".
FQDN can be specified with maximum 253 characters in length with letters, hyphens (-) and periods (.). FQDN cannot begin with a hyphen or period. Note that at least one period must be included.
- When the "Are you sure you want to change the IP address? " message appears, click "Yes".
- "Changing URL of AWC-Sky Defender is completed. Please disable and enable Device Collection Mode if Device Collection Mode is enabled. ", click "OK" and close the tool.
- If Device Collection Mode of AWC-SDF is running, disable and re-enable it.
NoteSince AWC-SDF address information is not saved in the backup data, if the AWC-SDF address is changed, the address must be manually changed again after reinstallation or restore.
Process of introducing AWC-SDF
The configurations are made for each system in the following order.◼ Configuration in Vista Manager mini
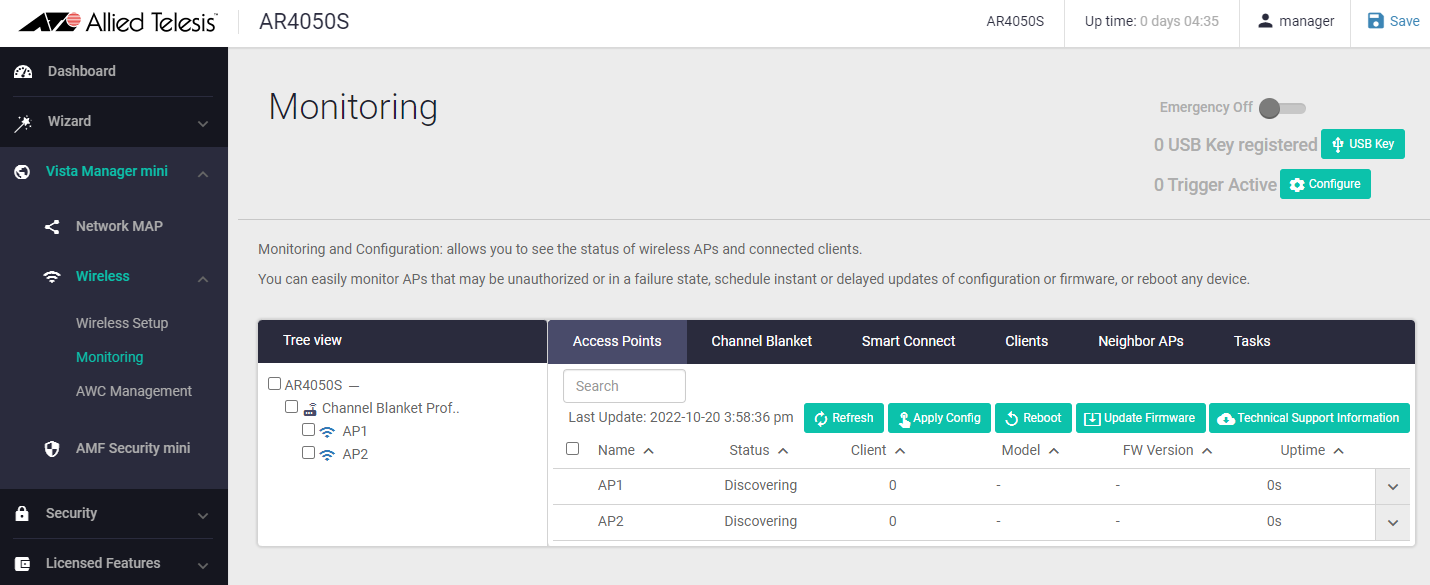
- Add the wireless AP under management.
The Profile assigned to a wireless AP requires a Network (VAP) dedicated to collect MAC addresses of wireless clients connected to (hereinafter referred to as "MAC Address Collection Network"), apart from the Network for normal use by users.
At this point, we will create and apply only the normal Network. Additionally, in Network > Security > MAC Authentication, select "MAC Filter". This lets you allow or deny access to wireless clients by referring to the appropriate MAC address list when they are later registered under AWC-SDF management and selected for access.
For detailed instructions, please refer to the reference manual of the AlliedWare Plus device that supports Vista Manager mini.
Note
When you configure Vista Manager mini via its CLI, please make sure to configure the "description" property of the profile.
Note
One AWC-SDF user is associated with one Vista Manager mini profile and one MAC Address Collection Network combination. If you want to allow multiple users managing, please follow the steps below to create multiple MAC Address Collection Networks and add each to a different profile.
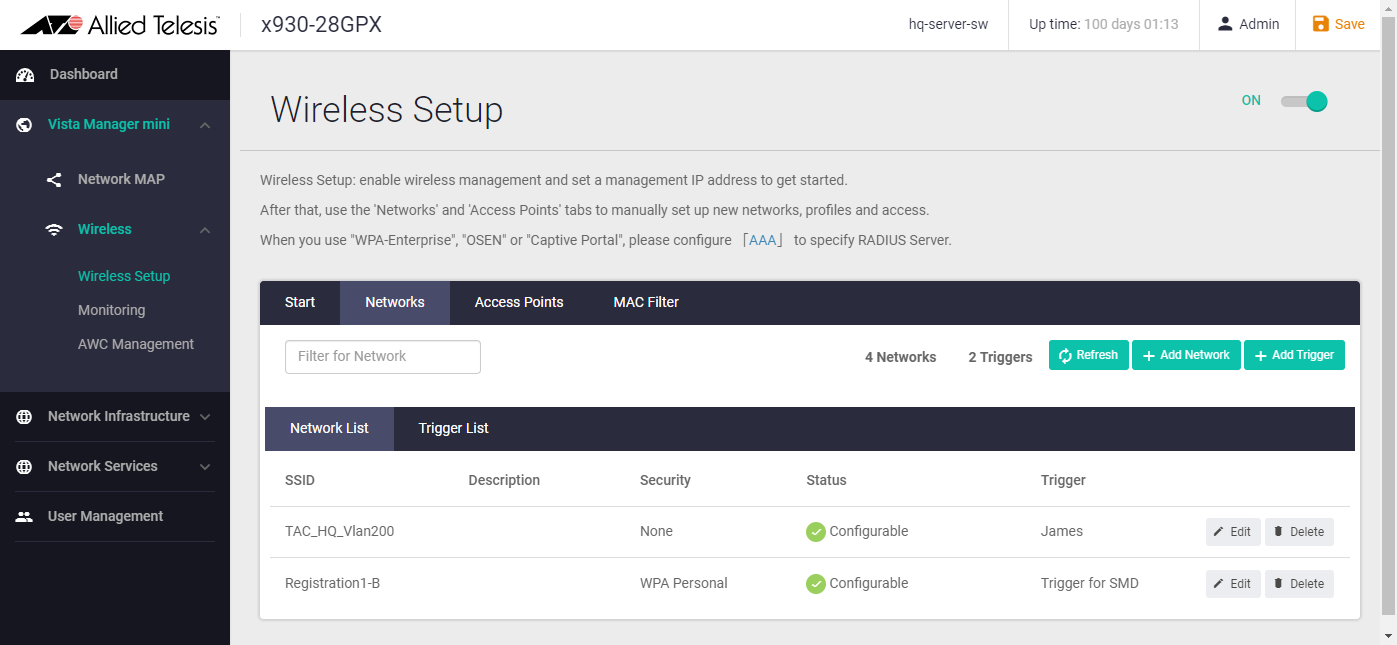
- Create a new MAC Address Collection Network.
To enable/disable the MAC Address Collection Network from the AWC plug-in, register the Trigger in Vista Manager mini and apply the Trigger when creating the MAC Address Collection Network.
Then, associate the MAC Address Collection Network with the profile and apply it to the AP.
Note
The Triggered Network cannot be set to the first VAP in each wireless band (VAP0 in Vista Manager mini). When editing a profile, click on the Network that you normally use first, and then click on the MAC Address Collection Network.
Note
Do not create multiple profiles with the same Triggered Network.
Note
If you change the configuration of an AP whose management status is "Managing", the configuration status will be displayed as "Modified". In this case, please apply the settings to the corresponding AP.
Note
Do not enable/disable Triggers in the Vista Manager mini screen.
If you need to halt the operation temporarily, such as when troubleshooting a problem that prevents you from operating the AWC Plug-in, please consult our technical staff before using Trigger switches.
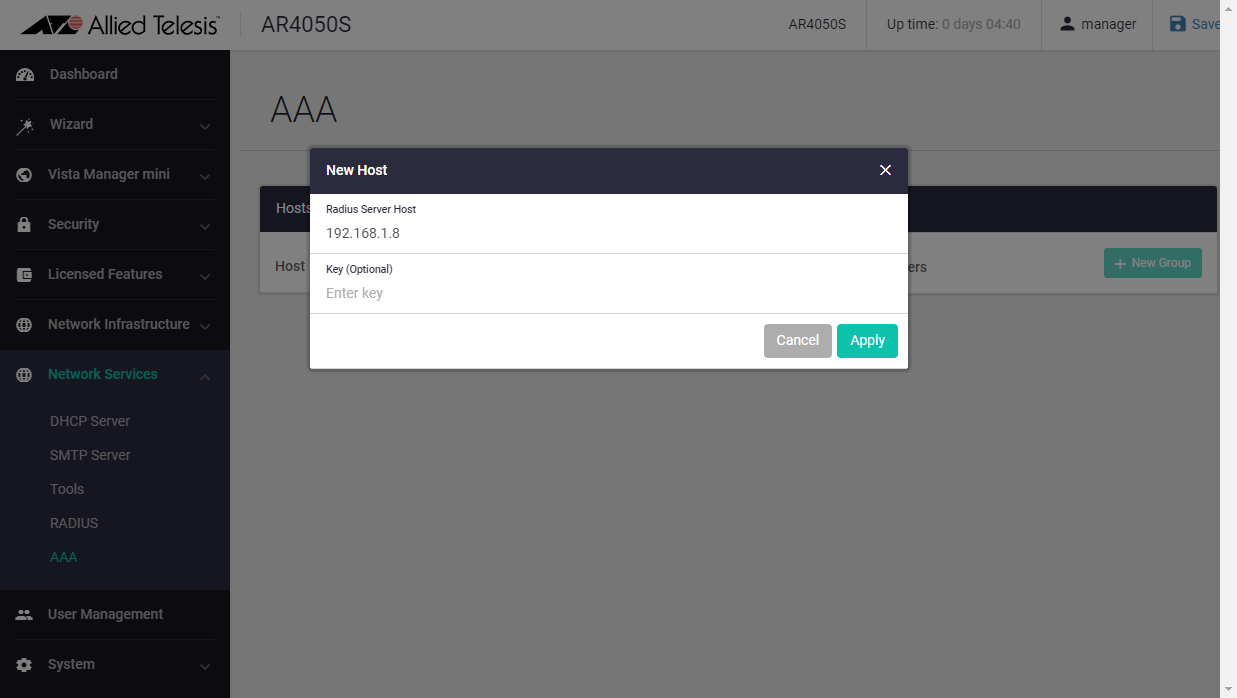
- If you have not configured the RADIUS client function, enter a fictitious RADIUS server setting.
When registering this network to the AWC-SDF, the AWC-SDF will set up a captive portal (external page authentication) for the MAC Address Collection Network (the Network associated with the wireless Trigger).
In this case, you will need to register some kind of RADIUS server to put the wireless AP under management, so register a fictitious RADIUS server setting in advance. The RADIUS server specified here is not referenced in the actual communication.
In the web GUI of the AlliedWare Plus device, open the "Network Services" -> "RADIUS Client" page, click the "Add Server" button, and enter Vista Manager mini's own IP address as a fake setting in the IP address field. The shared password can be random because it will not be referenced again.
◼ Configuration in the AWC Plug-in
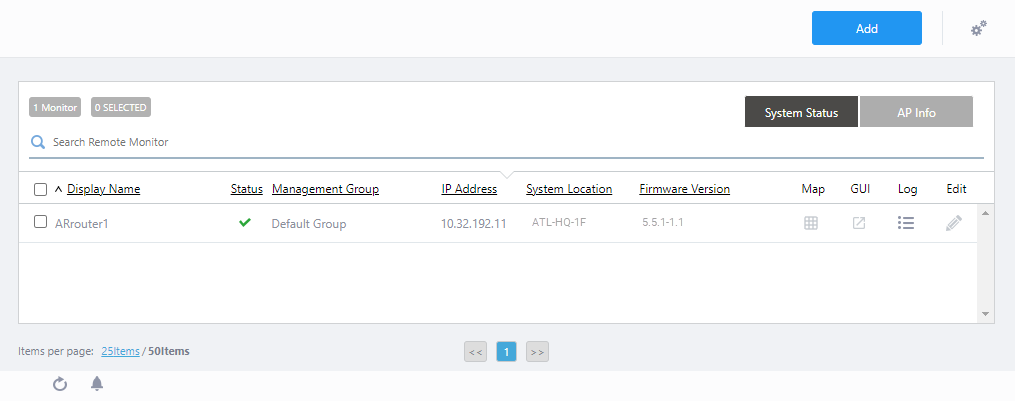
- Register the concerned Vista Manager mini as a remote monitor.
Enter the Display Name, Management Group, IP Address, Login ID, Login Password, and click the "Add" button. Checking "Receive Log" is not necessary.
After registering, make sure that the green check mark is displayed in the "Status" field.
- On the Sky Defender screen, create a user account for AWC-SDF.
Enter the user ID and password to be created, select the remote monitor registered in step 1, the Profile configured in Vista Manager mini, and the Network for MAC address collection (SSID of the Network where the Trigger is configured), and click the "Save" button.
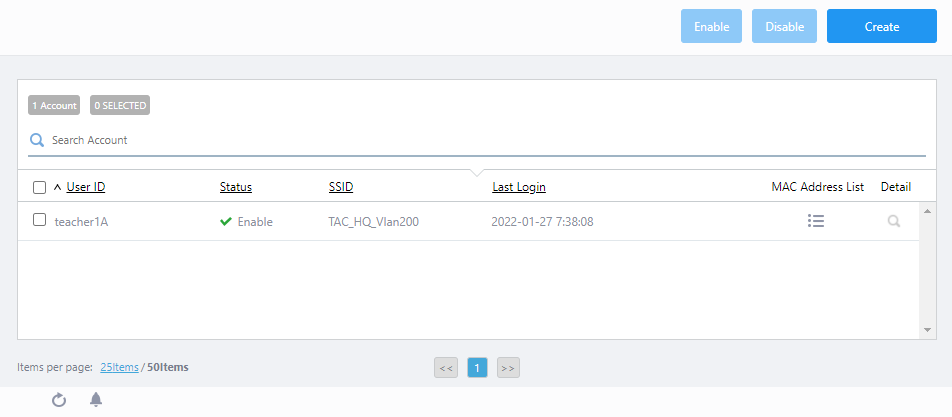
NoteIt is not supported for multiple users to manage connections for the same Profile.
◼ Configuration on the AWC-Sky Defender management screen
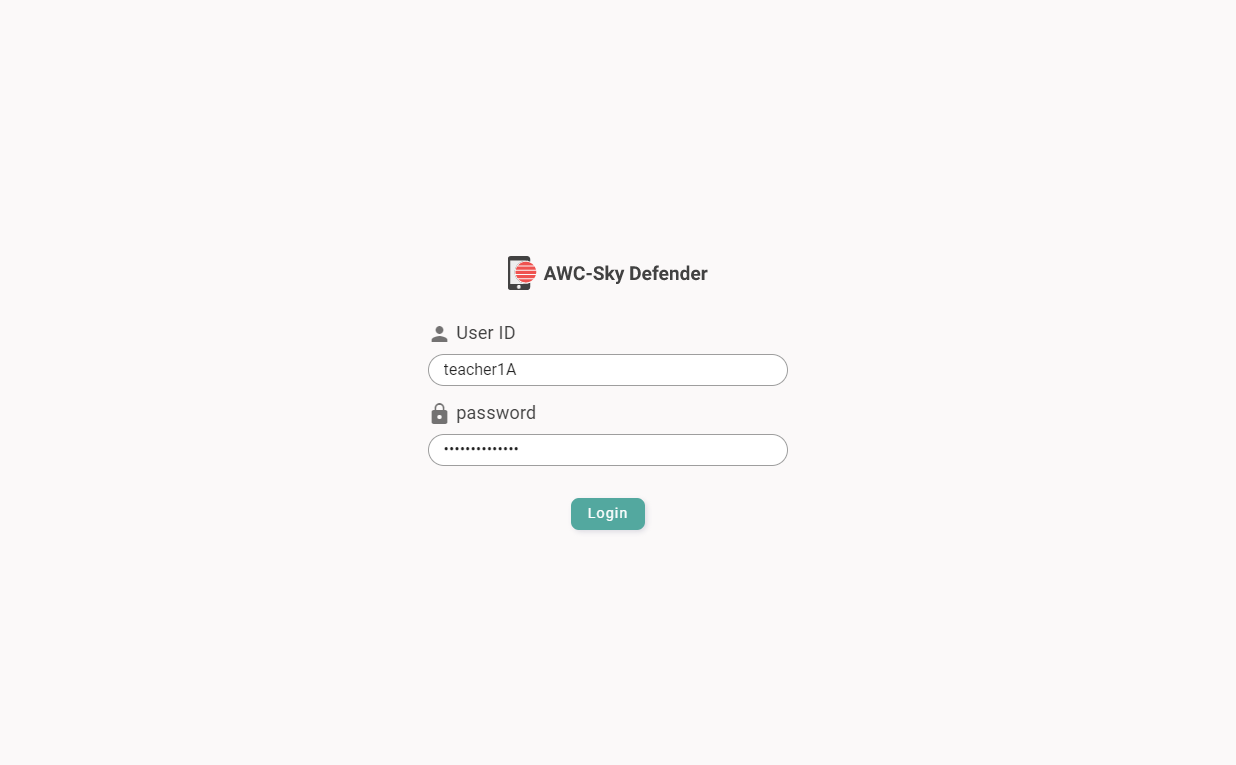
- Login to the management screen with the user account you created.
http:// (Vista Manager server's IP address or FQDN):9443/
- In the "Device Collection" screen, configure the "Device Registration" page settings. The "Device Registration" page is a captive portal that is open to users to register the MAC addresses of wireless clients.
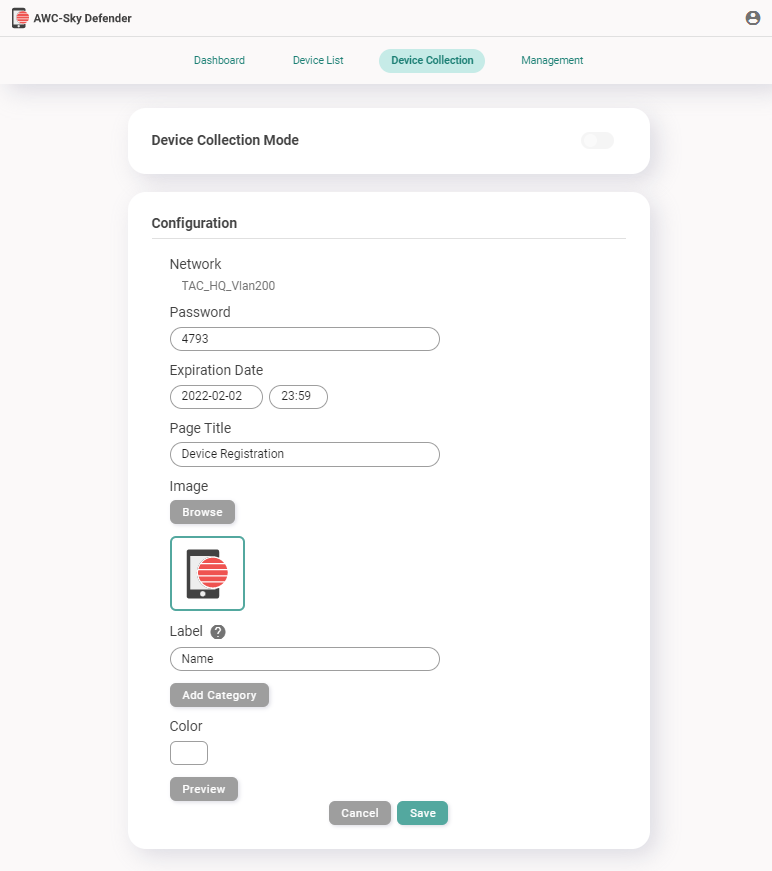
You can customize the password (4 digits) to access the Device Registration page, the Expiration Date of the Device Registration page, the Page Title, the Image to be displayed on the page, the Label (item name) of the information to be collected along with the registration, and the Color of the page background.
- Activate "Device Collection Mode" at the top of the "Device Collection" screen, and share the Device Registration page and the Password set in Step 2 with the users.
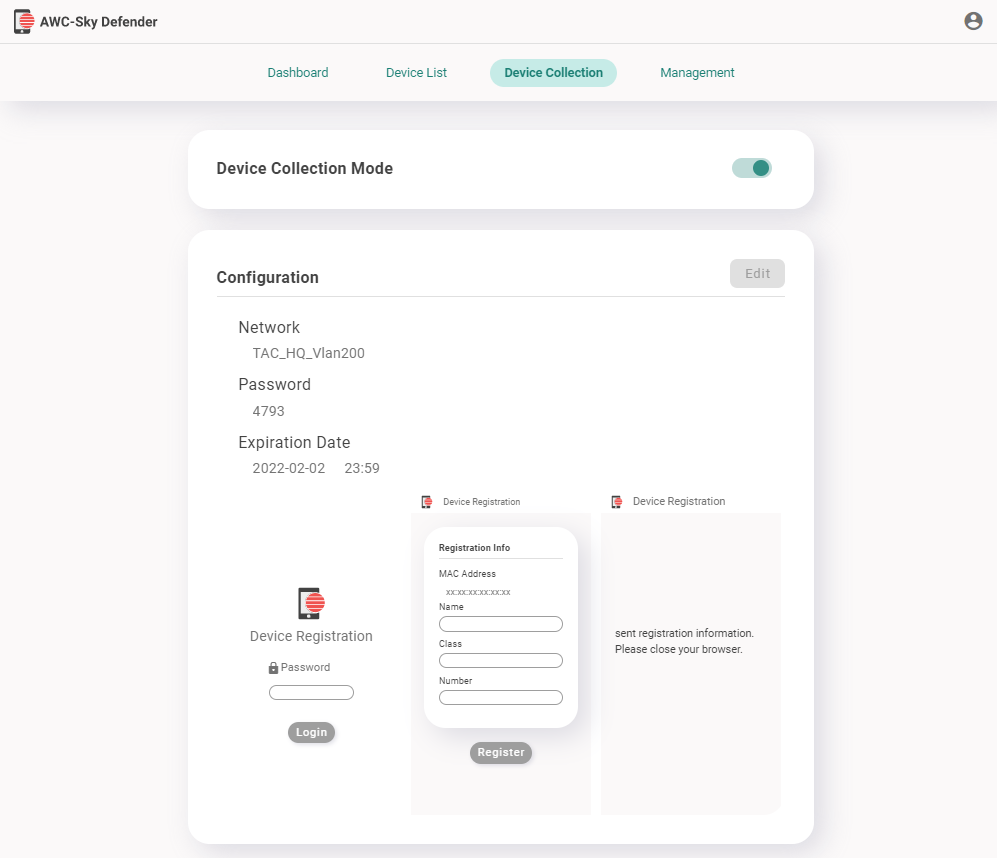
When a user connects to the MAC Address Collection Network created by Vista Manager mini, the configured page will be displayed.
The users log in with the above password, enter the information according to the screen display, and register it along with the MAC addresses.
Once done, disable the device collection mode and finish collecting MAC addresses.
Note
When enabling/disabling the device collection mode, the wireless communication of the APs will be stopped. The downtime depends on the amount of settings (usually about 1 minute for basic settings only).
- In the "Device List" screen, you can see the collected MAC addresses and information, as well as the date and time of collection in a panel view.
Check the items displayed in the panel, and click the "Allow" button (check mark) or the "Deny" button (cross mark). You can also click the "Edit" button (pencil icon) to edit the registered contents of an item.
When you have finished checking all the registered MAC address information, click the "Register" button.
When you click the "Register" button, only the MAC addresses of the wireless clients that are allowed to connect will be registered in the MAC address filter of the wireless AP.
If there is a wireless client whose allow/deny status has been changed since the last time you clicked the "Register" button, a dot will be displayed on the "Register" button.
Note
When applying a MAC address filter to a wireless AP, the wireless communication of the wireless AP will be stopped. The downtime depends on the amount of settings (usually about 1 minute for basic settings only).
Note
Devices that have clicked the "Deny" button in the "Device List" menu or devices that are not registered in the device list will not be able to communicate.
- On the "Dashboard" screen, make sure that the wireless clients you have allowed to connect are listed.
04 Jul 2023 09:16