Configure AP through Its Own Web Interface
With a few exceptions, all AP functions are configured through the AWC Plug-in.
- TQ series
- TQ4400, TQ4400e, TQ4600
Only the following settings can be changed through the respective AP's own management web interface:
- Basic Configuration > Username (Administrator), Password
Note
Use this only as a preparatory step to let an AP be detected as a guest device.
Make sure that the guest device's username and password match the ones for the guest-class configured on a parent AMF device.
Change the non-guest device username and password to an AP-specific configuration.
- Advanced Configuration > Ethernet Configuration
- Optional Configuration > LLDP
- Optional Configuration > HTTP/HTTPS Configuration
Refer to "AT-TQ Series Reference Manual" for its management web interface.
- Basic Configuration > Username (Administrator), Password
- TQ1402, TQm1402, TQ5403, TQ5403e, TQm5403, TQ6602, TQ6602 GEN2, TQm6602 GEN2, TQ6702 GEN2, TQm6702 GEN2
Only the following settings can be changed through the respective AP's own management web interface:
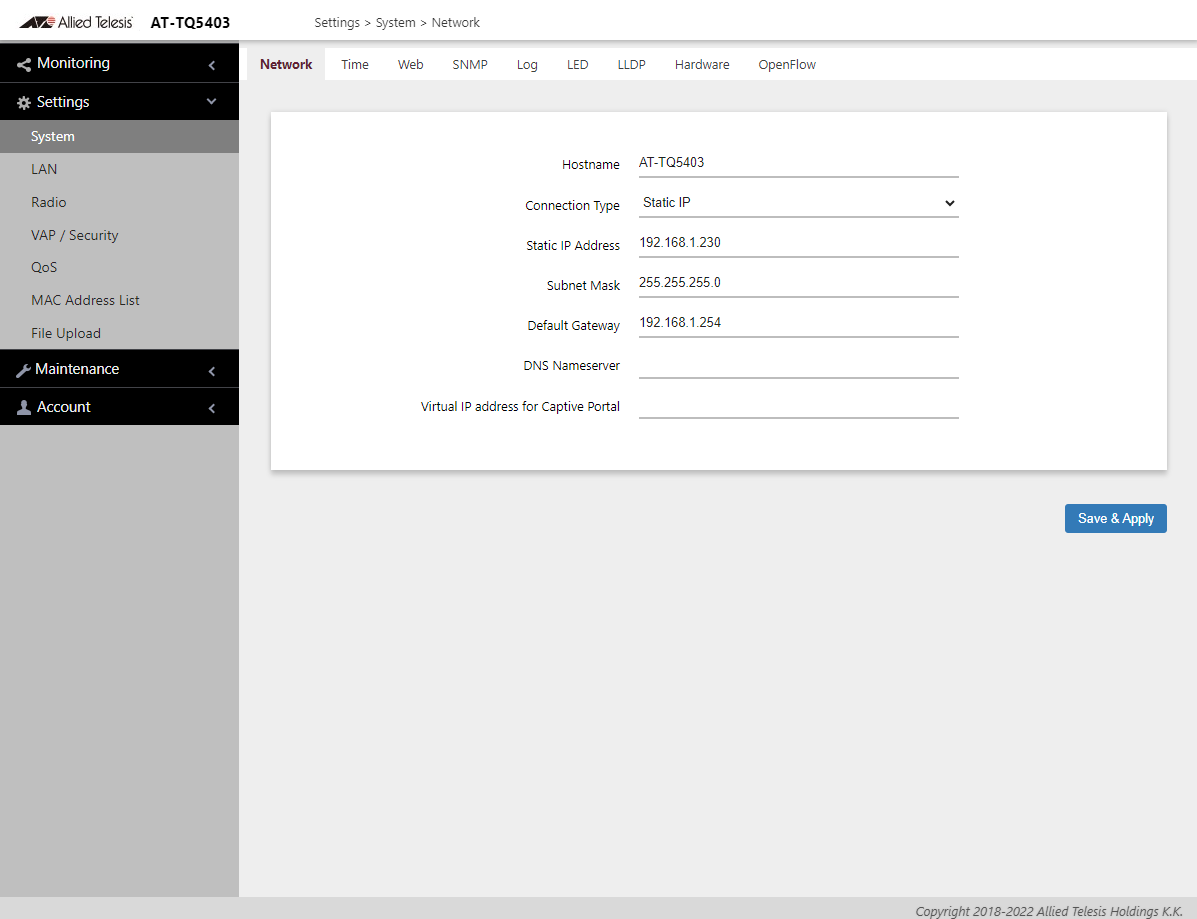
- System > Communication
- System > Web
- System > LLDP
- LAN > VLAN Configuration
- LAN > LAN 2 Port (TQ5403 only)
Note
When you enable a static LAG on a TQ5403, you also have to configure a static channel group on an AlliedWare Plus switch to which the AP is connected to.
Also note that when you use a LAG to connect an AP to an AMF device, you cannot add the AP from a guest device list, and Zero Touch Configuration and Auto Recovery are not supported.
- Account > User
Note
Use this only as a preparatory step to let an AP be detected as a guest device.
Make sure that the guest device's username and password match the ones for the guest-class configured on a parent AMF device.
Change the non-guest device username and password to an AP-specific configuration.
- Account > Language
Refer to "AT-TQ Series Reference Manual" for its management web interface.
- System > Communication
- TQ4400, TQ4400e, TQ4600
If you change an AP's configuration through its web interface using other methods, the AWC Plug-in will not be able to detect and manage the AP.
- Login to the AWC Plug-in as a user account that can access a Management Group to which the target AP belongs to.
- Select "Wireless Configuration" > "AP Settings" from the AWC Plug-in menu.
A list of wireless APs will appear.
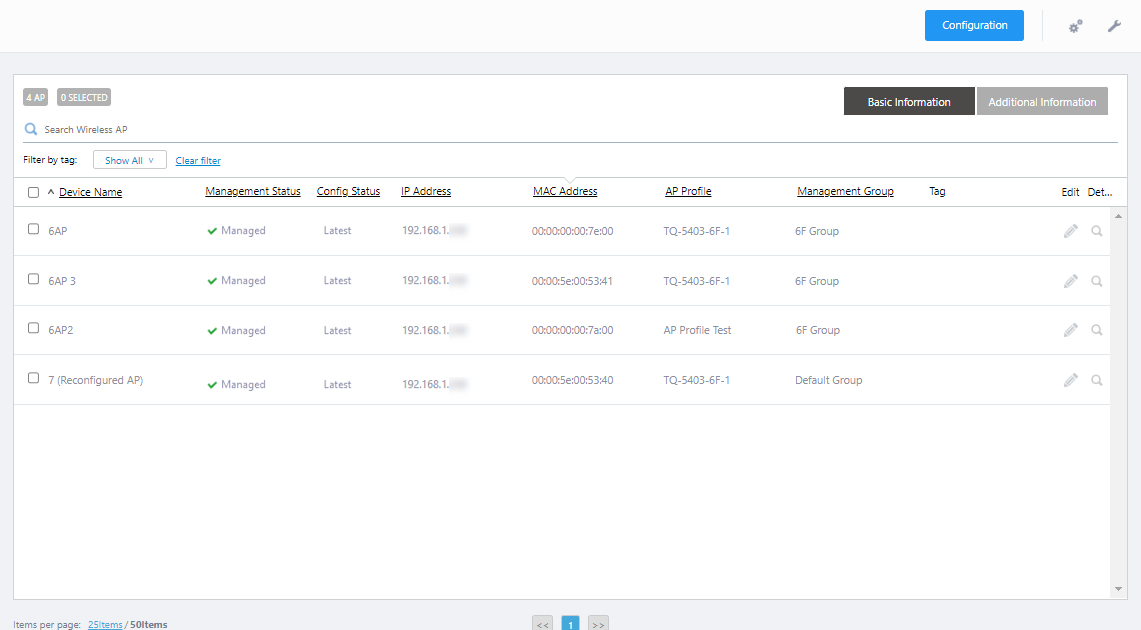
- Select one target AP from the list of APs.

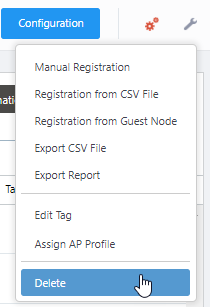
- Place the mouse cursor on the gear icon at the top right of the screen and select "Delete" from the submenu.
The target AP is removed from the list and the AWC plug-in terminates management of the relevant AP.
- Wait for at least a minute to make sure that the AP is no longer managed by the AWC Plug-in.
- Change the AP configuration through its own management web interface.
- When you finish the configuration changes, select "Wireless Configuration" > "AP Settings" from the AWC Plug-in menu.
A list of wireless APs will appear.
- Place the mouse cursor on the gear icon at the top right of the screen and select "Add Manually" from the submenu.
The "Wireless AP Registration" dialog box will appear.

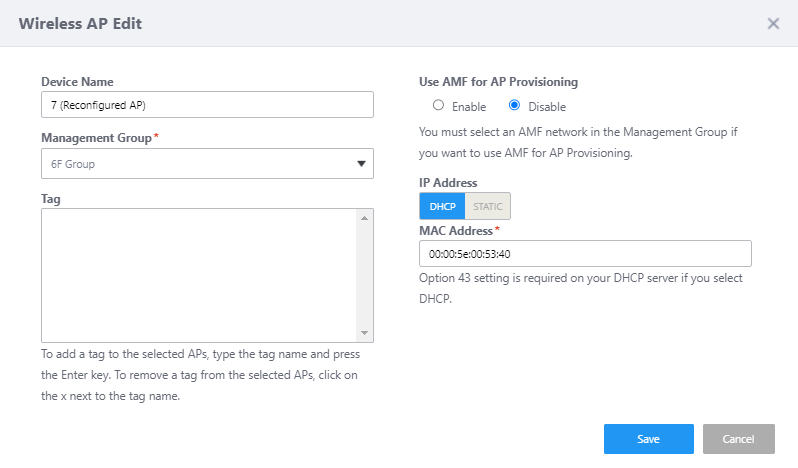
- Enter the required information in the "Wireless AP Registration" dialog box and click "Add".
* If you have changed the AP's IP address, enter a new IP address in the "Wireless AP Registration" dialog box.
Shows the Wireless AP Detail page.
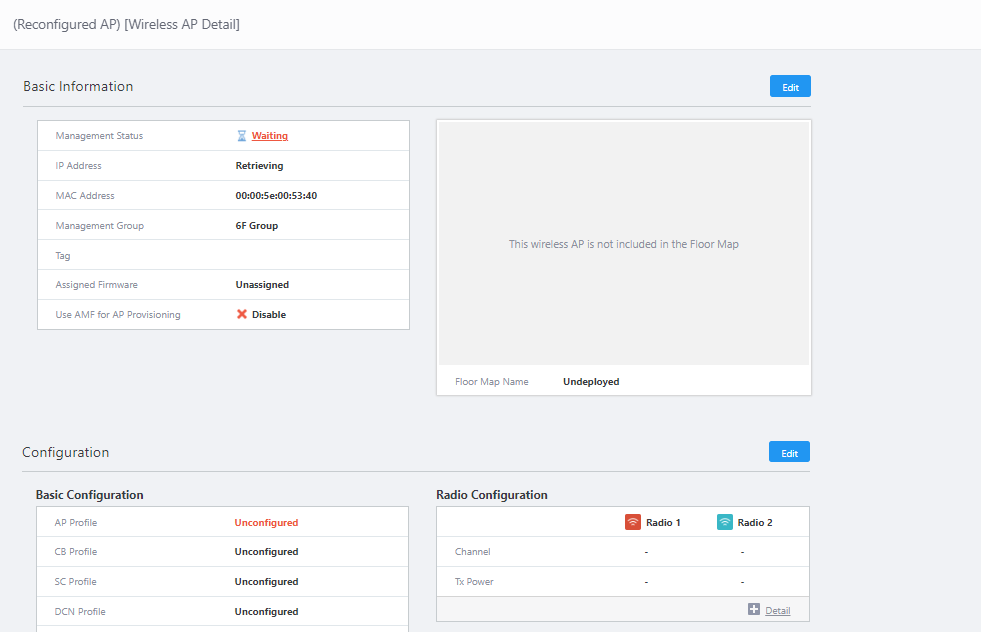
- Clicke "Edit" button at the top right of the Configuration section.
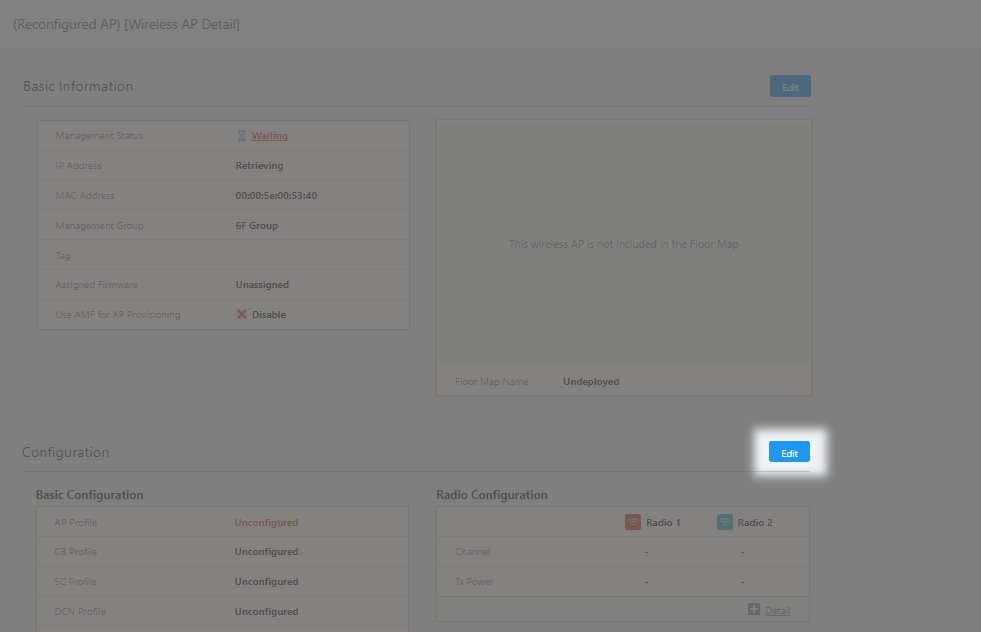
Moves to the "Wireless AP Individual Configuration" screen and displays the "AP Profile Assignment" dialog box.
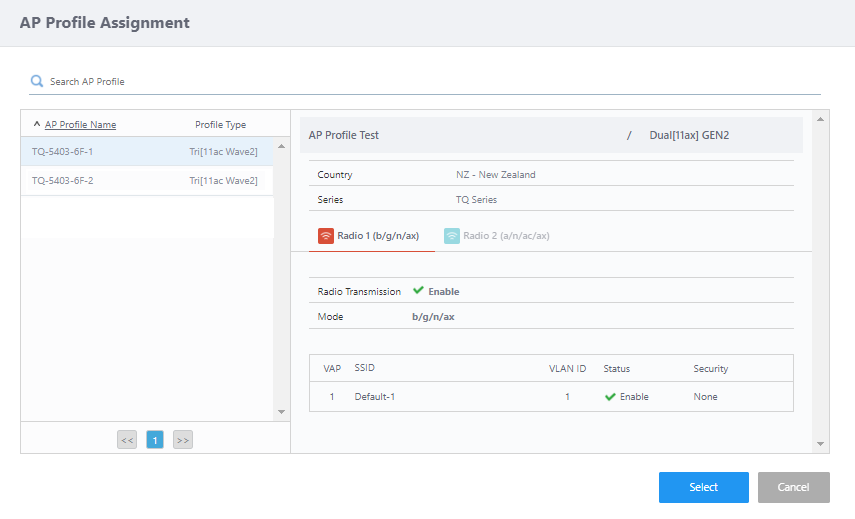
- Select an AP Profile that has been assigned to the AP and click "Select".
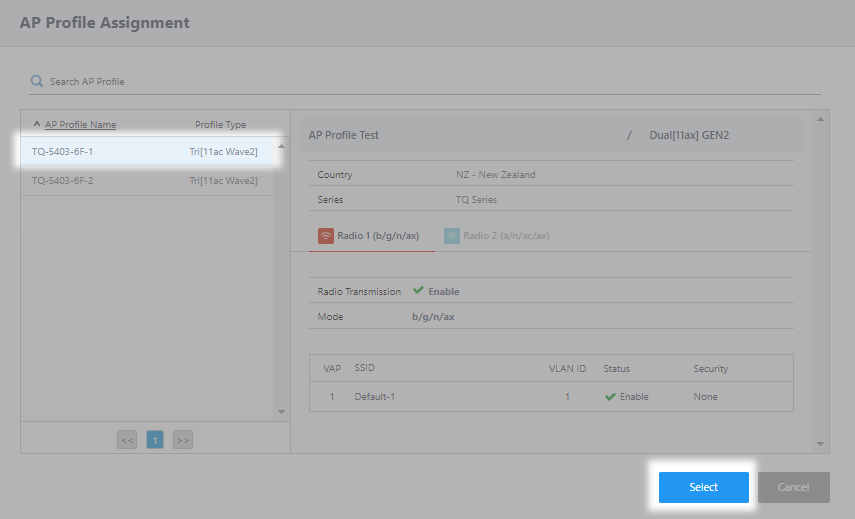
Returns to the Wireless AP Individual Configuration screen.
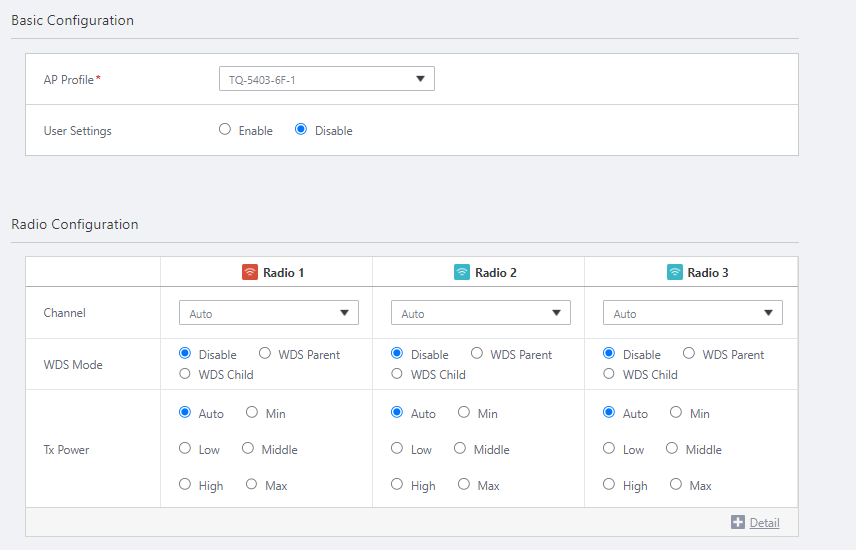
- Click "Save" at the top right of the Wireless AP Individual Configuration screen.

You return to the Wireless AP Detail screen.
Once the AWC Plug-in detect the AP, the configuration will be applied.
Note
Depending on the detection timing of the AP and the application of configuration, "Management Failed" may appear in the management status.
In this case, if the AP registration has been completed correctly, the configuration is applied regardless of the displayed notification, and you can check the config status after the screen transition.
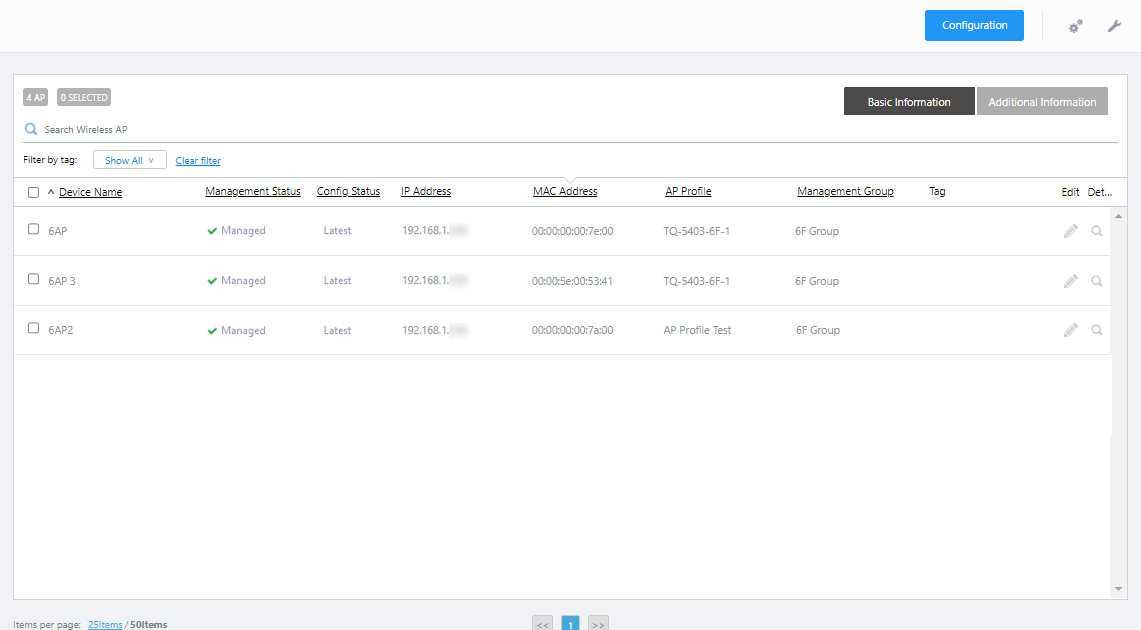
- Select "Wireless Configuration" → "AP Settings" from the AWC Plug-in menu.
A list of wireless APs will appear.
You can see the config status of the wireless AP.

14 Dec 2023 11:07