Add Wireless AP
Here is an example of adding a Satellite AP to a configured Smart Connect network using the Profile Configuration created up to this point.
This time, we will make various settings to the wireless AP using OTA (Over The Air: wireless communication between APs).
NoteIn order to configure and manage a Satellite AP by using OTA (Over The Air), it is necessary that the AP model supports the Smart Connect feature, runs the firmware version 6.0.1-1-1 or later, and is in factory default status.
Additionally, when using OTA to add the satellite AP right after a firmware upgrade, log on to the AP and perform an initialization before adding it under management.
Refer to the firmware reference manual of the AP for the initialization procedure.
Register AP
- Select "Wireless Configuration" > "AP Settings" from the AWC Plug-in menu.
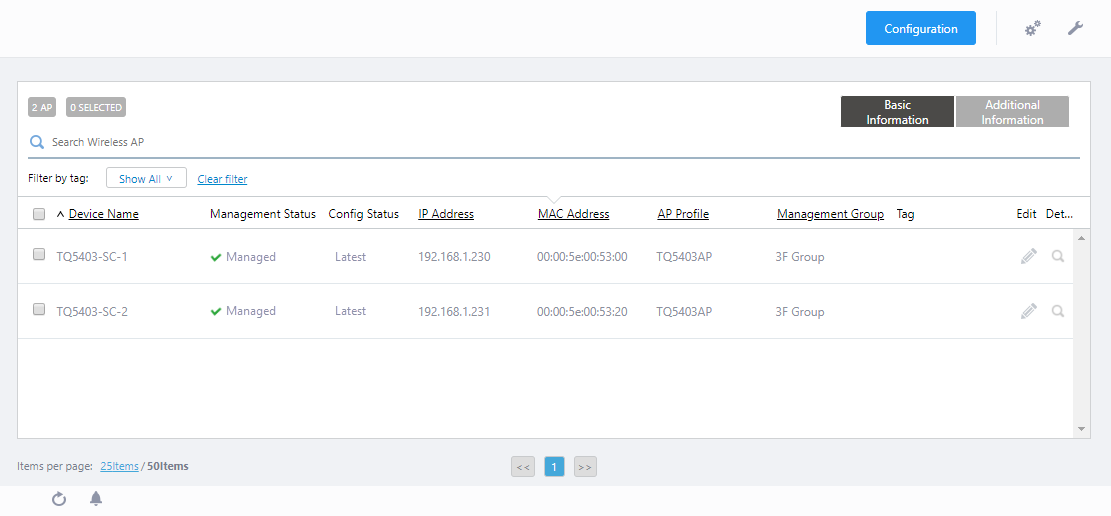
The AP list screen will appear.
- Put the mouse cursor on the gear icon at the top right of the screen and select "Manual Registration" from the submenu.
The "Wireless AP Registration" dialog box will appear.
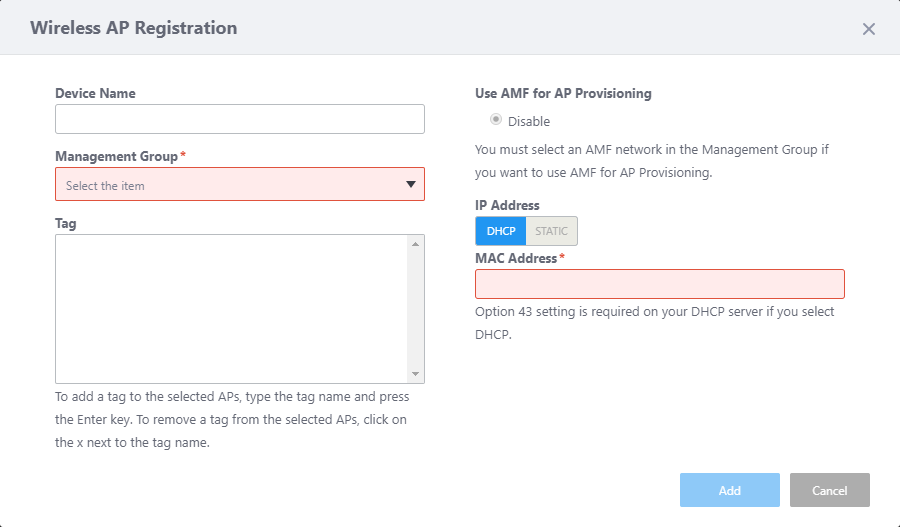
- Enter an administrative name for the AP you want to register, in the "Device Name" field.
Here, enter "TQ5403-SC-3".
- Specify the Management Group that you want the AP to belong to.
Select "3F Group" from "Management Group".
Then the "Enable" option will be added to "Use AMF for AP Provisioning".
- Select "Disable" for "Use AMF for AP Provisioning".
It is necessary to specify a static IP address in advance on the AP web interface or assign a static IP address to the AP from a DHCP server.
- Specify "IP Address" of the AP to be added as "TQ5403-SC-3.
In the IP address field, there are two options, "DHCP" and "STATIC".
Here, select "DHCP" to allow "TQ5403-SC-3" joining under management by AWC-SC "Auto Discovery" feature.
- Enter MAC Address "00:00:5e:00:53:40" of the AP to be added as "TQ5403-SC-3".
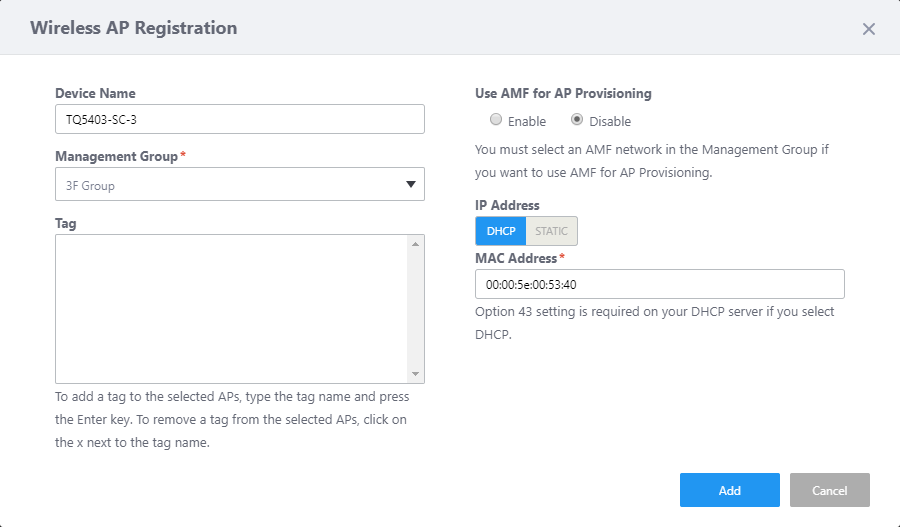
- Click "Add".
The AP Configuration Detail screen will appear.
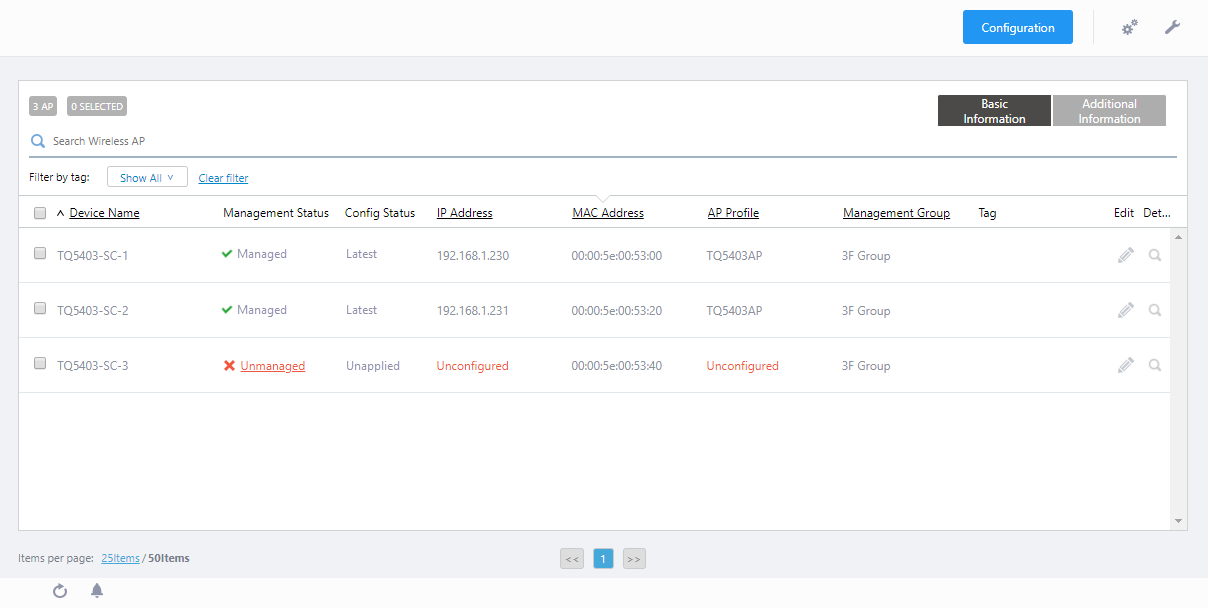
On the "Wireless AP Detail" page, the selected AP "TQ5403-SC-3" is added. At this stage, the "Management Status" is "Unmanaged" and the "AP Profile" is "Unconfigured".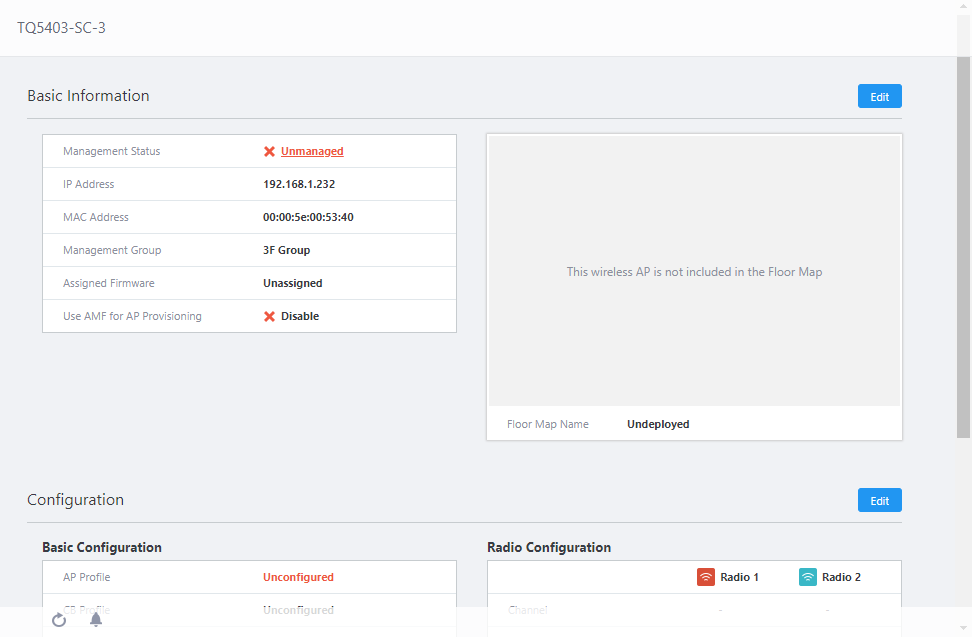
When assigning the AP Profile to the AP, other settings (CB Profile, SC Profile) are also applied.
Leave the AP Profile unapplied, because we will apply the SC Profile before the AP Profile, to avoid starting unintended operation of VAP "Default-1" on the wireless band, which the SC Profile will override.
At the time of adding a Satellite AP, the SC Profile "TQ5403SC" corresponding to the Management Group "3F group" has already been created, so the AP is automatically subject to the applicable SC Profile. "TQ5403SC" is shown in the "SC Profile" of "Configuration" at the bottom of the "Wireless AP Detail".
Put APs on Floor Map
Put the newly added AP on the Floor Map.- Select "Wireless Monitoring" > "Floor Map" from the AWC Plug-in menu, to display the "Floor Map" screen.
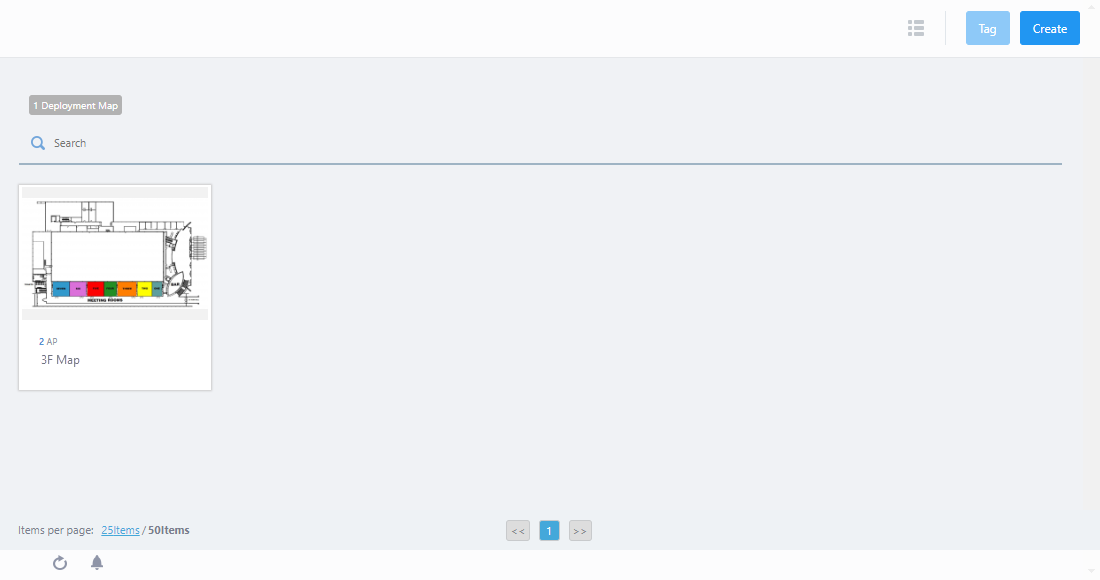
- Click "3F Map" on Floor Map Panels.
Wireless Status View for the "3F Map" will appear.
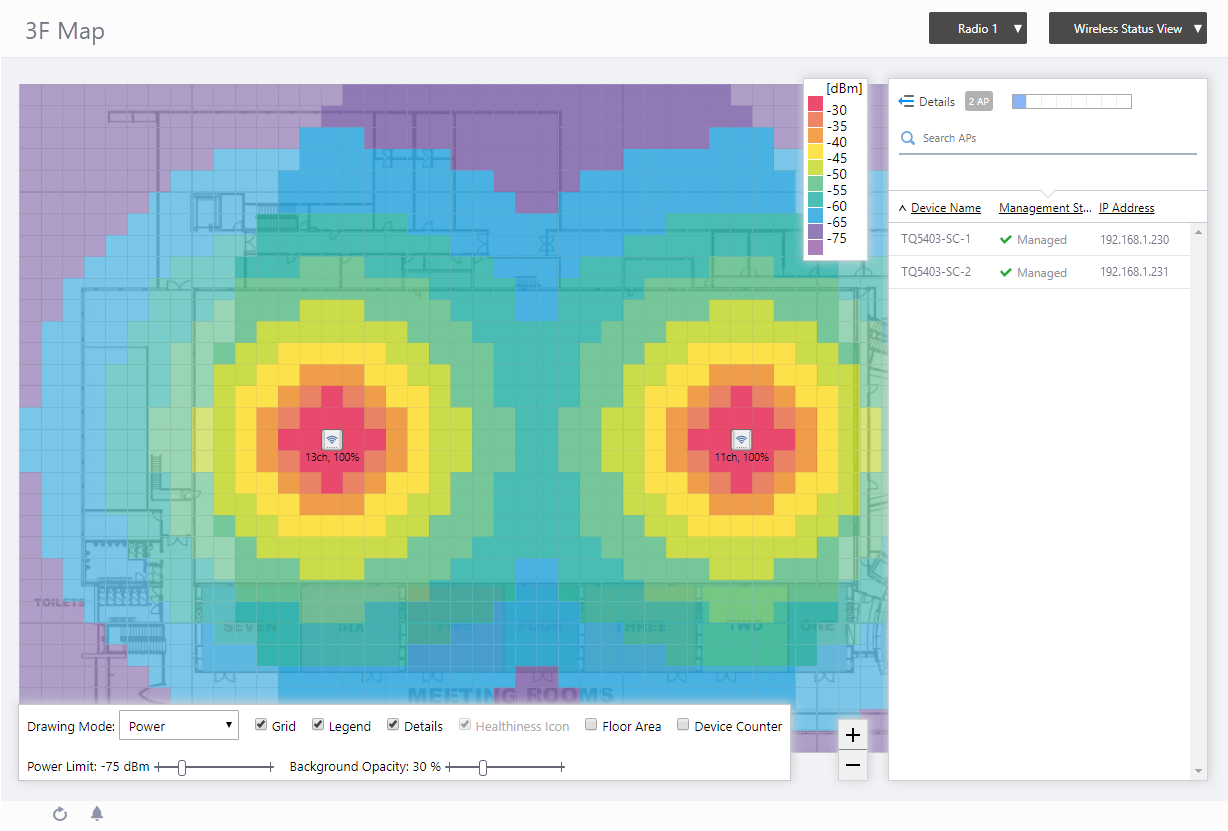
- Click the View Selection dropdown menu (currently showing "Wireless Status View") at the top right of the screen and select "Add AP to Map" from the dropdown menu.
The "Add AP to Map" view will appear. A list of APs in the same Management Group as the map are shown on the right side of the screen.
At this stage, cells in "AP Profile" are "Unconfigured" and cells in "Management Status" are "Unmanaged" because the AP Profile has not been applied to the APs.
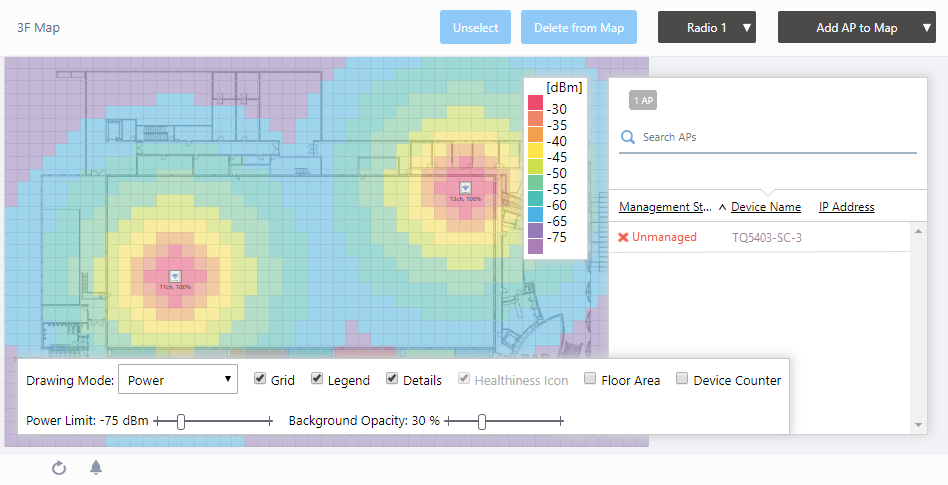
- Click "TQ5403-SC-3" in the list.
The mouse cursor will change to an AP icon.
- Click a point in the map where you want to put TQ5403-SC-3.
If you want to change the position of the AP icon, drag the AP icon and drop it in the desired position.
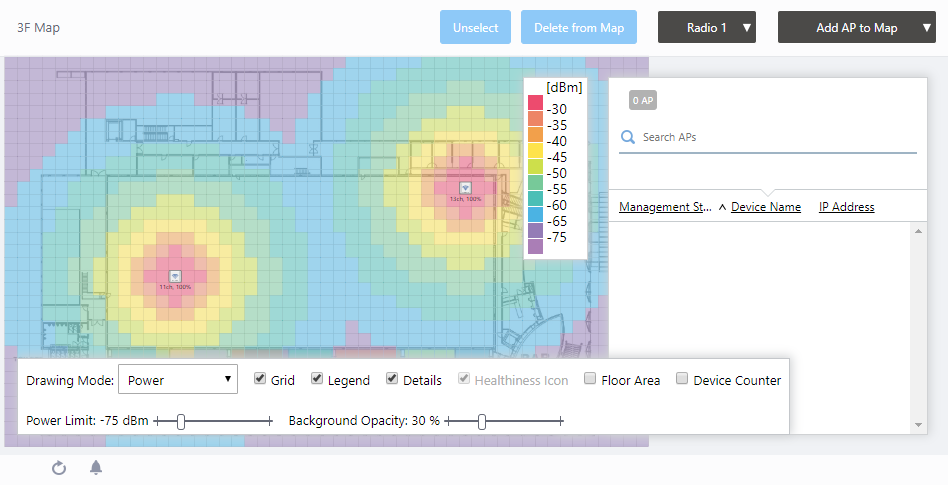
Select "Wireless Monitoring" > "Floor Map" from the AWC Plug-in menu to display the "Floor Map" screen. You can see that 3 APs are placed on each floor map.

Confirm SC Profile
Confirm that the SC Profile is applied to the newly added AP "TQ5403-SC-3".- Select "Wireless Configuration" > "SC Profile" from the AWC Plug-in menu.
This shows a list of SC Profiles.
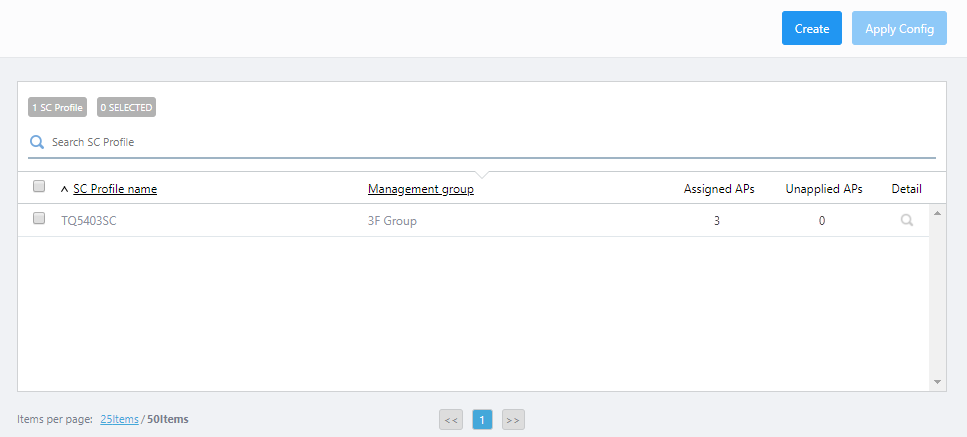
- Confirm that the current "Assigned APs" of the SC Profile "TQ5403SC" created in Create SC Profile is "3".
If the "Assigned APs" is "3", the confirmation here is complete.
To add a new Root AP as a member of Smart Connect, set the AP as the Root in the "AP List" on the "Edit SC Profile" screen.
Refer to step 14 in Create SC Profile for how to set the AP as a Root.
If you register a AP that does not use Smart Connect, set the AP to "Disabled" for "Smart Connect" in the "AP List" on the "Edit SC Profile" screen.
Apply AP Profile
Apply the AP Profile "TQ5403AP" to the AP "TQ5403-SC-3".- Select "Wireless Configuration" > "AP Settings" from the AWC Plug-in menu.
The AP list screen will appear.
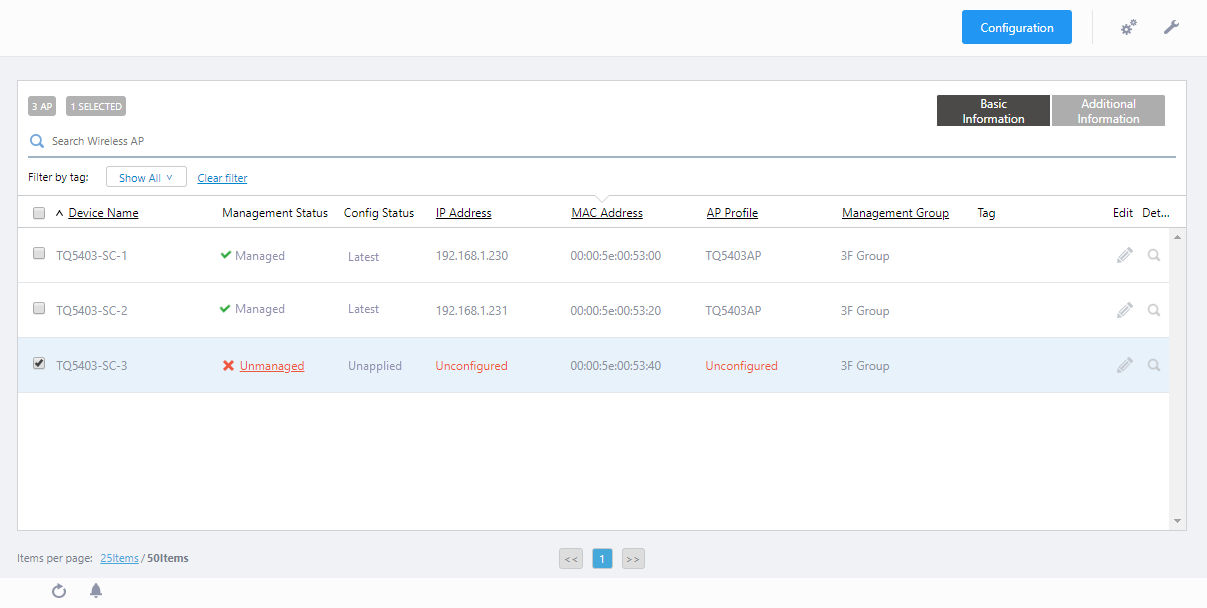
- Check the AP "TQ5403-SC-3".
- Put the mouse cursor on the gear icon at the top right of the screen and select "Assign AP Profile" from the submenu.
The "AP Profile Assignment" dialog box will appear.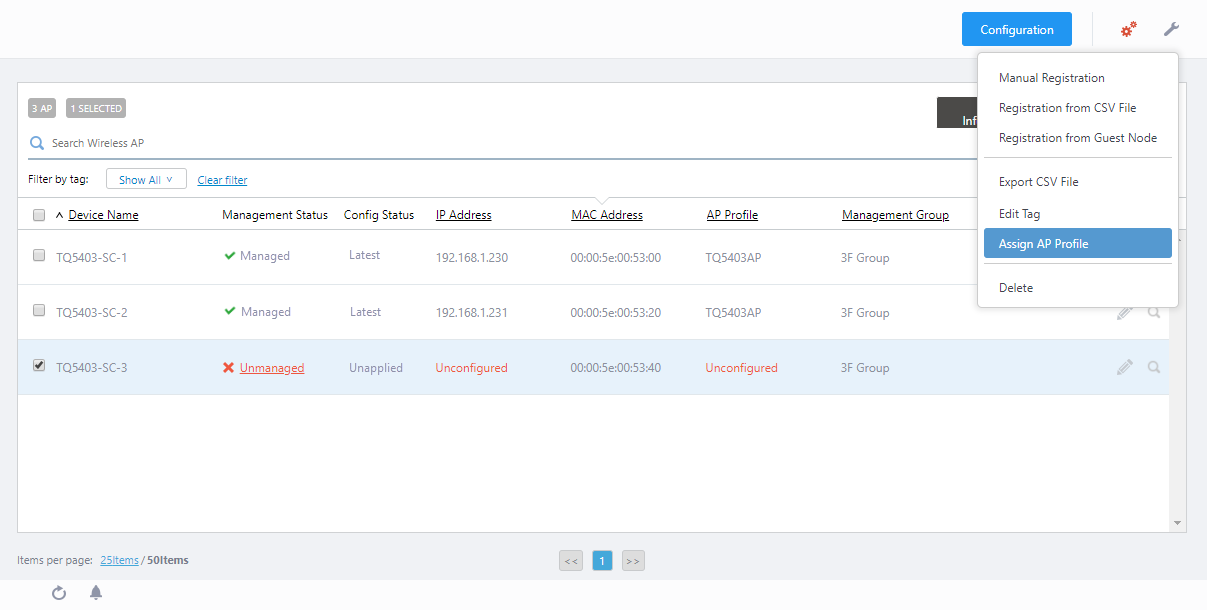
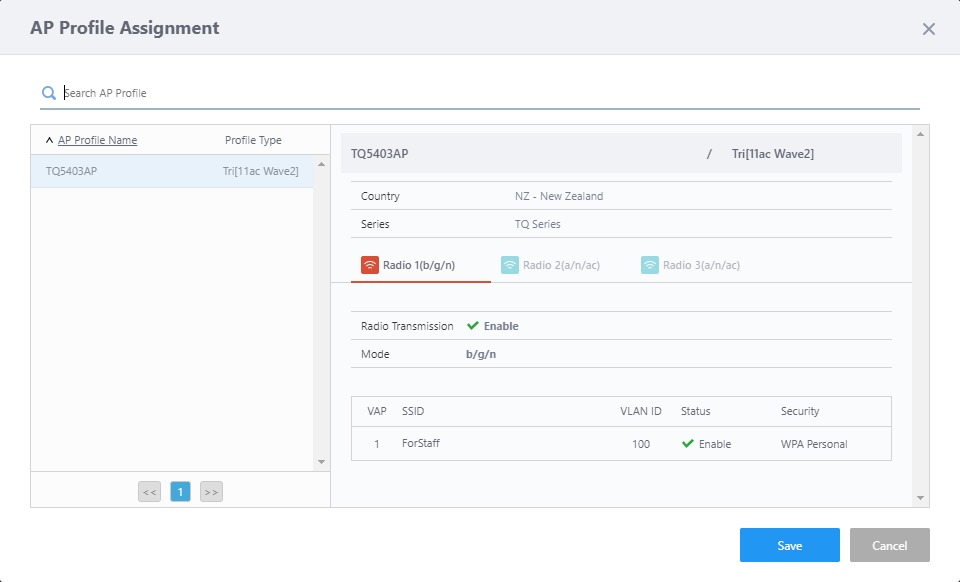
- Make sure that the AP Profile "TQ5403AP" created in Create AP Profile is selected in the AP Profile list, Click "Save".
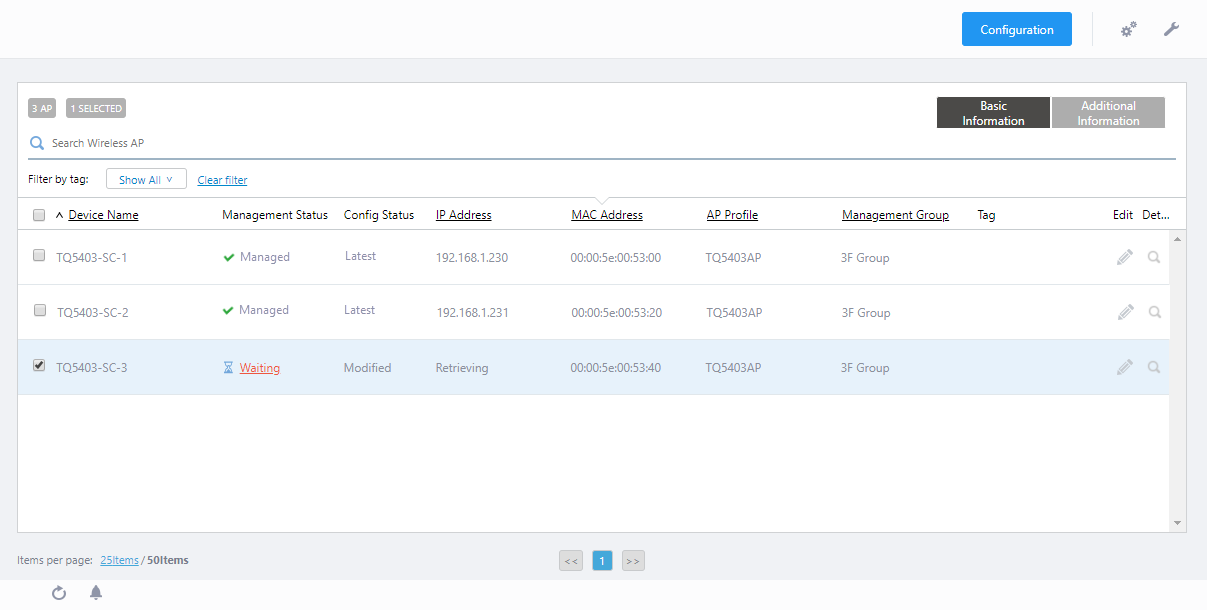
- When you are back to the AP list screen, you can see that the target APs' "Management Status" and "Configuration Status" were changed to "Waiting" and "Retrieving" respectively.
Add Satellite AP (Wireless Configuration)
Use OTA (Over The Air) to add a factory default AP as a Satellite AP.To operate the factory default AP as a Satellite AP, connect the DC plug of the AC adapter to "TQ5403-SC-3" after completing all the settings up to this point.
When the boot process is completed, the followings will be processed automatically.
- "TQ5403-SC-3" searches for and connects to beacons of surrounding APs using the initial setting SSID "sc-initial-provisioning" while switching channels.
At this time, on the wireless AP, the WIRELESS LAN LED (2.4GHz, 5GHz 1, and 5GHz 2) corresponding to the wireless band used for the scanning beacon flashes slowly (once per second).
- The Root AP "TQ5403-SC-1" or the Satellite AP "TQ5403-SC-2" assigns a temporary IP address to "TQ5403-SC-3".
At this time, the MAC address "00: 00: 5e: 00: 53: 40" of "TQ5403-SC-3" is checked agiainst the MAC address list of the candidate AP to be managed.
If the AWC plug-in permits joining, the SSID "SC-Default-cVVGG" defined in the SC Profile is sent from the Root AP "TQ5403-SC-1" or the Satellite AP "TQ5403-SC-2" to "TQ5403-SC-3", and let it connect to the Smart Connect network.
- After the connection by AWC-SC is established, the new AP obtains the IP address and DHCP option 43 (vendor specific information) from the actual DHCP server, and refers to the DHCP option information to send a request to join the AWC server.
- When "TQ5403-SC-3" joins, the AWC plug-in associates the registered MAC address "00:00:5e:00:53:40" with the IP address and transfers the assigned AP and SC Profiles to "TQ5403-SC-3".
During steps 2 to 4, the WIRELESS LAN LED (2.4GHz, 5GHz 1) corresponding to the wireless band used by AWC-SC blinks rapidly (about 4 times per second).
- From "TQ5403-SC-3", a multi-channel VAP "ForStaff" for wireless client connection will be operated on Radio 1 channel.
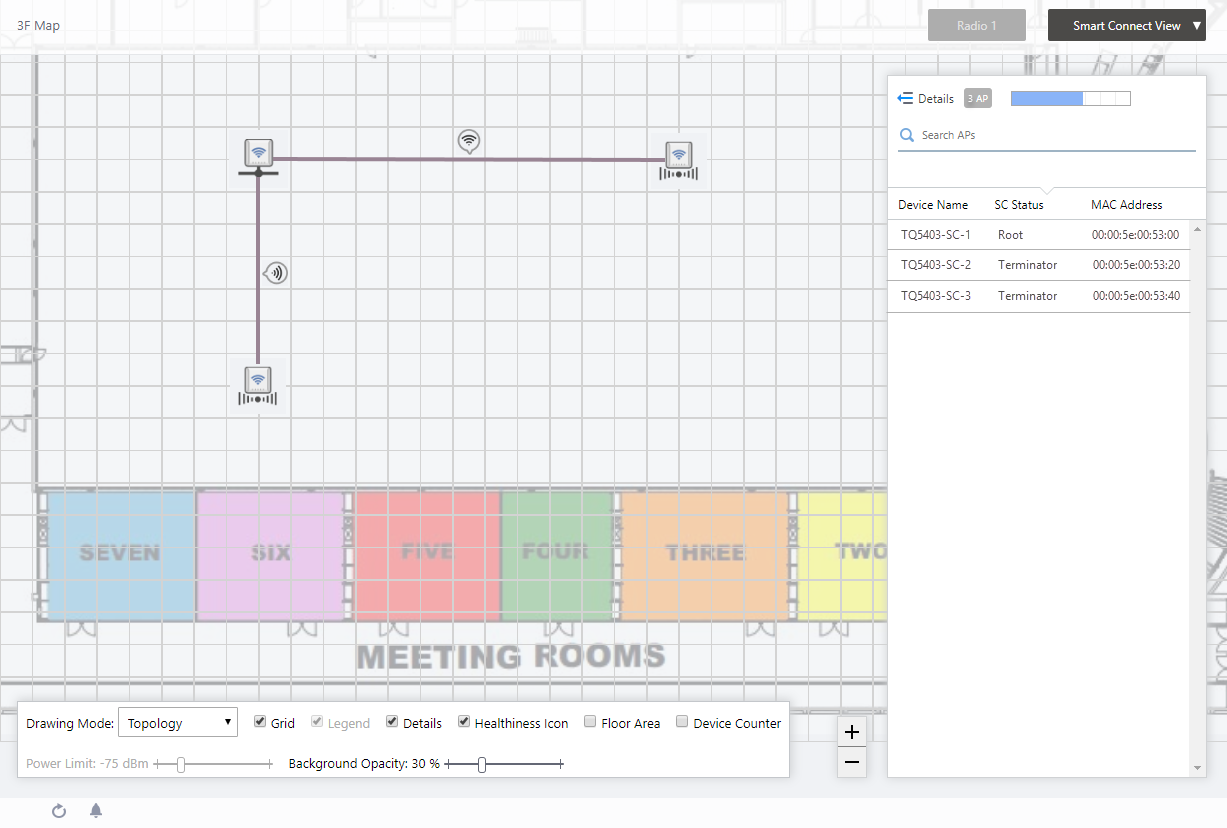
If the AWC-SC is correctly configured, the Details [Smart Connect View] of Floor Map screen allows you to graphically check the status of wireless connection between APs by AWC-SC.
Other APs (TQ5403-SC-4, TQ5403-SC-5) can be added under the management of the AWC Plug-in as the same way. In AWC-SC, up to four Satellite APs can be connected to one Root AP.
After all the above configuration, you can see the "Details [Smart Connect View]" of the "Floor Map" screen shows the same settings as the configuration example presented.
22 Apr 2021 15:29