Create AP Profile
Next, create the AP Profiles.
An AP Profile is a bundled set of configuration parameters that can be applied to a specific set of APs. You can save time by creating separate AP profiles according to the location and operation of APs and applying each profile to a group of APs.
Generally speaking, you should create an AP Profile for each AP model that uses the same feature set. Note that you have to create an AP profile even if the profile only applies to a single AP.
This time, we will create and apply a single AP Profile to the TQ4600s.
AP Profile for TQ4600
First, let's create an AP Profile for TQ4600.- Select "Wireless Configuration" > "AP Profile" from the AWC Plug-in menu.
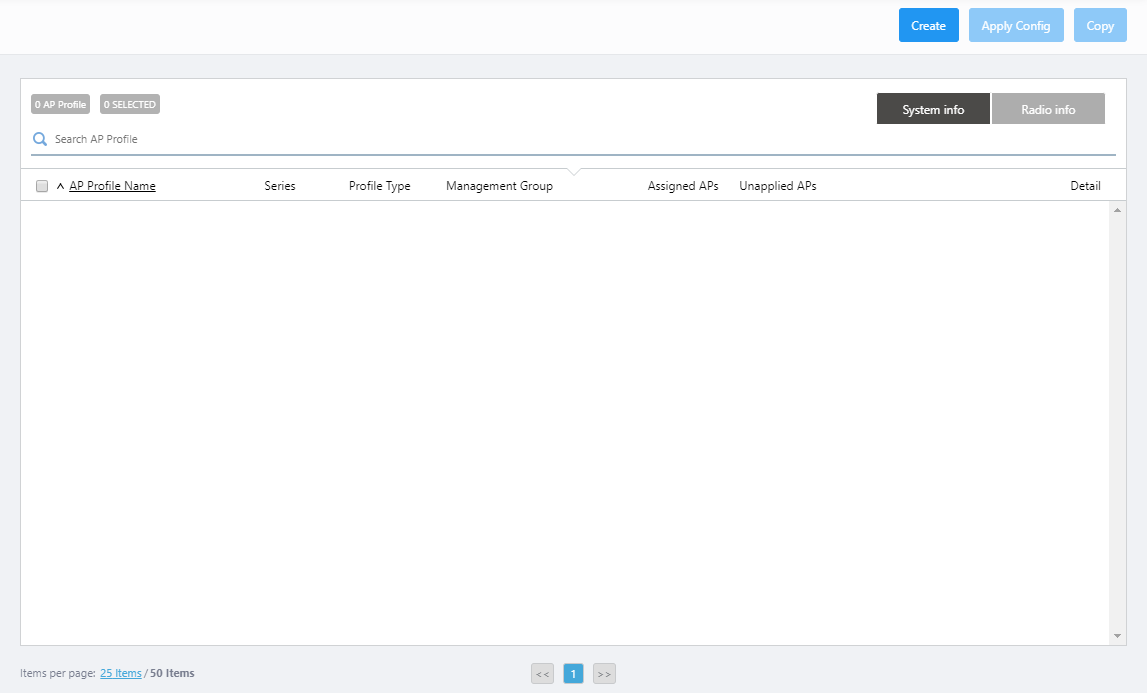
The AP Profile list screen will appear.
- Click "Create" at the top right of the screen.
The "Select Country, AP Series and Profile Type" dialog box will appear.
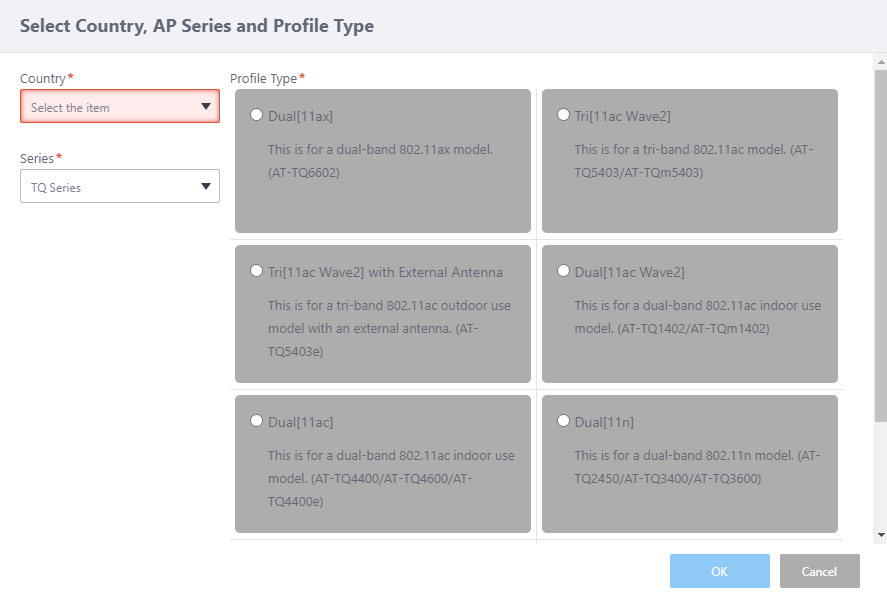
- Select a Country.
If the default country code for the currently logged in user is configured, it is selected by default.
- Select "TQ Series" from "Series".
- Select "Profile Type".
There are several options for this item, depending on the supported feature set of the AP model.
Select "Dual[11ac]", which is suitable for TQ4600.
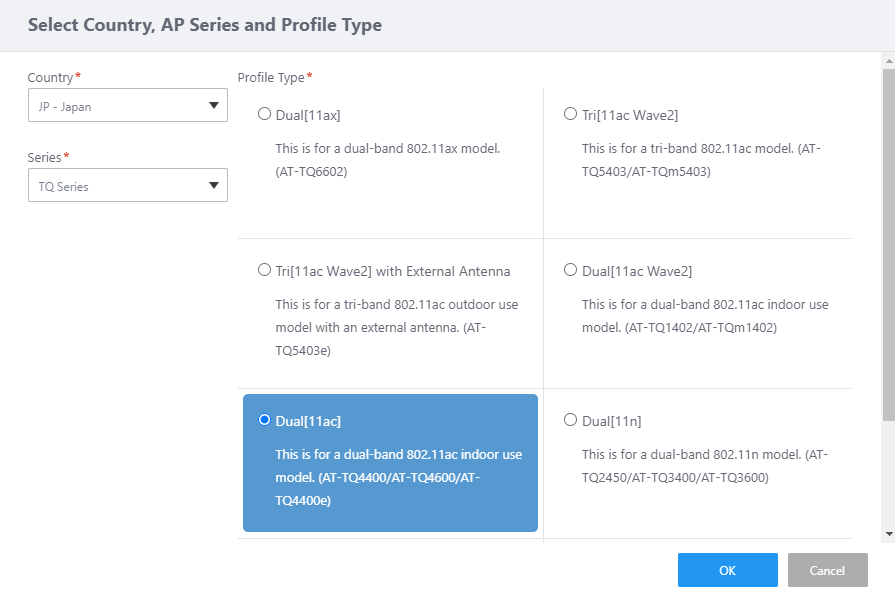
- Click "OK".
The AP profile configuration screen will appear.
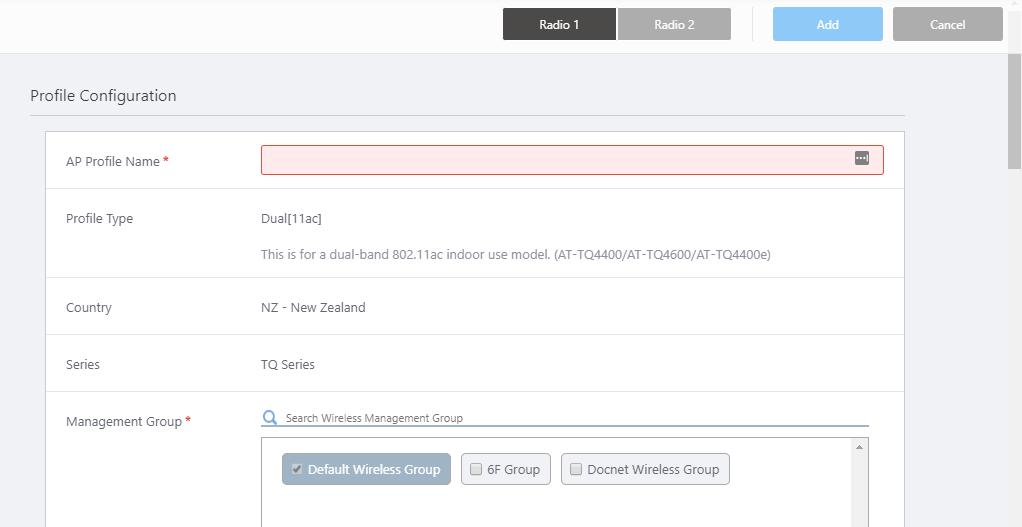
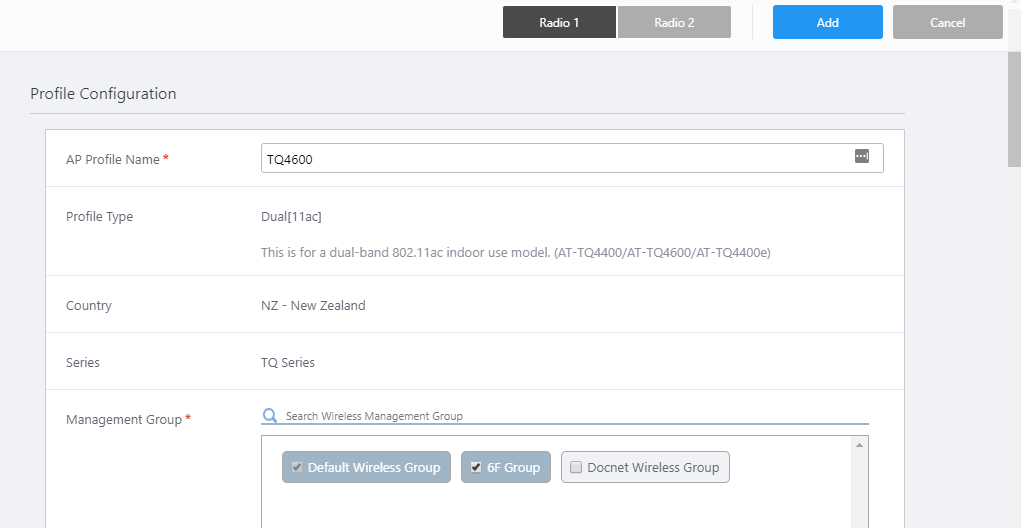
- Configure general parameters in the "Profile Configuration" section.
- Enter "TQ4600" in "AP Profile Name".
- The "Profile Type", "Country" and "Series" fields show the options selected in the earlier "Select Country, AP Series and Profile Type" dialog box.
- Select the Management Groups that you want this AP Profile to belong to.
An AP Profile can be used in multiple Management Groups by selecting those groups in this dialog box.
Here we check "6F Group", which we created earlier.
Note that you cannot uncheck the "Default Wireless Group".
- Enter "TQ4600" in "AP Profile Name".
- You can specify the AP's system settings in the "Basic Configuration" section.
In the "Timezone" section, select a timezone to apply to the APs.
Here, we set the time display to NZST (New Zealand Standard Time). Select "New Zealand - NZST-12" from the drop-down list.
You can also narrow down the choices displayed in the drop-down list by entering a part of the above timezone character string in the search field above the drop-down list, such as "new zealand" in this case.
- The "NTP Client" field is used to enable/disable the NTP client on the APs.
To use the AWC (Autonomous Wave Control) feature, which we will describe later, you have to enable the NTP client.
Here we enable the NTP client so we can enable AWC later.
When you enable the NTP client, an additional "NTP Server IP Address/Hostname" field will appear. Enter the IP address of the switch (192.168.1.1) that is configured as an NTP server.
- The "Syslog Client" field lets you enable or disable the syslog client feature on the APs.
If you want the APs to send log messages to the syslog server, enable this item.
Here we set the syslog client to disabled.
- You can enable or disable the SNMP agent on the APs in the "SNMP Agent" section.
If you want to monitor and configure the APs with SNMP manager, enable this item.
Here we enable the SNMP Agent because we are going to monitor the APs with the SNMP Plug-in.
When you enable the SNMP Agent, the following fields will appear. Here we enter the following data:
Table 1: TQ4600 SNMP Agent Configuration
Item Name Value Description Read Only Community Name public Enter the read-only SNMP community name, using 1 to 256 ASCII characters including letters, digits, and symbols (except " ' \ & < >). Port Number 161 Enter the UDP port that the SNMP agent listens on. Restrict the source of SNMP requests Disable Enable this to accept SNMP requests only from specific source addresses. Only allow from the designated hosts or subnets - Enter the IP address or hostname (FQDN) of the SNMP manager.
This is only displayed when "Restrict the source of SNMP requests" is enabled.Community name for traps public Specify the trap SNMP community name, using 1 to 256 ASCII characters including letters, digits and symbols (except " ' \ & < >). Trap types Cold Start
Link Up/Down
Authentication
Association
Filtered STASelect the SNMP Trap types to generate. Trap Host IP Address/Hostname 192.168.1.249 Specify IP addresses or hostnames (FQDNs) to which SNMP traps will be sent.
A maximum of 3 trap hosts can be configured.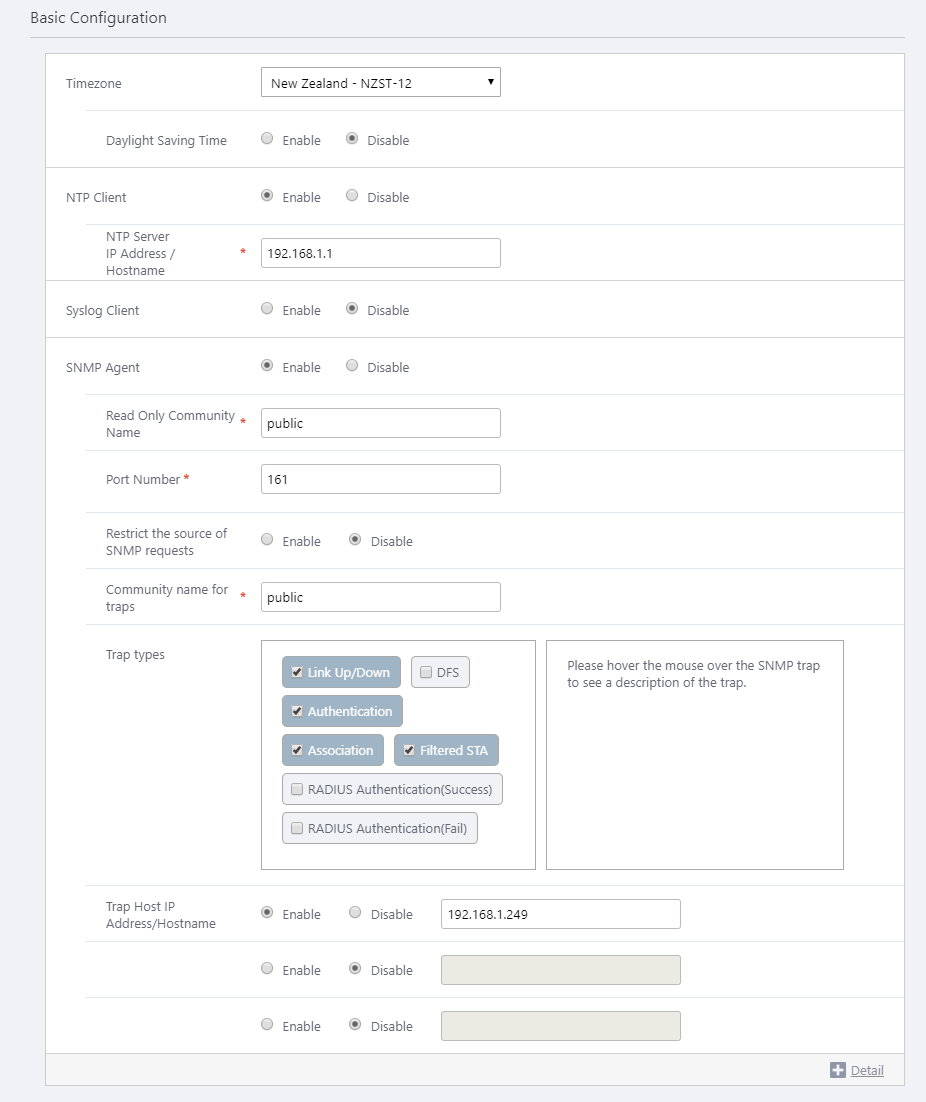
- Clicking "+ Detail" will show the "NTP Synchronization Interval", "MAC Address List", "LED" and "Factory Reset Button" fields.
- "NTP Synchronization Interval" is only displayed when "NTP Client" is enabled. It lets you change the interval at which the NTP client attempts to synchronize its time with NTP servers. Here we leave this unchanged (10 minutes).
- "MAC Address List" lets you specify MAC address lists (blacklist or whitelist) used by MAC Access Control features with a MAC Address List on the APs.
An AP can use only a single MAC address list but the MAC Address List feature can be enabled or disabled per VAP (SSID).
Here we haven't created a MAC address list. Leave "MAC Address List" empty in order to accept all wireless clients that have a valid SSID and key.
- The "LED" and "Factory Reset Button" fields let you select the operational mode of the AP's LEDs and the button.
Here we choose "Turn On" for "LED" and "Enable" for "Factory Reset Button".
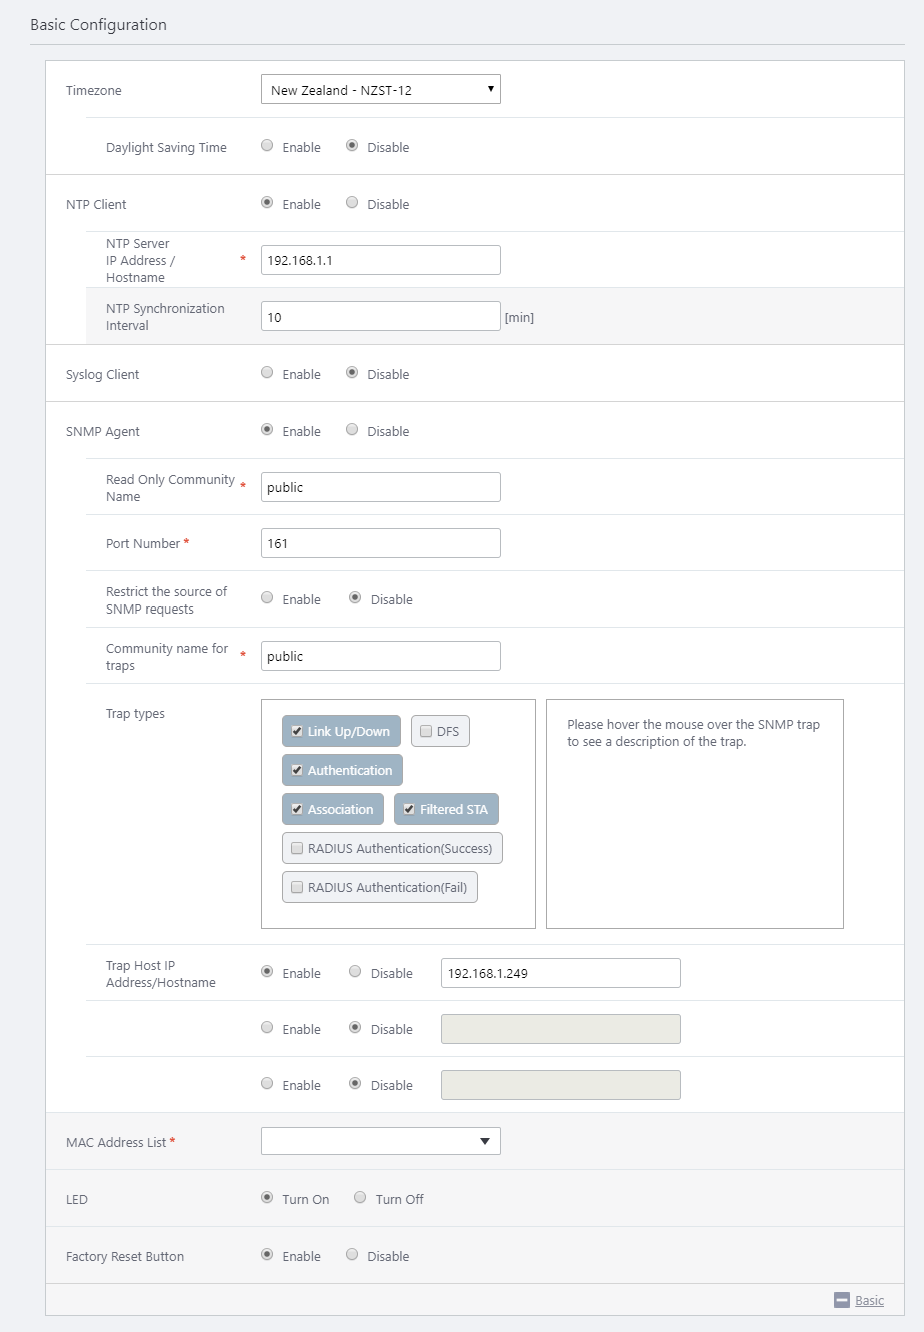
- "NTP Synchronization Interval" is only displayed when "NTP Client" is enabled. It lets you change the interval at which the NTP client attempts to synchronize its time with NTP servers. Here we leave this unchanged (10 minutes).
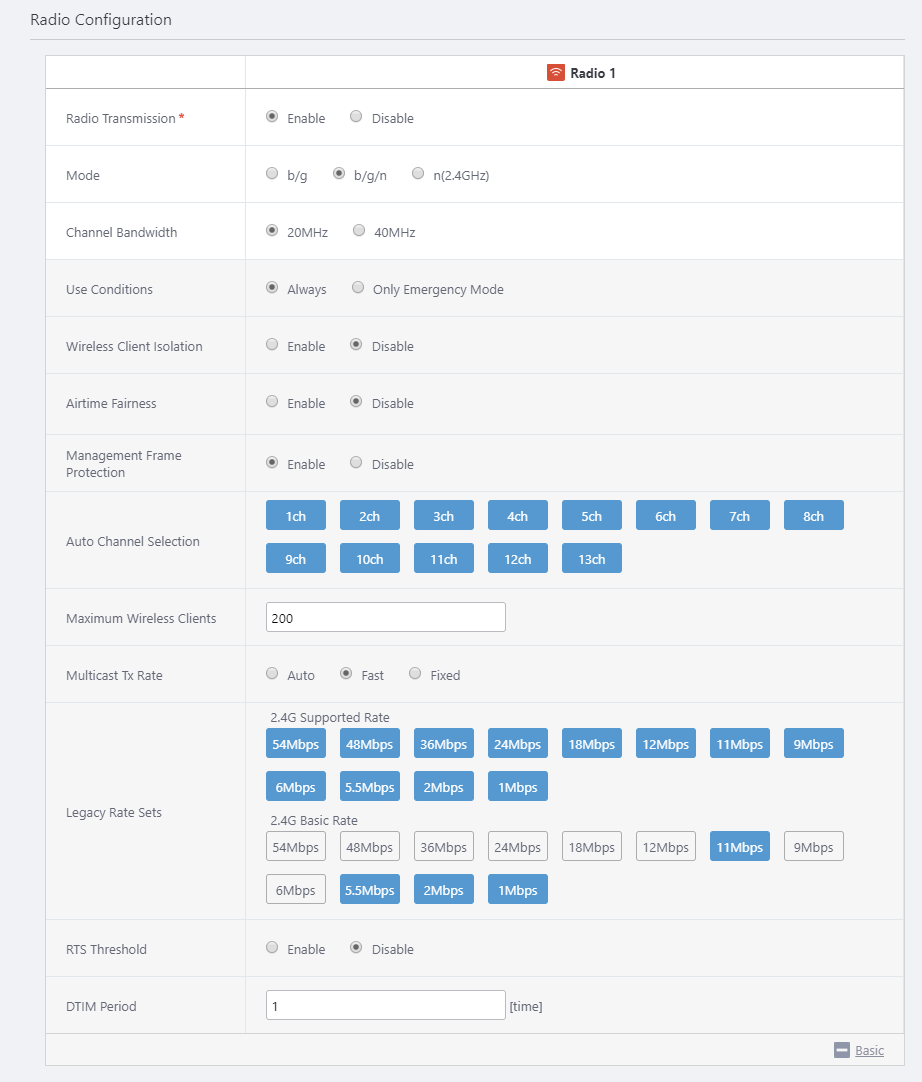
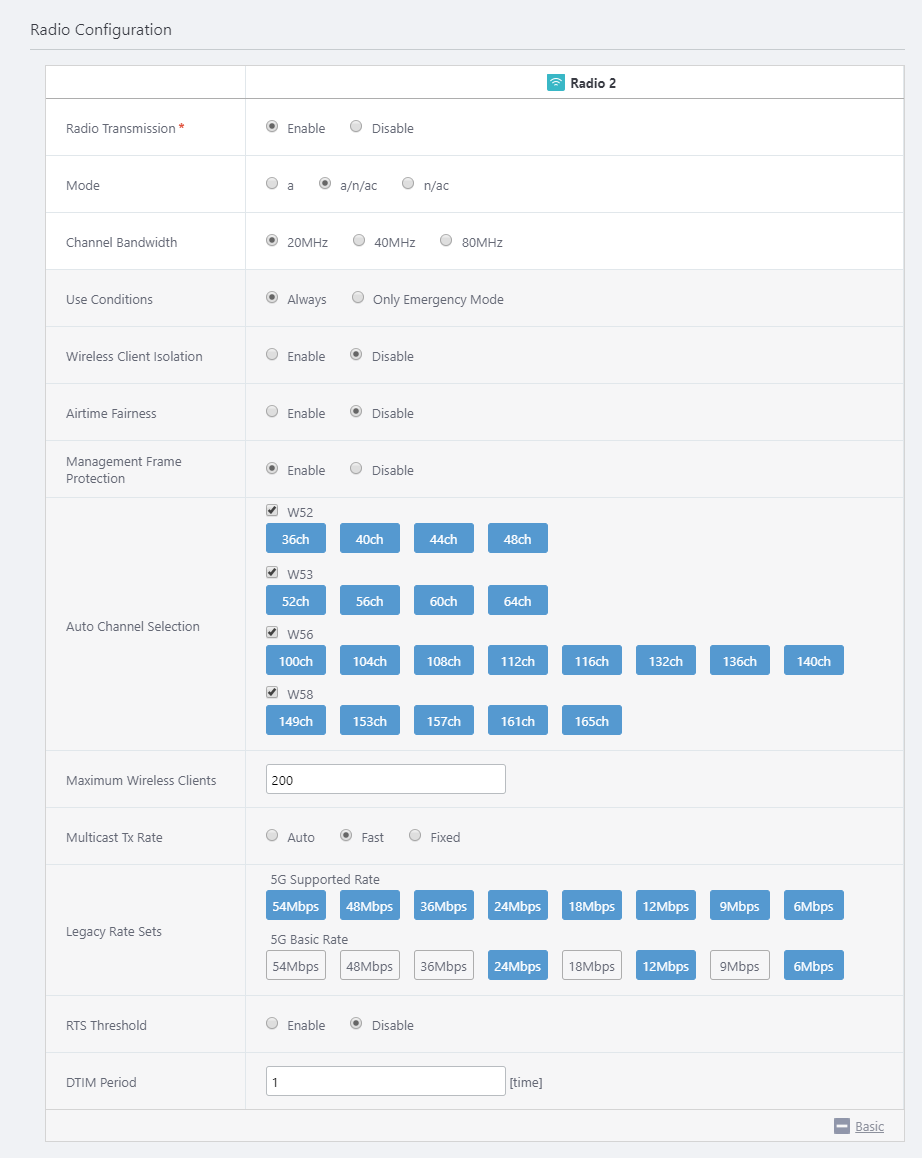
- You can specify configuration parameters for radio waves in the "Radio Configuration" section.
Depending on the selected "Profile Type", configure "Radio 1 (2.4GHz)" and "Radio 2 (5GHz W52/W53/W56)" appropriately. You can switch the radio by clicking the "Radio 1" and "Radio 2" buttons at the top of the screen.
Here we enter the following data:
Table 2: TQ4600 Wireless Configuration
Item Name Value Description Radio 1 Radio 2 Radio Transmission Enable Enable Specify whether to transmit and receive radio waves in the selected frequency band. Mode b/g/n a/n/ac Specify the wireless modes (protocols) to use. Bandwidth 20MHz 20MHz Specify the bandwidth to use. IEEE 802.11ac and IEEE 802.11n can aggregate two or four adjacent channels to make a large 40MHz or 80MHz channel. Use Conditions Always Always Select "Always" to always use the wireless feature. Select "Only Emergency Mode" to use the radio band only in emergency mode.
Refer to Enable Emergency Mode for more details.Wireless Client Isolation Disable Disable Specify whether to block communication between wireless clients connected to the same VAP. Airtime Fairness Disable Disable Specify whether to give each client an equal amount of airtime regardless of its speed. Management Frame Protection Enable Enable Specify whether to protect management frames. Auto Channel Selection All All Specify the channels to use. All channels are selected by default. Maximum Wireless Clients 200 200 Specify the maximum number of clients that can connect to the APs. Multicast Tx Rate Fast Fast Specify a selection method for IEEE 802.3 multicast/broadcast transmission rate. Legacy Rate Sets
2.4G Supported Rate: All
2.4G Basic Rate: 11 5.5 2 1 (Mbps)
5G Supported Rate: All
5G Basic Rate: 24 12 6 (Mbps)
Specify valid rates to use when IEEE 802.11b/g or IEEE 802.11a is being used.
- 2.4G/5G Supported Rate
Select rates to support.
- 2.4G/5G Basic Rate
Select the rates that must be supported on wireless stations (clients or other APs) for them to be allowed to connect to the APs.
RTS Threshold Disable Disable To transmit RTS packets in IEEE 802.11b/g/a mode, select Enable and specify the minimum size of Tx packets. DTIM Period 1 1 Specify how frequently to insert a DTIM (Delivery Traffic Indication Map) in the AP's beacons (every 1 to 255 beacons)
◼ Radio 1
◼ Radio 2
- 2.4G/5G Supported Rate
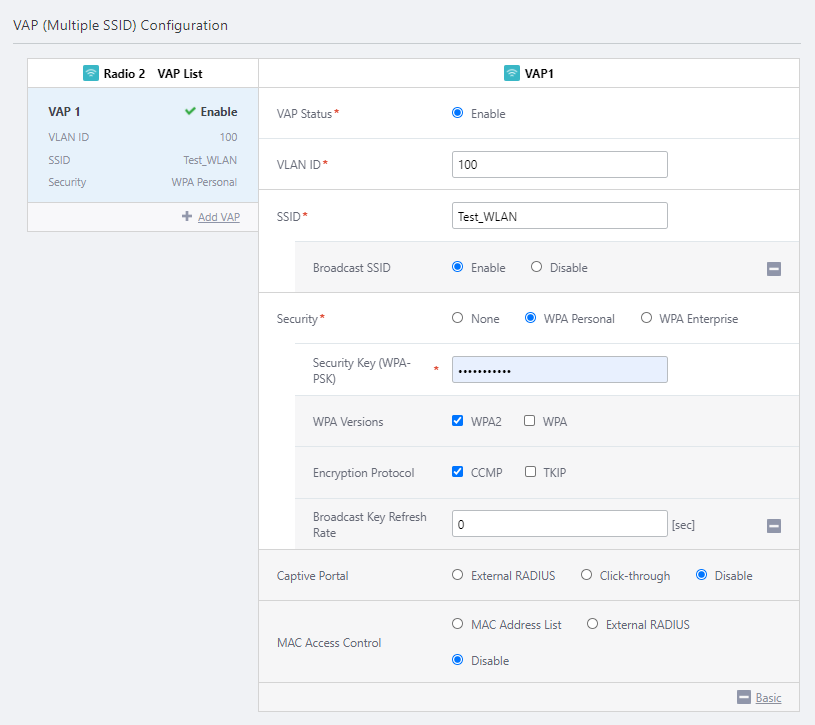
- Configure VAPs in the "VAP (Multiple SSID) Configuration" section.
Depending on the selected "Profile Type", configure VAPs for "Radio 1 (2.4GHz)" and "Radio 2 (5GHz W52/W53/W56)" appropriately.
Here we enter the following data:
Table 3: TQ4600 VAP Configuration
Item Name Value Description Radio 1 VAP 1 Radio 2 VAP 1 VAP Status Enable Enable Specify one of "Enable", "Disable" and "Emergency". The VAP Status of VAP1 is always "Enable" when "Use Condition" in the "Radio Configuration" section is set to "Always". VLAN ID
100
100
Specify a VLAN ID used for communication between the VAP and associated clients.
Note
Specify a VLAN ID that is different from the AP's management VLAN. When the AP is detected as a guest device, a parent AMF device is configured to collect the guest device information automatically ("dynamic discovery"), and wireless clients get their IP addresses via DHCP.
SSID Test_WLAN Test_WLAN Specify an SSID (network name) to use on the VAP. Broadcast SSID Enable Enable Specify whether to broadcast the SSID on the VAP. Band Steering Disable - Specify whether to use the Band Steering feature, which encourages clients supporting both 2.4GHz and 5GHz to prefer 5GHz, to reduce congestion in the 2.4GHz band.
This item is only displayed for "Radio 1". To use this feature, make sure you configure a VAP with the same SSID and security for each radio (Radio 1 and 2).
This item is not supported, and therefore is not displayed, when the Profile Type is "Single" (TQ3200).Security WPA Personal WPA Personal Specify a security method for the VAP. Security Key (WPA-PSK) 4YourEyesOnly 4YourEyesOnly Specify an encryption key for the VAP. WPA Versions WPA2 WPA2 Specify a WPA version to use on the VAP. Encryption Protocol CCMP CCMP Specify an encryption protocol to use on the VAP. Broadcast Key Refresh Rate 0 0 Specify an interval at which to refresh the broadcast key that is sent to clients on the VAP. Specifying "0" stops the key from refreshing. Captive Portal Disable Disable Specify whether to use the Captive Portal feature on the VAP. MAC Access Control Disable Disable Specify whether to use MAC Access Control on the VAP. 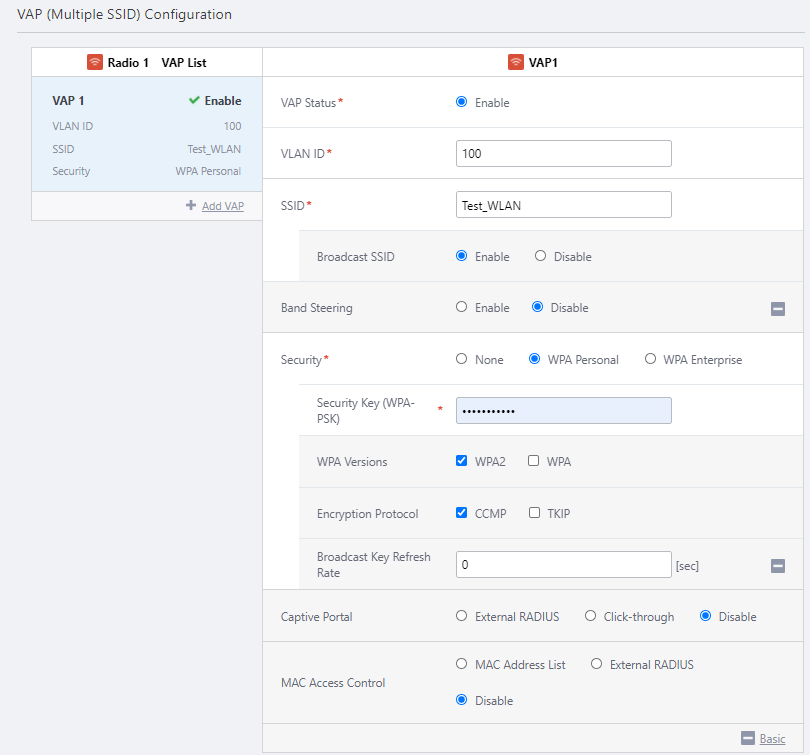
- Click "Add" at the top right of the screen.
Now you can see the newly created AP Profile "TQ4600".
09 Sep 2021 11:06