Create Account
Now that we have a Management Group for the network we chose, let's create an account to manage APs in the group.
Vista Manager EX and the AWC Plug-in share a single account information database.
Here we are going to create a user for managing "1-2F network".
NoteYou do not have to create an additional account if you plan to use the default Admin account to manage all APs.
- Select "User Management" from the Vista Manager EX main menu.
- Click "Create" at the top right of the screen.
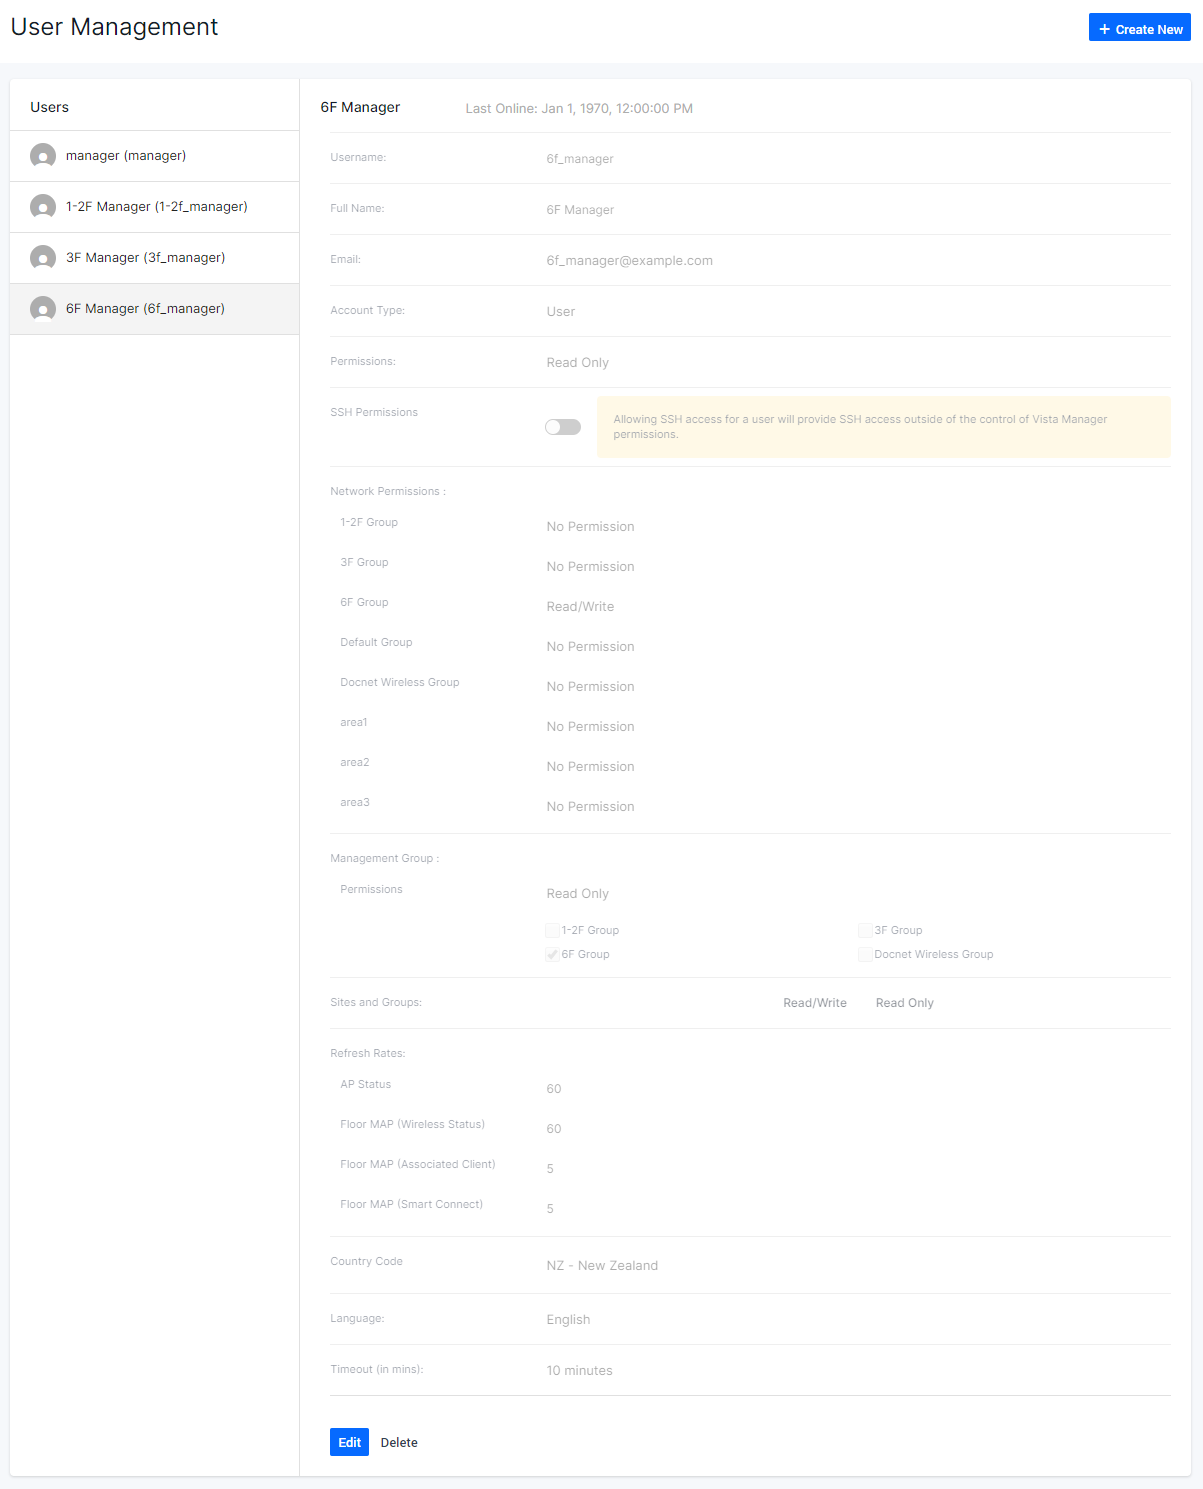
The "New User" screen will appear.
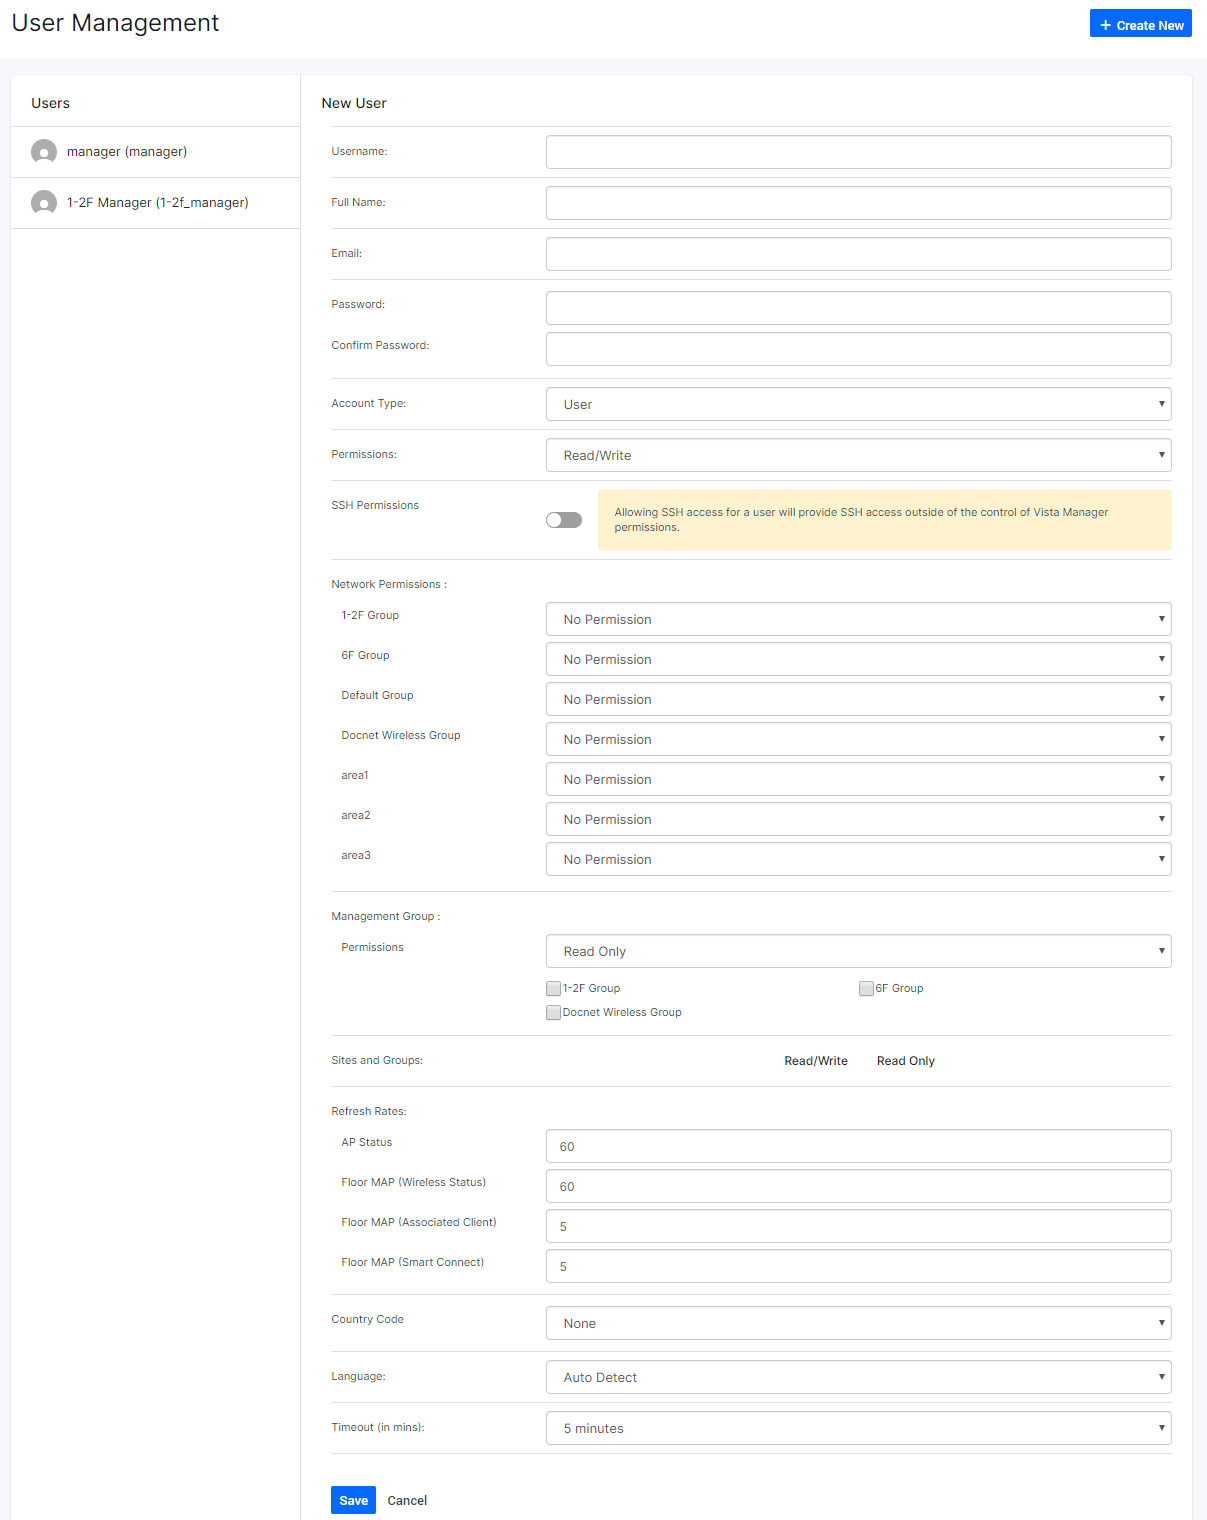
- Enter a username, a full name and an email address.
Here we enter the following data:
Table 1: Account Configuration 1
Item Name Value Description Username
1-2f_manager
An account ID for the user, which is used to log in.
Note
The username cannot be changed once created.
Note
The username is not reusable and should be unique through the whole lifetime of an Vista Manager EX / AWC Plug-in system. That is, once an account has been created with a username, the username cannot be used for another account, even if you delete the original account.
Please carefully consider the account policy etc. before creating one.Full Name 1-2F Manager A display name for the user, such as their full name. The full name should be less than or equal to 100 characters in length. Email
1-2f_manager@example.com
The email address to be used for password recovery and license expiry notification. Please specify a valid email address.
Note
If an obsolete account is deleted, the email address associated with it at the time of deletion is not reusable. If you are going to delete an account, and if it is possible for the email address owner to have another account in the future, we recommend you change the email address of the obsolete account to a dummy address before deleting the account.
- Enter a password.
Then enter the same password again for confirmation.
Table 2: Account Configuration 2
Item Name Value Description Password
t0psecret!
Password for the user.
The password should have 8 or more characters and contain characters from each category of digits, alphabet, and symbols (! @ # $ % ^ & * ( ) can be used).
Confirm Password Enter the same password again for confirmation. 
- Select an account type.
Here we select "User" because we want to allow the user to configure "area1" only.
Table 3: Account Configuration 3
Item Name Value Description Account Type
User
Select the type of account.
- Admin
Can use all functions of Vista Manager EX, including user and system settings.
- User
Can only change or check the status and settings of areas to which permissions are given separately.

- Admin
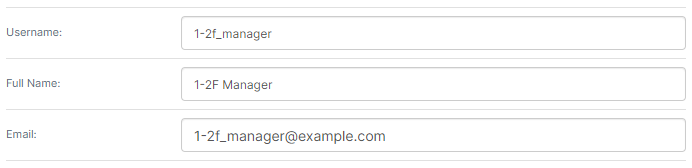
- If you specify "User" for the Account Type, select the user's permissions for Vista Manager EX Service Monitoring and the user's network access permissions for various "areas" (AMF areas, the AWC Plug-in's Management Group and the SNMP Plug-in's Subnet).
Table 4: Account Configuration 4
Item Name Value Description Permissions
Read Only
Select the user's permissions for Vista Manager EX Service Monitoring.
- Read Only
This user can only view Service Monitoring.
- Read/Write
The Admin can view, create, edit, and delete Service Monitors.
SSH Permissions
Off
If the Account Type is "User", the option for the permission of SSH connection to the AMF devices in authorized areas is displayed.
This option is not displayed when the Account Type is set to "Admin". Admins can connect to all the AMF devices via SSH.
Network Permissions
1-2F Group - Read/Write
other areas - No Permission
If you specify "User" as the Account Type, select the user's access permission for each area. The default is "No Permission".
"Area" here stands for the following elements:
- "AMF Area" in the AMF Network
- "Management Group" of the AWC Plug-in
- "Subnet" of the SNMP Plug-in
You can choose one from the following permission levels for each area:
- No Permission
No information about the area is shown.
Note
When a user logs in who has "No Permission" set for an area, Vista Manager EX's "My Account" page displays the area name and that the user has "No Permission" on the area. In multi-tenant usage, to prevent a user from knowing another user's area, we recommend you avoid giving the areas names that are too relevant or identifiable, such as company names.
- Read Only
Users at this level can view the area's status.
The user can view topology maps of areas and devices, device information, comments for devices and events, and logs of Abnormal and Normal events.
For plug-in areas, the user can only view device information in the area.
- Read/Write
The user can view the area's status and can perform certain operations on the area.
Operations include performing AMF device backup, SSH to device, editing notes for devices and events, and changing backup configuration on the AMF controller and masters.
For plug-in areas, the user can view and configure devices in the area.
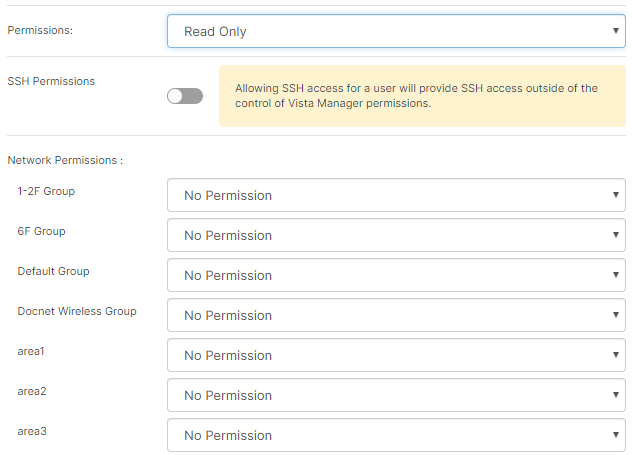
- Read Only
- If you specify "User" as the Account Type, select the Management Groups to which the user belongs.
Management Groups created by an Admin are listed here. In this example, the "1-2F Group" that was created in Create Management Group is listed.
Table 5: Account Configuration 5
Item Name Value Description Management Group Permissions
1-2F Group - checked
Select the AWC Plug-in's Management Groups to which the User belongs. The User can view and edit configuration of the APs in the groups.
Permission for the Management Group is fixed as "Read Only". Therefore, Users cannot modify Management Groups.
- When the Account Type is "User", you can set the user Read/Write permissions for each Site and Group in Vista Manager EX.
Creating site or group structures do not affect the management by the AWC Plug-in, so we will ignore it for now.
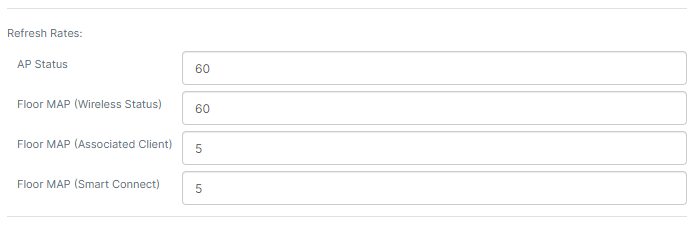
- Confirm and adjust display refresh rates for the AWC Plug-in.
Table 6: Account Configuration 6
Item Name Value Description Refresh Rates
(default)
Specifies the automatic display refresh intervals (in seconds) for the AWC Plug-in.
- AP Status (Default: 60 secs)
- Floor MAP (Wireless Status) (Default: 60 secs)
- Floor MAP (Associated Clients) (Default: 5 secs)
- Floor Map Details (Smart Connect) (Default: 5 sec)
- AP Status (Default: 60 secs)
- Select a default Country Code for the AP profiles.
Table 7: Account Configuration 7
Item Name Value Description Country Code NZ - New Zealand Specify the default Country Code for AP Profiles in the AWC Plug-in. This is used to properly configure APs for radio frequency regulation in the country. The default is None. 
- Select the Language for the web interface and configure the session Timeout.
Table 8: Account Configuration 8
Item Name Value Description Language English Select the language used on the management web interface.
You can select from Auto Detect (Default), English, and Japanese. When set to "Auto Detect", the language is selected according to the web browser's language preference.Timeout 10 minutes Specify the web interface's session timeout.
A login session times out and the login page reappears after the configured number of minutes of inactivity.
Available options are 5 min, 10 min, 20 min, 30 min, 1 hour, and Never. If you set Timeout to Never, a login session never times out and automatic logout is disabled.
Timeout is set to 5 minutes by default.
- Click "Save".
You can see the created user "1-2F Manager" was added to the list.
09 Sep 2021 11:06