How to configure Authentication
Preface
The RADIUS Server authenticates the user who makes the connection request to the NAS. The basic operation of authentication in the RADIUS protocol is to verify whether the user making the authentication request is registered on the RADIUS Server and whether the credentials (password, etc.) included in the connection request match those registered on the RADIUS Server.In addition, AT-RADgate provides a unique function of MAC Address-based endpoint authentication to enable efficient management of network access control solutions for user endpoints that use our network products. This authentication operation evaluates whether the MAC Address of the endpoint included in the authentication request is registered in AT-RADgate, and can be used in conjunction with user authentication.
The port authentication function of the AW+ Switch provides three authentication modes: MAC-based Authentication, IEEE 802.1X Authentication, and Web Authentication. If you combine this with AT-RADgate Endpoint Authentication, the authentication that works is as follows:
| User Authentication | Endpoint Authentication | |
|---|---|---|
| MAC-based Authentication | − | × |
| IEEE 802.1X Authentication | × | × |
| Web Authentication | × | × |
NoteThe steps for setting up user authentication and endpoint authentication are as follows:AW+ has a two-step authentication function that enforces user authentication and endpoint authentication for one supplicant. The two-step authentication function performs two authentication processes for one supplicant: MAC-based Authentication and IEEE 802.1X Authentication or Web Authentication, and is different from this function. This function performs endpoint authentication simultaneously during the IEEE 802.1X Authentication or Web Authentication process, and does not require any special settings on the AW+ side.
User Authentication setup procedure
Registering NAS
The RADIUS Server authenticates the sender (NAS) of the received message. During this process, messages sent by unauthorized sources are discarded.Therefore, to correctly build an authentication system, all systems that send RADIUS Authentication requests must be registered in AT-RADgate. Register the NAS and NAS Profile on the Policy Management > NAS page.
If you need to register a large number of NAS devices at once, you can create a CSV file containing the NAS information in advance and then register them by uploading it. To import a CSV file, use "Import" button on the System Management > Database Management page.
By default, the NAS is set to perform user authentication only, so if you do not want to perform endpoint authentication, there is no need to register a NAS Profile.
Click the "Add" button at the top right of the Policy Management > NAS page to display the Add NAS dialog.

| Item Name | Description |
|---|---|
| IPv4 Address | NAS IP Address. |
| Pre-Shared Key | Pre-Shared Key (PSK). It should be the same as what you set on the NAS. |
| Tag | You can set the group to which this NAS belongs. Multiple tags can be set by separating them with a space character. |
Registering User
The RADIUS Server authenticates the user who makes the connection request to the NAS. The basic operation of authentication using a RADIUS Server is to verify that the user making the authentication request is registered on the RADIUS Server and to verify whether the credentials (password, etc.) included in the connection request match those registered on the RADIUS Server.User policy is managed on the Policy Management > User page. You can also import using a CSV file.
Click the "Add" button in the upper right corner of the Policy Management > User page to display the Add User dialog.
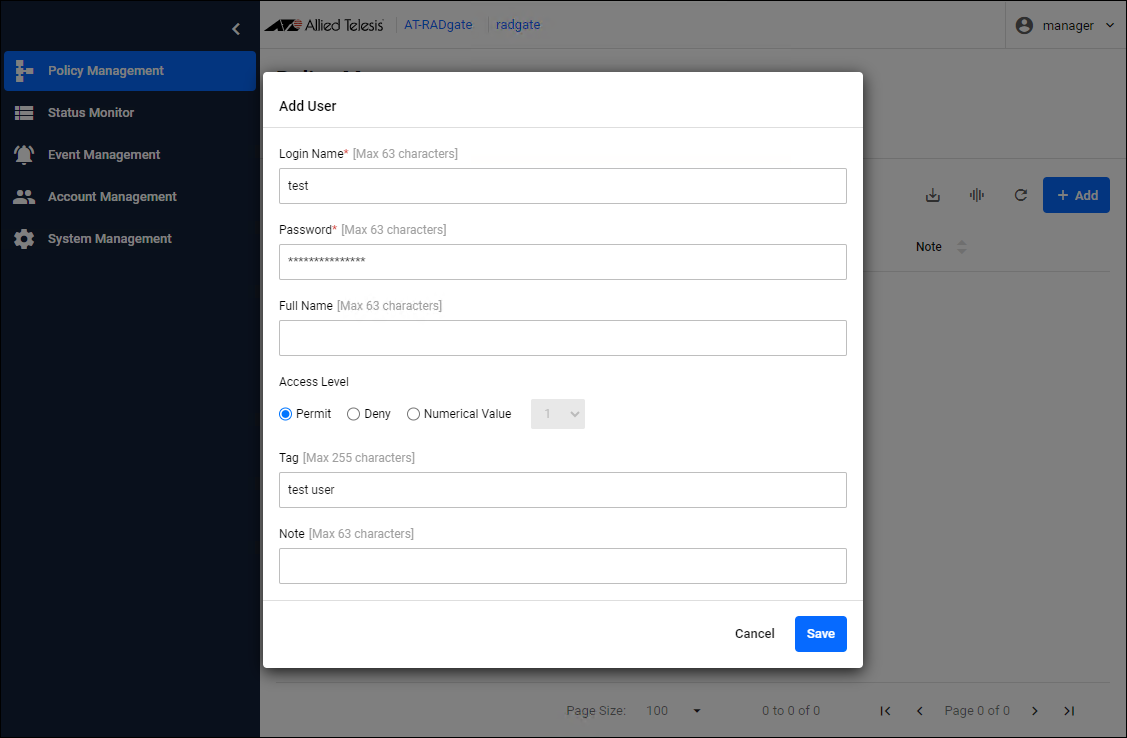
| Item Name | Description |
|---|---|
| Login Name and Password | Enter the user account name and password to be used for authentication. |
| Access Level | You can set the authority level for this user. Users who are denied access here are denied access even if the contents of their authentication request are valid.NoteYou can change the behavior by configuring the Supplicant Profile. |
| Tag | You can set the groups to which this user belongs. Multiple tags can be set by separating them with a space character. |
NoteAT-RADgate provides the Supplicant Profile functionality. This feature allows you to configure additional settings for authenticated supplicants. Access Level and Tag can be used in conjunction with the Supplicant Profile feature to easily apply the same settings to multiple supplicants.
Confirm the authentication result
User Authentication does not manage authenticated supplicants. To check whether the supplicant can be authenticated, check the Event Management > Application Log page.Endpoint Authentication setup procedure
Registering NAS Profile and NAS
For endpoint authentication, the Edge Switch or Wireless LAN Access Point that houses the user endpoint is registered as a NAS.NoteThe RADIUS Server authenticates the sender (NAS) of the received message. During this process, messages sent by unauthorized sources are discarded.A network device that registers as a NAS for endpoint authentication must store the MAC Address of the endpoint requesting authentication in the Calling-Station-Id attribute field of the authentication request message. AW+ Switches and Wireless LAN Access Points meet this requirement and can be registered as a NAS for Endpoint Authentication.
Therefore, to correctly build an authentication system, all systems that send RADIUS Authentication requests must be registered in AT-RADgate. Register the NAS Profile and NAS on the Policy Management > NAS page.
If you need to register a large number of NAS devices at once, you can create a CSV file containing the NAS information in advance and then register them by uploading it. To import a CSV file, use "Import" button on the System Management > Database Management page.
By default, the NAS is set to perform user authentication only, so you need to create a new NAS Profile that enables endpoint authentication and set it on the NAS you want to register.
Create the following two:
- NAS Profile
- NAS
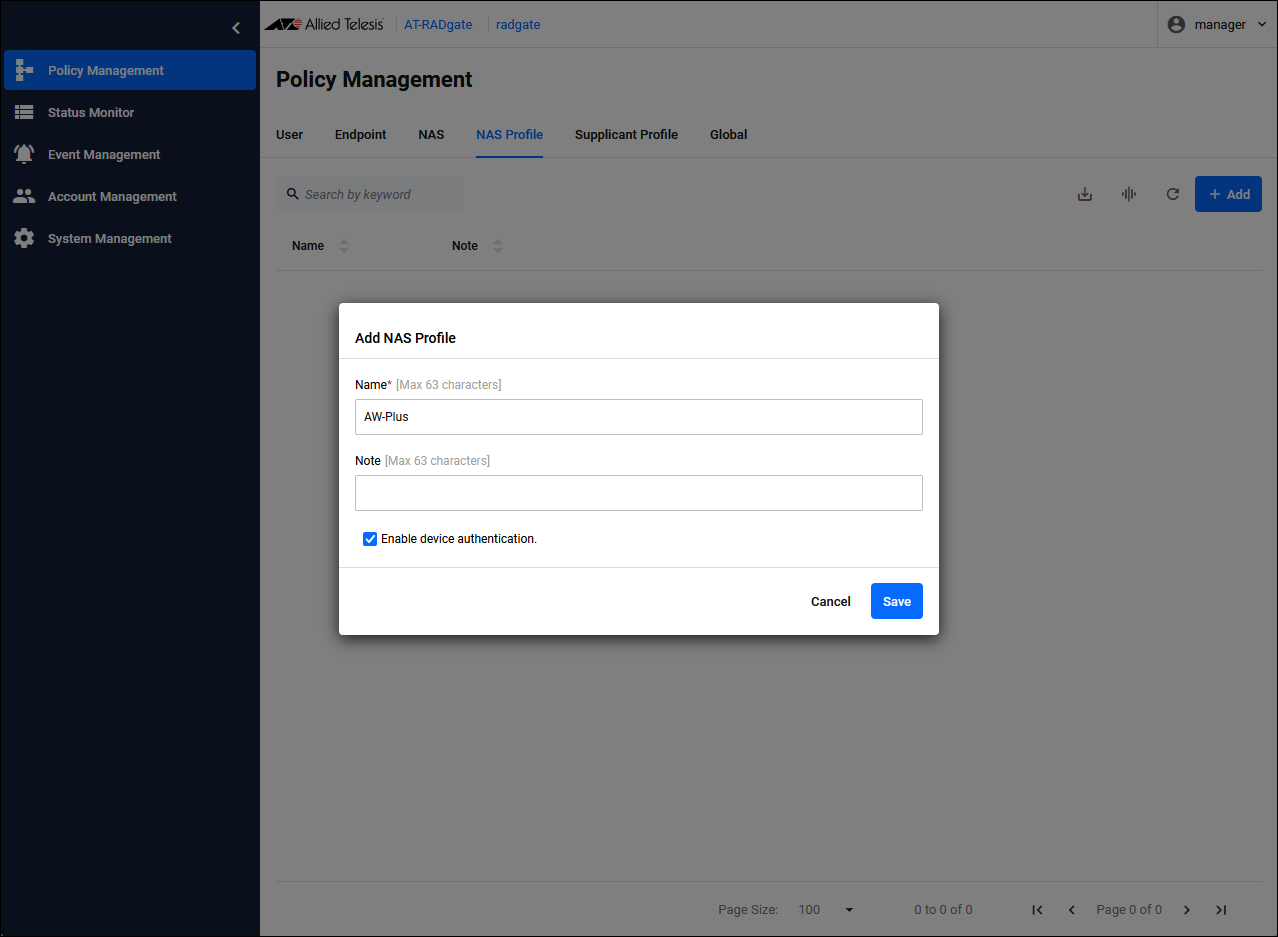
| Item Name | Description |
|---|---|
| Name | NAS Profile name. |
| Enable device authentication. | Check the check box. |
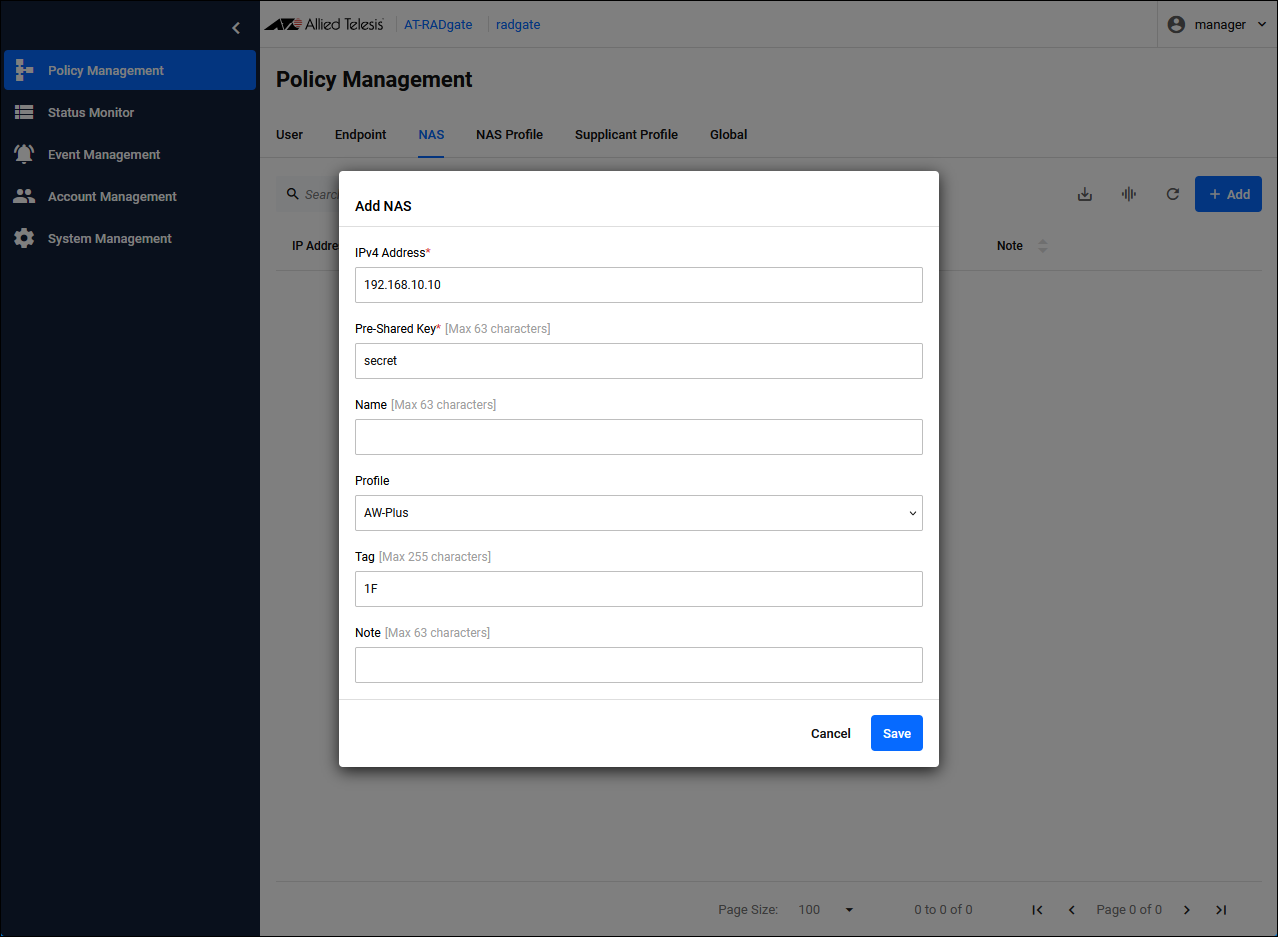
| Item Name | Description |
|---|---|
| IPv4 Address | NAS IP Address. |
| Pre-Shared Key | Pre-Shared Key (PSK). It should be the same as what you set on the NAS. |
| Profile | Select the "AW-Plus" NAS Profile you created first. |
| Tag | You can set the group to which this NAS belongs. Multiple tags can be set by separating them with a space character. |
Registering User
The RADIUS Server authenticates the user who makes the connection request to the NAS. The basic operation of authentication using a RADIUS Server is to verify that the user making the authentication request is registered on the RADIUS Server and to verify whether the credentials (password, etc.) included in the connection request match those registered on the RADIUS Server.User policy is managed on the Policy Management > User page. You can also import using a CSV file.
Click the "Add" button in the upper right corner of the Policy Management > User page to display the Add User dialog.
| Item Name | Description |
|---|---|
| Login Name and Password | Enter the user account name and password to be used for authentication. |
| Access Level | You can set the authority level for this user. Users who are denied access here are denied access even if the contents of their authentication request are valid.NoteYou can change the behavior by configuring the Supplicant Profile. |
| Tag | You can set the groups to which this user belongs. Multiple tags can be set by separating them with a space character. |
NoteAT-RADgate provides the Supplicant Profile functionality. This feature allows you to configure additional settings for authenticated supplicants. Access Level and Tag can be used in conjunction with the Supplicant Profile feature to easily apply the same settings to multiple supplicants.
NoteWhen used in conjunction with the MAC-based Authentication feature of the AW+ Switch, user registration is not required. In addition, when endpoint authentication is enabled, AT-RADgate analyzes the authentication request message and automatically determines whether it is MAC-based Authentication request, so no additional settings are required to enable MAC-based Authentication.
Registering Endpoint
If endpoint authentication is enabled, AT-RADgate evaluates whether the MAC Address stored in the authentication request message matches the one registered in the RADIUS Server.Register the Endpoint policy on the Policy management > Endpoint page. You can also import using a CSV file.
Click the "Add" button in the upper right corner of the Policy Management > Endpoint page to display the Add Endpoint dialog.
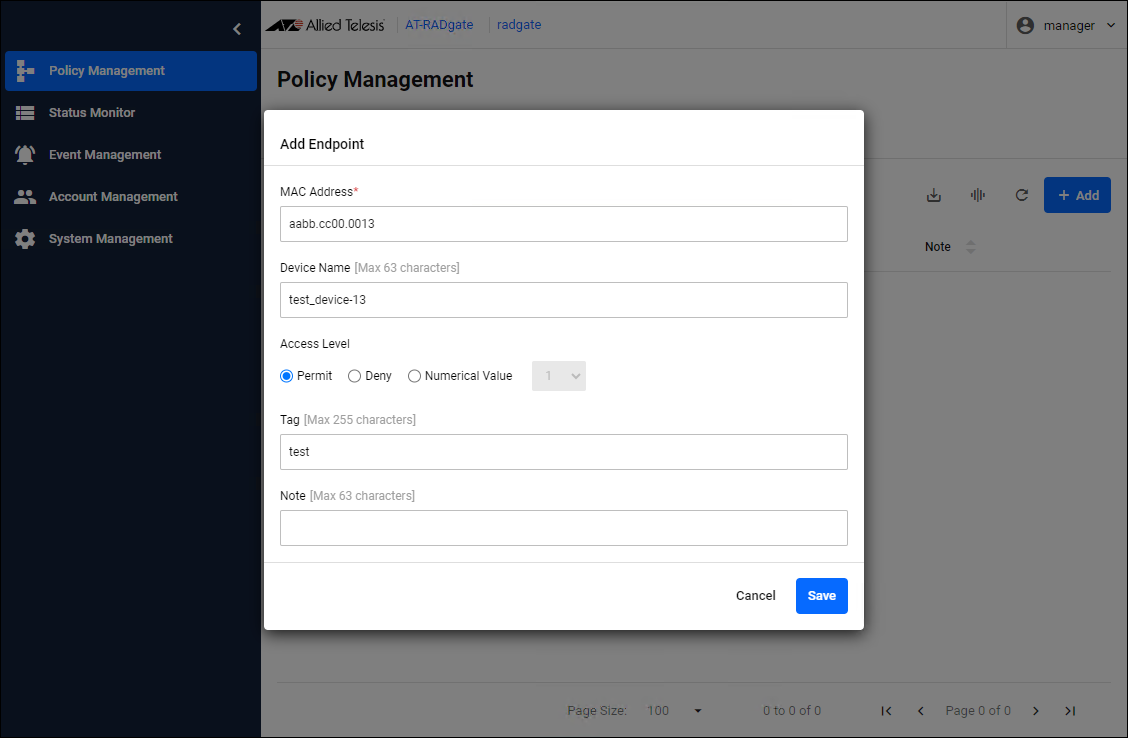
| Item Name | Description |
|---|---|
| MAC Address | Enter the MAC Address of the device to be authenticated. |
| Device Name | Enter the device name of the device to be authenticated. You can assign the same device name to multiple devices. |
| Access Level | You can set the authority level for this user. Devices that are set to be denied access here are denied access even if the contents of the authentication request are correct.NoteYou can change the behavior by configuring the Supplicant Profile. |
| Tag | You can set the group to which this device belongs. Multiple tags can be set by separating them with a space character. |
NoteAT-RADgate provides the Supplicant Profile functionality. This feature allows you to configure additional settings for authenticated supplicants. Access Level and Tag can be used in conjunction with the Supplicant Profile feature to easily apply the same settings to multiple supplicants.
Confirm the authentication result
If endpoint authentication is enabled, you can check the status of authenticated devices on the Status Monitor > Endpoint page.Configuring Dynamic VLAN
When using the AW+ Switch in conjunction with endpoint authentication, AT-RADgate do not specify the VLAN to which authenticated endpoints are connected by default. By registering Supplicant Profile, you can specify the VLAN to which a specific authenticated endpoint is connected.Register Supplicant Profile on the Policy Management > Supplicant Profile page. You can also import using a CSV file.
Click the "Add" button in the upper right corner of the Policy Management > Supplicant Profile page to display the Add Supplicant Profile dialog.
The name is the identifier for the Supplicant Profile. Set a name that does not overlap with any already registered profiles. The priority is the order in which profiles are applied to authenticated devices; profiles with the lowest value are evaluated first, and the first matching profile is applied.
To connect all registered devices to the "vlan10" network:
If you want to connect all registered devices to the "vlan10" network, configure as below in the Add Supplicant Profile dialog.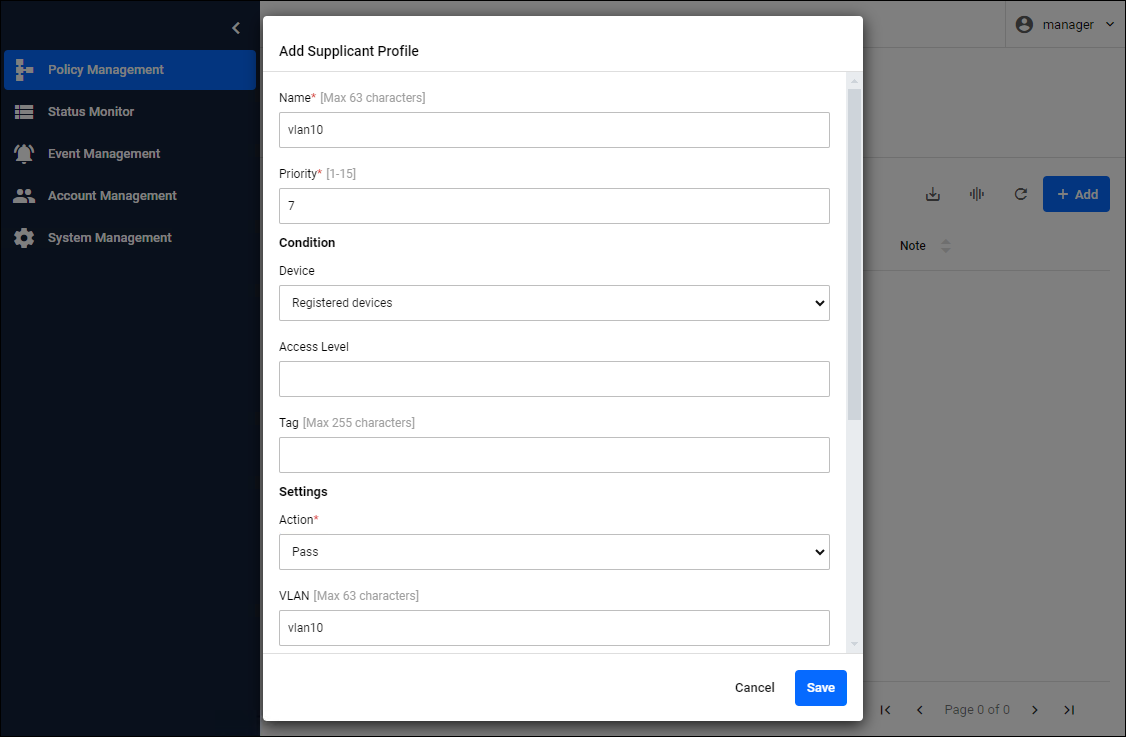
| Item Name | Setting value |
|---|---|
| Condition / Device | Registered devices |
| Settings / Action | Pass |
| Settings / VLAN | vlan10 |
When connecting only Endpoints with access level 5 to "vlan100"
If you want to connect certain groups to different networks, you can use access levels or tags. If only endpoints with access level 5 are to connect to "vlan100", set the Add Supplicant Profile dialog as follows.
| Item Name | Setting value |
|---|---|
| Condition / Access Level | 5 |
| Settings / Action | Pass |
| Settings / VLAN | vlan100 |
When connecting only Endpoints with the tag "admin" to "vlan200"
If you want to connect certain groups to different networks, you can use access levels or tags. If you want to connect only devices with the tag "admin" to "vlan200", set the following in the Add Supplicant Profile dialog.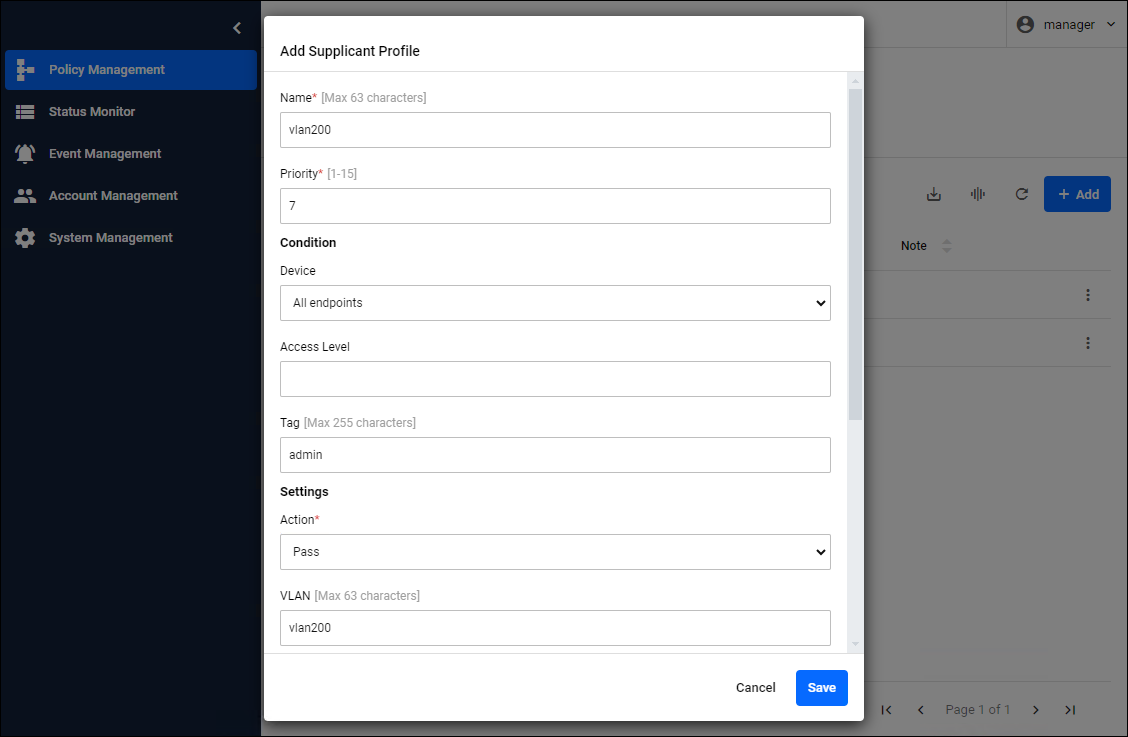
| Item Name | Setting value |
|---|---|
| Condition / Tag | admin |
| Settings / Action | Pass |
| Settings / VLAN | vlan200 |
NoteThe VLAN to be set in "Settings / VLAN" must be configured on the network device in advance. The value you set depends on the specifications of the network device. For AW+ Switch, you can specify the VLAN name or VLAN ID.
Configuring Dynamic ACL
When using AW+ Switch in conjunction with endpoint authentication, you can set an ACL (packet filter) for authenticated endpoints by registering Supplicant Profile.Register Supplicant Profile on the Policy Management > Supplicant Profile page. You can also import using a CSV file.
Click the "Add" button in the upper right corner of the Policy Management > Supplicant Profile page to display the Add Supplicant Profile dialog.
There are two ways to configure an ACL: by specifying the name of an ACL that has already been defined on the AW+ Switch, or by specifying the contents of the ACL itself.
Specify the name of an ACL that has already been defined on the AW+ Switch.
To apply the ACL named "acl-100" registered in the network switch to all registered devices, set the following in the Add Supplicant Profile dialog.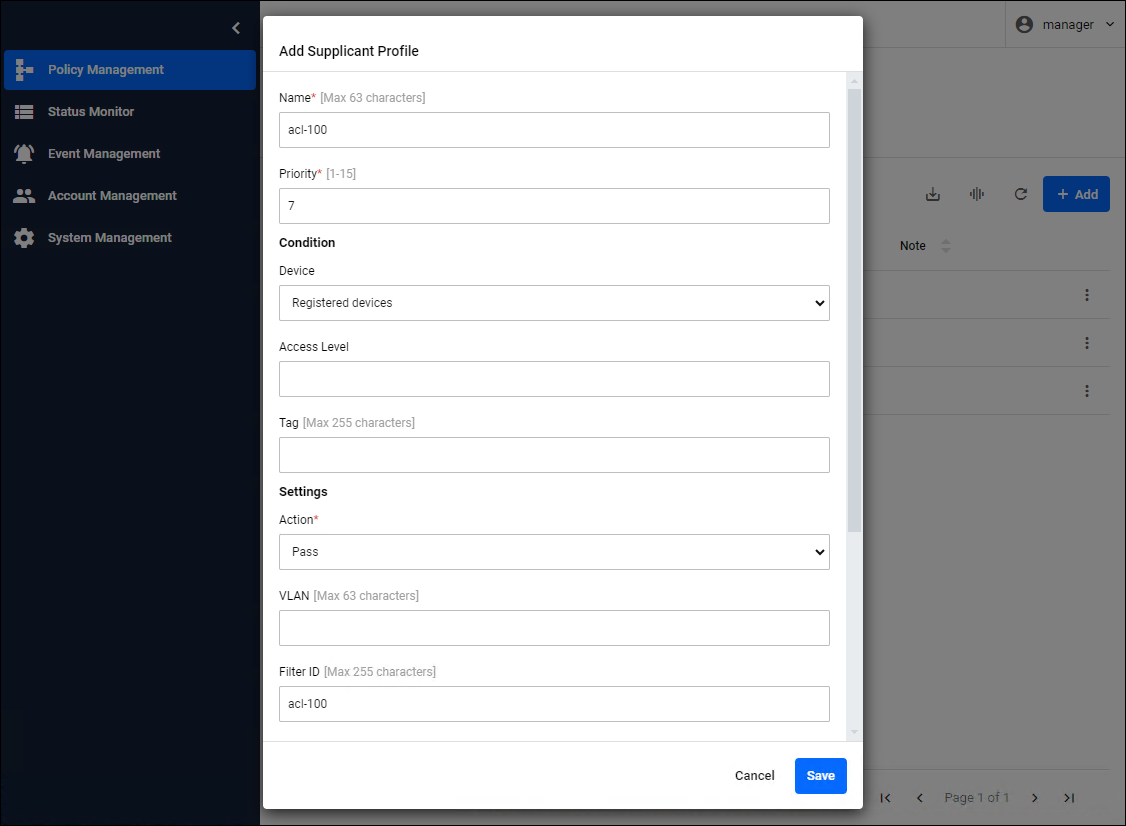
| Item Name | Description and setting value |
|---|---|
| Name | This is the identifier for the Supplicant Profile. Set a name that does not overlap with any already registered profiles. |
| Priority | This is the order in which profiles are applied to authenticated devices. Profiles are evaluated from lowest to highest, and the first matching profile is applied. |
| Condition / Device | Registered devices |
| Settings / Action | Pass |
| Settings / Filter ID | acl-100 |
Specify the ACL contents themselves
To apply an ACL that only allows communication with the 192.168.10.0/24 subnet to all registered devices, set the following in the Add Supplicant Profile dialog.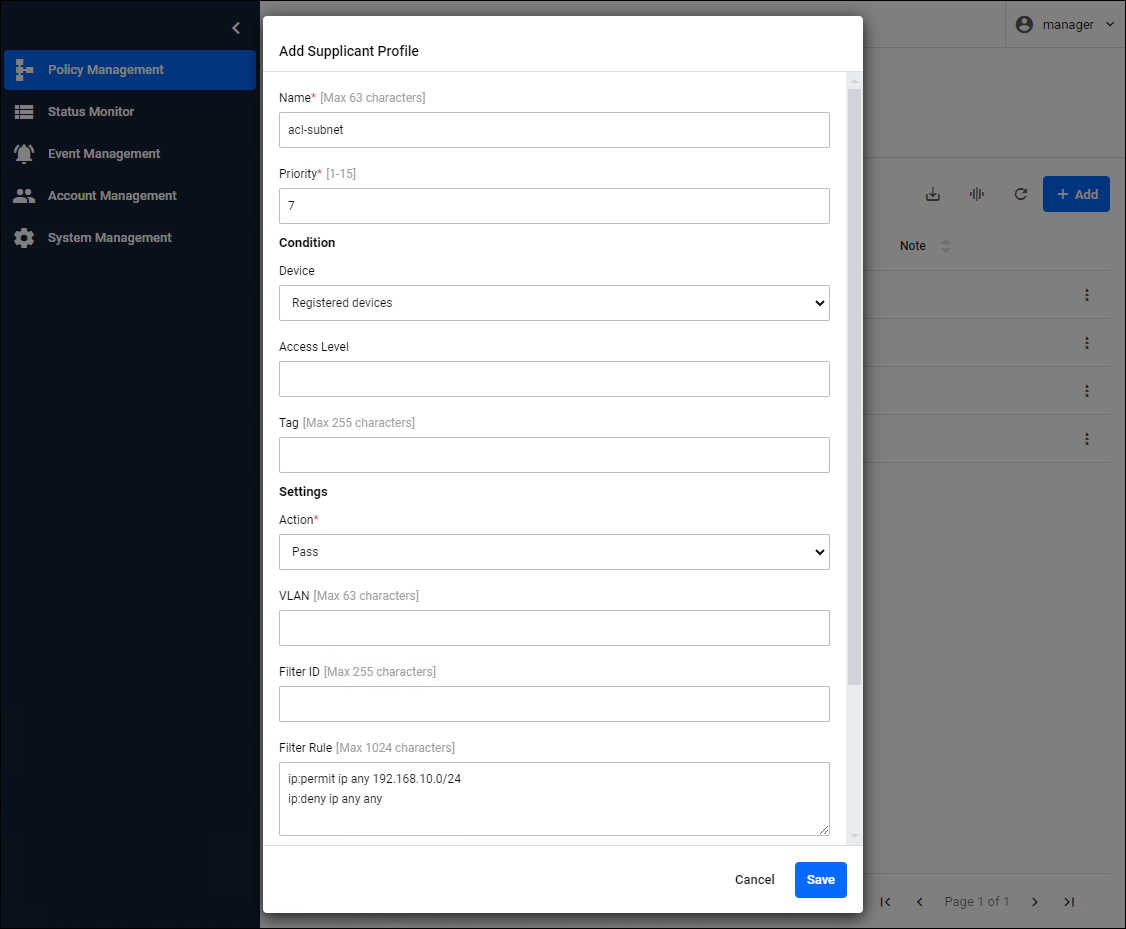
| Item Name | Description and setting value |
|---|---|
| Name | This is the identifier for the Supplicant Profile. Set a name that does not overlap with any already registered profiles. |
| Priority | This is the order in which profiles are applied to authenticated devices. Profiles are evaluated from lowest to highest, and the first matching profile is applied. |
| Condition / Device | Registered devices |
| Settings / Action | Pass |
| Settings / Filter Rule | ip:permit ip any 192.168.10.0/24 ip:deny ip any any |
NoteThe format of the filter rules must match the specifications of the network device. If you want to write multiple rules, separate them with a newline character.
17 Jun 2025 09:28