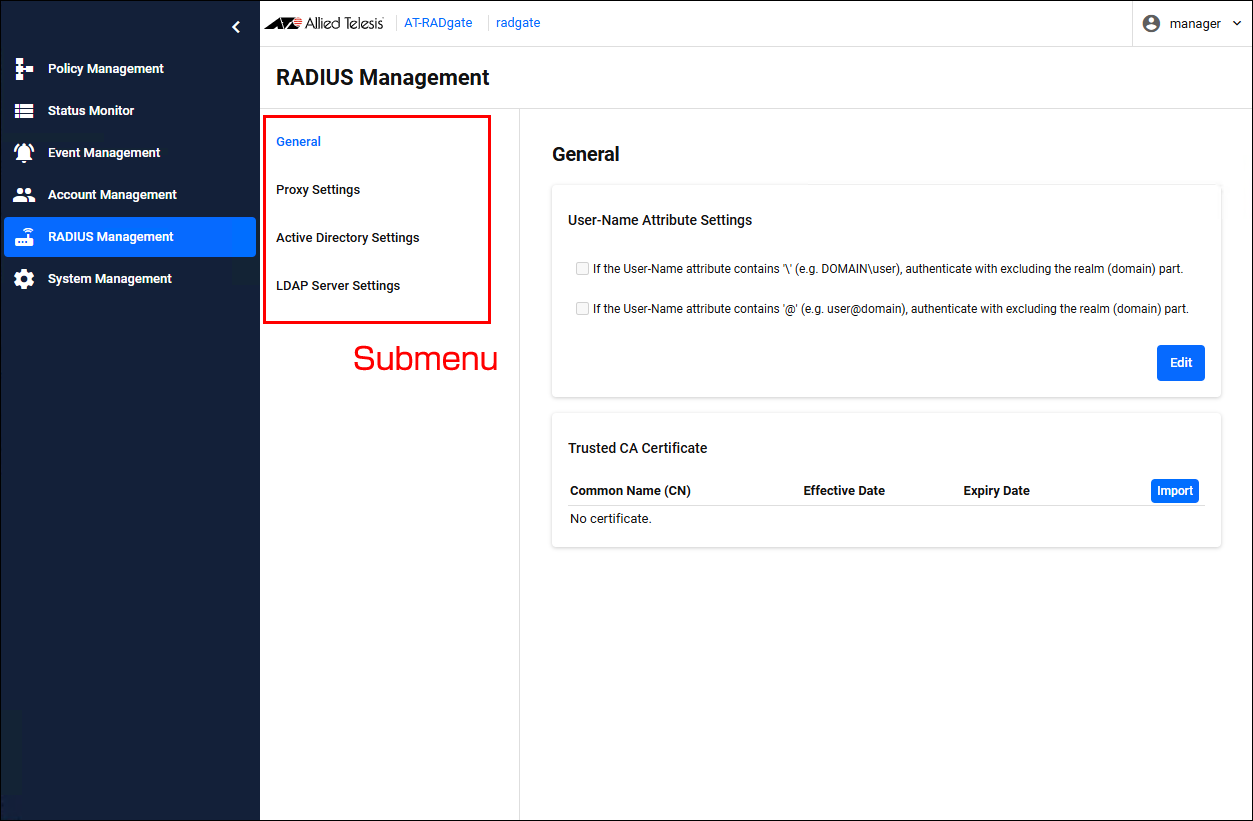
RADIUS Management
The "RADIUS Management" page has the following submenus: General, Proxy Settings, Active Directory Settings, and LDAP Server Settings, each of which allows you to configure settings related to authentication.
You can only change the settings if the account you are logged in with has the "Allow to configure system settings" privilege assigned to it. If no permissions are assigned, you can only view.
General
RADIUS Management > GeneralOn the "General" page, you can configure User-Name Attribute Settings and Trusted CA Certificate.
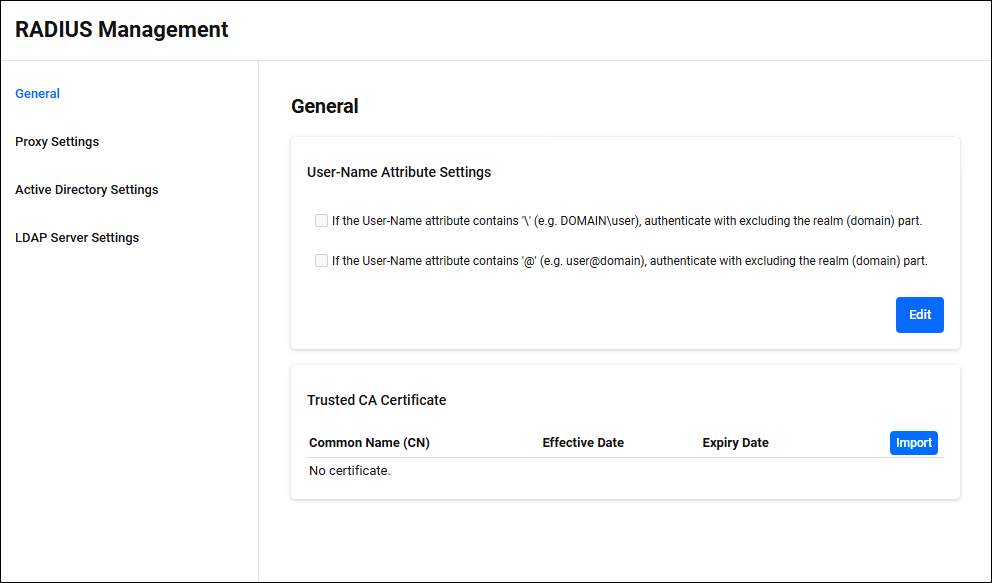
User-Name Attribute Settings
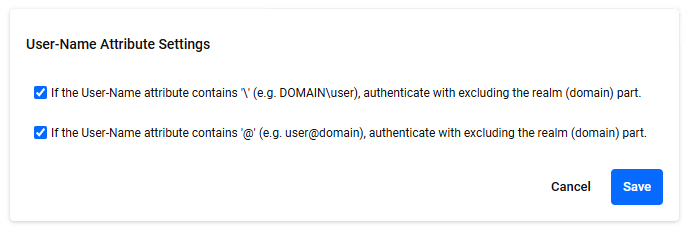
RADIUS Management > General > User-Name Attribute SettingsYou can choose to include or exclude the realm (domain) portion of the User-Name attribute during authentication. Click the "Edit" button at the bottom right to enter edit mode.
◼ Edit mode
| Item / Button Name | Mandatory | Format | Description |
|---|---|---|---|
If the User-Name attribute contains '\' (e.g. DOMAIN\user), authenticate excluding the realm (domain) part.
|
− | Check box | If you check the checkbox, when the User-Name attribute contains '\', authentication is performed excluding the realm (domain) part.
|
| If the User-Name attribute contains '@' (e.g. user@domain), authenticate with excluding the realm (domain) part. | − | Check box | If you check the checkbox, when the User-Name attribute contains '@', authentication is performed excluding the realm (domain) part. |
| "Cancel" button | − | − | Stop editing. |
| "Save" button | − | − | Save the settings. |
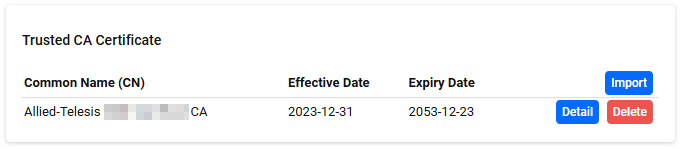
Trusted CA Certificate
RADIUS Management > General > Trusted CA CertificateThe EAP-TLS authentication method uses an SSL client certificate instead of a password to authenticate users. Authentication is performed by verifying that the received SSL client certificate is signed by a CA that AT-RADgate trusts. This page allows you to manage the SSL Certificate of CAs trusted by AT-RADgate.
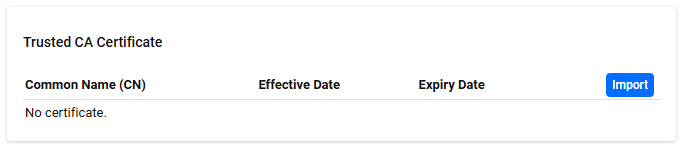
◼ Importing CA certificate
You can upload a CA certificate file in PEM format. On the page where you click the "Import" button, select the CA Certificate. If the CA Certificate is successfully imported, it is added to the list and a description of the CA Certificate, a "Detail" button, and a "Delete" button are displayed.
| Item / Button Name | Description |
|---|---|
| Common Name (CN) | The value of the certificate's Common Name field. |
| Effective Date | The certificate's effective date. |
| Expiry Date | The expiration date of the certificate. |
| "Import" button | Upload the CA Certificate. |
| "Detail" button | The Certificate Detail dialog opens. |
| "Delete" button | Delete the CA Certificate. |
Certificate Detail
Click the "Details" button on the Trusted CA Certificate page to display the "Certificate Detail" dialog.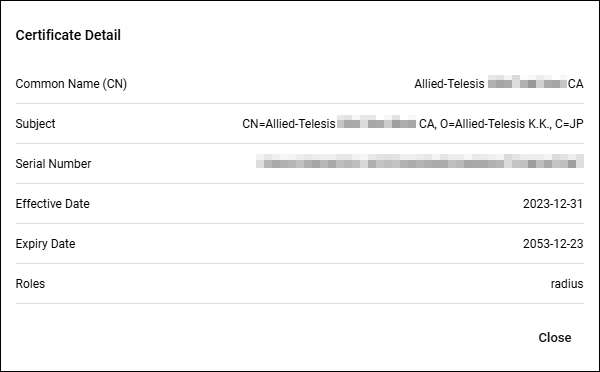
| Item / Button Name | Description |
|---|---|
| Common Name (CN) | The value of the certificate's Common Name field. |
| Subject | The identity of the certificate's owner (user or server). |
| Serial Number | A unique number assigned to each certificate. |
| Effective Date | The certificate's effective date. |
| Expiry Date | The expiration date of the certificate. |
| Roles | This is the function of AT-RADgate that uses this certificate. |
| "Close" button | Close the Certificate Detail dialog. |
Proxy Settings
RADIUS Management > Proxy SettingsYou can configure the RADIUS Proxy function.
NoteIn order for the RADIUS Server to receive packets from a RADIUS Proxy, you must register the RADIUS Proxy on the Policy Management > NAS > RADIUS Proxy page.
NoteProxying CoA/Disconnect packets is not supported.
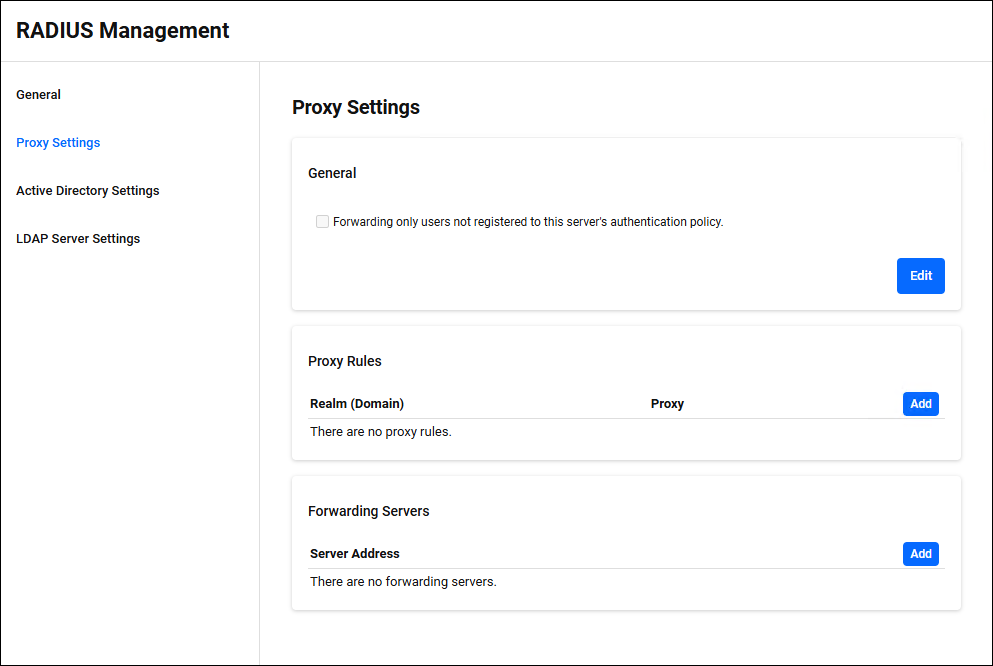
General
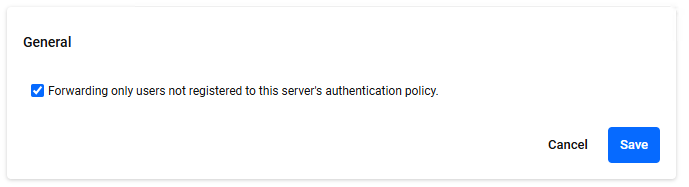
RADIUS Management > Proxy Settings > GeneralYou can select whether to forward only the User-Name attribute of the received RADIUS packet if the user is not registered in the authentication policy of this server. Click the "Edit" button at the bottom right to enter edit mode.
◼ Edit mode
| Item / Button Name | Mandatory | Format | Description |
|---|---|---|---|
| Forwarding only users not registered to this server's authentication policy. | × | Check box | If you check the check box, the received authentication request is treated as a packet to be forwarded only if the User-Name attribute does not exist in the authentication policy of this server. The final decision on whether to forward the request depends on the result of realm analysis by the proxy rules.NoteThe authentication policies in question are User policies and Endpoint policies. |
| "Cancel" button | − | − | Stop editing. |
| "Save" button | − | − | Save the settings. |
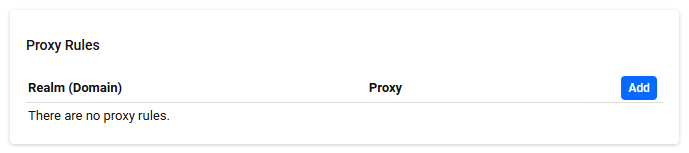
Proxy Rules
RADIUS Management > Proxy Settings > Proxy RulesManage proxy rules.
A list of registered proxy rules is displayed.
A proxy rule defines whether to forward received RADIUS packets and, if so, to which server.
| Item / Button Name | Description |
|---|---|
| Realm (Domain) | The value of the registered realm is displayed. The realm part of the User-Name attribute is used to determine if it applies to this realm. |
| Proxy | If "Do", it means that RADIUS packets are forwarded if the realm part of the User-Name attribute corresponds to this realm. If "Don't" is selected, it means that RADIUS packets are not forwarded even if the realm part of the User-Name attribute corresponds to this realm. |
| "Add" button | Open the Proxy Rule dialog. |
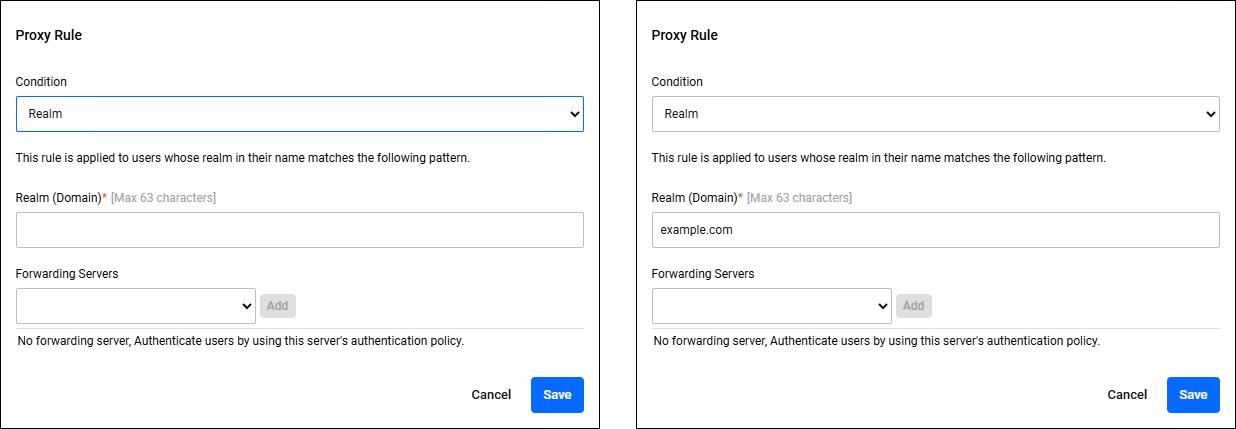
Proxy Rules
Clicking the "Add" button in the upper right corner of the Proxy Rules displays the Proxy Rule dialog, where you can add a new proxy rule. Clicking the "Edit" menu on the right side of an already registered proxy rule displays the Proxy Rule dialog, allowing you to edit the proxy rule.The two dialogs share a common form.
| Item / Button Name | Mandatory | Format | Description |
|---|---|---|---|
| Condition | − | Realm / No Realm / Default | "No Realm" means that there is no delimiter (see "Realm Parsing Rules" for more information). "Default" means that no such realm exists. |
| Realm (Domain) | × | String (Max 63 characters) | This is displayed and can be entered only if you select "Realm" in the "Condition" item. If you select anything other than "Realm", it is hidden. Any character from A-Za-z0-9._- can be used. "LOCAL", "DEFAULT", and "NULL" cannot be registered. |
| Forwarding Servers | − | − | The server to which RADIUS packets are forwarded. You can select from the IP addresses registered in the "Forwarding Servers" settings. You can add a destination server to the list of Forwarding Servers by selecting it and clicking the "Add" button. If multiple destination servers are registered, the one at the top of the list has the highest priority, and the further down the list the lower the priority. |
| "Add" button | − | − | Add the destination server to the Forwarding Servers list in "Proxy Rules". |
| "Delete" button | − | − | Remove the Forwarding Server from the Forwarding Servers list in "Proxy Rules". |
| "Cancel" button | − | − | Stop editing. |
| "Save" button | − | − | Save the settings. |
Realm
The RADIUS Proxy finds the realm part of the User-Name attribute of the received RADIUS packet and compares it with the realms of the registered proxy rules. If a matching proxy rule is found, the RADIUS packet is forwarded to the destination server associated with that proxy rule.Realm Delimiter Characters
The delimiter is used to find the realm portion of the User-Name attribute.| Delimiter | Description |
|---|---|
\
|
For a User-Name attribute such as Realm\User, the part before \ is the realm.
|
| If you have a User-Name attribute like User@Realm, the part after the @ is the realm. |
Realm Parsing Rules
The rules for determining the realm are as follows:- If no such realm exists, it is treated as the "default" realm.
- If there is no "default" realm configured, then the server will authenticate to its own server without proxying.
- Even if the realm is determined, if the destination server is not bound to the realm, authentication will be performed on the server itself without proxying.
Forwarding Servers
RADIUS Management > Proxy Settings > Forwarding ServersManage Forwarding Servers.
A list of registered Forwarding Servers is displayed.
The Forwarding Servers define the server to which the received RADIUS packets are forwarded.

| Item / Button Name | Description |
|---|---|
| Server Address | This is the IP address of the registered Forwarding Servers. |
| "Add" button | Open the Forwarding Servers dialog. |
Forwarding Servers
Clicking the "Add" button in the upper right corner of the Forwarding Servers display the Forwarding Server dialog, allowing you to add a new Forwarding Server. If you click the "Edit" menu on the right side of a Forwarding Server that has already been registered, the Forwarding Server dialog appears, allowing you to edit the Forwarding Server.The two dialogs share a common form.

| Item / Button Name | Mandatory | Format | Description |
|---|---|---|---|
| IPv4 Address | × | IPv4 Address | This is the IP address of the Forwarding Servers. |
| Authentication Port Number | − | 1-66535 | The port number on which the Forwarding Server receives authentication packets. If left blank and saved, the default value of 1812 is used. |
| Accounting Port Number | − | 1-66535 | The port number on the Forwarding Server to receive accounting packets. If left blank and saved, the default value of 1813 is used. |
| "Configure Pre-Shared Key" button | − | − | This is only displayed in the dialog when editing the Forwarding Server. Clicking this displays the "Pre-shared Key" item, allowing you to change the pre-shared key. |
| Pre-Shared Key | × | Password | The pre-shared key for the Forwarding Server. |
| Timeout | × | 5-60 | The time to wait for a response from the Forwarding Server when forwarding a RADIUS packet. |
| "Cancel" button | − | − | Stop editing. |
| "Save" button | − | − | Save the settings. |
Failover/Failback
The RADIUS Proxy maintains the status of Forwarding Servers. If multiple Forwarding Servers are registered, and the Forwarding Server with the highest priority goes down, the proxy fails over to the Forwarding Server with the next highest priority. Also, if a Forwarding Server that was down recovers, it is failed back based on the original priority. The conditions are as follows:If the transfer of a RADIUS packet to the Forwarding Server fails, or if the transfer is successful but there is no response before the timeout setting is reached, the server is considered down after 40 seconds, and an attempt is made to transfer the packet to another Forwarding Server with a lower priority.
AT-RADgate assumes that a Forwarding Server that it has deemed down has recovered after 120 seconds and attempts to forward the RADIUS packet again.
| Glossary | Description |
|---|---|
| Failover | This is a function that automatically switches to the next highest priority Forwarding Server and continues processing when the RADIUS Proxy determines that it is no longer able to exchange RADIUS packets with the Forwarding Server. |
| Failback | This is a function that returns processing from a lower priority Forwarding Server to the original higher priority Forwarding Server when a higher priority Forwarding Server that was unable to exchange RADIUS packets recovers. |
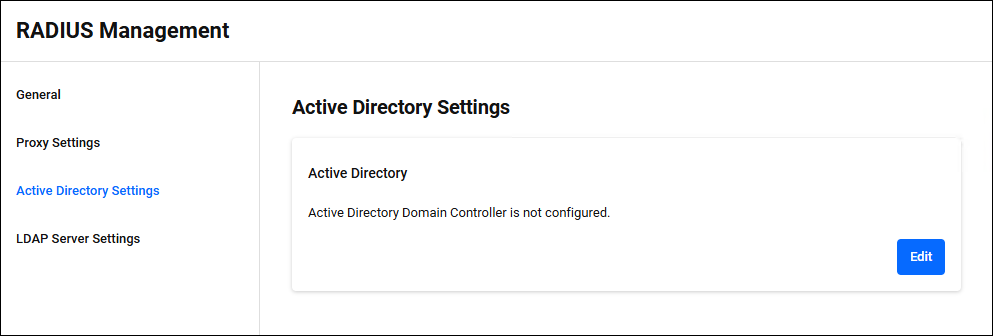
Active Directory Settings
RADIUS Management > Active Directory SettingsConfigure the Active Directory domain to be linked with Windows Active Directory for RADIUS Authentication. Click the "Edit" button at the bottom right to enter edit mode.
If an Active Directory domain is not registered, the message "Active Directory domain is not set." is displayed. If registered, information about the currently registered Active Directory domain is displayed.
NoteThe following Windows Active Directory on Windows Server is available.
Windows Server 2019 (Standard and Datacenter editions)
Windows Server 2022 (Standard and Datacenter editions)
Windows Server 2025 (Standard and Datacenter editions)
NoteLDAP authentication and Windows Active Directory authentication cannot be used together.
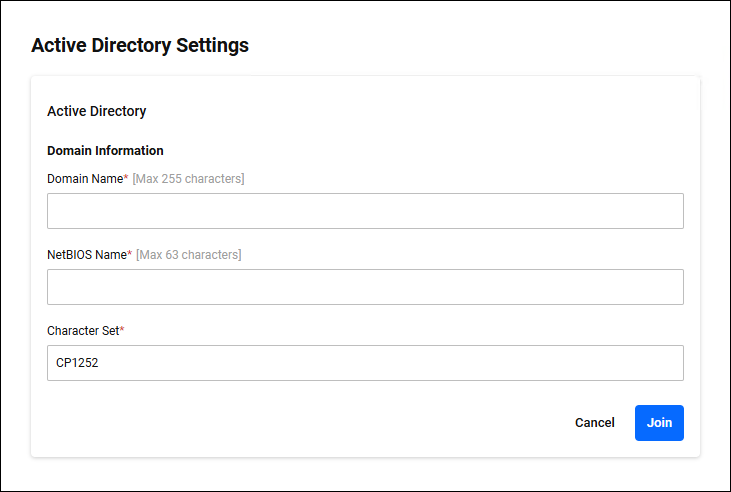
◼ Edit mode
| Item / Button Name | Mandatory | Format | Description |
|---|---|---|---|
| Domain Name | × | String (Max 255 characters) | Enter the Active Directory domain name. |
| NetBIOS Name | × | String (Max 63 characters) | Enter the NetBIOS name. For example, if the Active Directory domain name is "example.co.jp", enter "EXAMPLE" as the NetBIOS name. |
| Character Set | × | String | Enter the character code setting for the domain controller. The default is "CP1252" (Latin 1/Western European). For Japanese, enter "CP932" (Japanese/Shift-JIS).NoteUse the default setting, "CP1252". This change is not supported in this version. |
| "Edit" button | − | − | Start editing. |
| "Cancel" button | − | − | Stop editing. |
| "Join" button | − | − | Save your edits and join the Active Directory domain. |
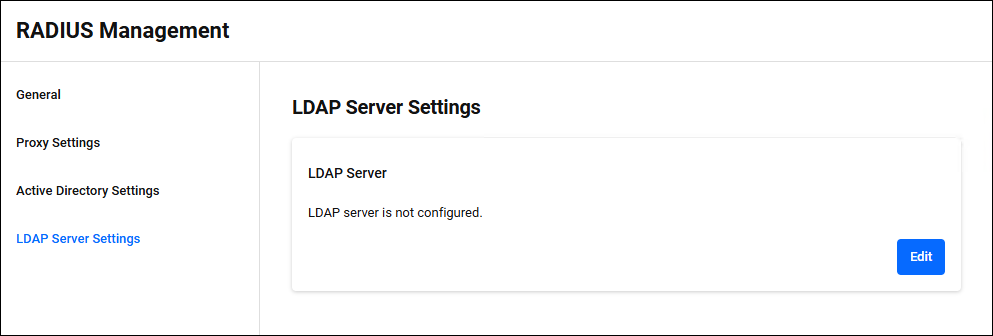
LDAP Server Settings
RADIUS Management > LDAP Server SettingsIf you enable the LDAP Server authentication function, you can authenticate users using user information registered in the LDAP Server instead of the user policy in your own authentication database. The authentication protocol used is PAP or EAP-TTLS (PAP).
NoteOnly the following Windows Active Directory servers are available for use as LDAP servers.
Windows Server 2019 (Standard and Datacenter editions)
Windows Server 2022 (Standard and Datacenter editions)
NoteCertificate validation is not performed during communication between the LDAP Server and the RADIUS Server.
NoteConfigure the settings for linking with the LDAP Server. Click the "Edit" button at the bottom right to enter edit mode.LDAP authentication and Windows Active Directory authentication cannot be used together.
If the LDAP Server is not registered, the message "LDAP server is not configured." is displayed. If registered, information about the currently registered LDAP Server is displayed.
◼ Edit mode
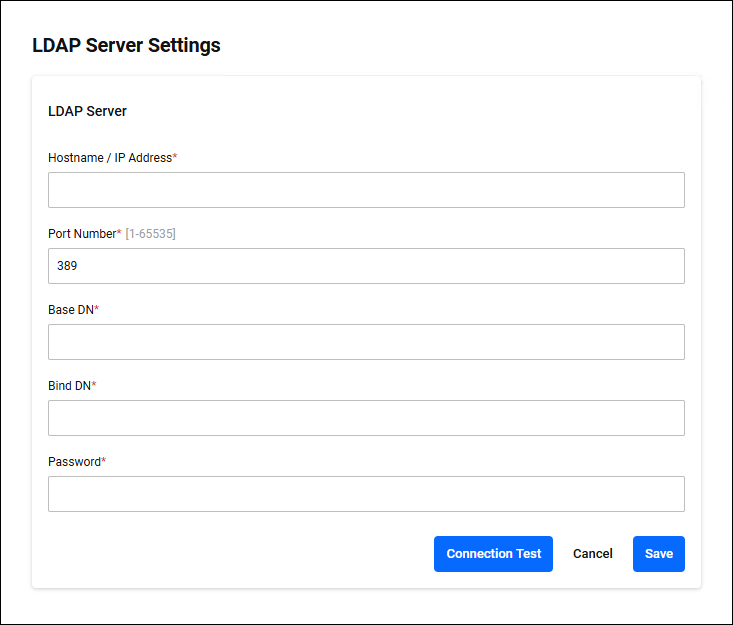
| Item / Button Name | Mandatory | Format | Description |
|---|---|---|---|
| Hostname / IP Address | × | Hostname / IP Address | The host name or IP address of the LDAP Server. |
| Port Number | × | 1-65535 | The port number of the LDAP Server. The default port number is 389. |
| Base DN | × | String (Max 255 characters) | The distinguished name at which to begin a search in the LDAP directory. |
| Bind DN | × | String (Max 63 characters) | The distinguished name of the user to use when authenticating (binding) to the LDAP Server. |
| Password | × | String (Max 63 characters) | This is the password used in combination with the bind DN (user distinguished name) for authentication when binding to the LDAP Server. |
| "Connection Test" button | − | − | Test whether you can connect to the LDAP Server. |
| "Cancel" button | − | − | Stop editing. |
| "Save" button | − | − | Save the settings. |
01 Oct 2025 12:51