Installing AT-RADgate
For Hyper-V
The general steps to set up AT-RADgate on Hyper-V are as follows:- Preparing the installation image file
- Connecting to the server and creating a virtual machine
- Creating a Virtual Switch
- Virtual Machine Configuration
- Allied Telesis Container Platform Launches
NoteThis manual does not cover the setup of the supported OS, Windows Server, or the virtualization environment, Hyper-V.
NoteMost of the tasks explained in this manual are performed using Hyper-V Manager, the Hyper-V GUI management tool. For information on how to connect to a Hyper-V host from Hyper-V Manager and general usage of Hyper-V Manager, refer to the manuals for each product.
Preparing the installation image file
Here are the files for package version 1.1.1 of AT-RADgate:- radgate-1.1.1.iso
Connecting to the server and creating a virtual machine
- Launch "Hyper-V Manager" from the Start menu, etc.
- If the Hyper-V host name you are working on (local server name) is not displayed in the left pane of the Hyper-V Manager window, add it using the following steps.
If the local server name is displayed, proceed to step 3.
-
2-1. Right-click on "Hyper-V Manager" in the left pane and select "Connect to Server" from the context menu.
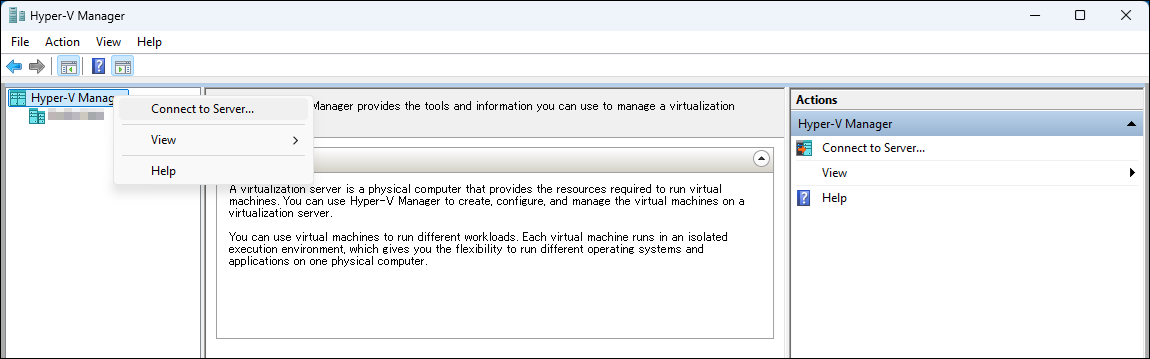
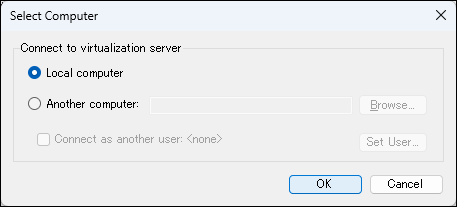
2-2. In the "Select Computer" dialog, select "Local computer" and click "OK".
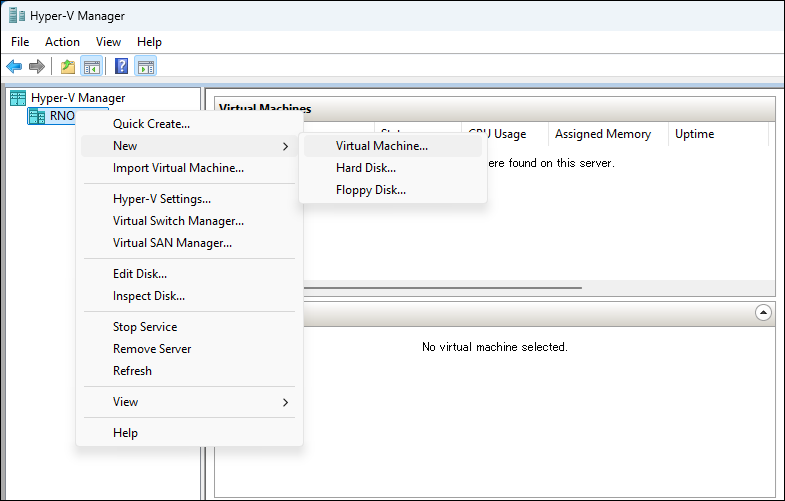
- Right-click on the local server name in the left pane and select "New" > "Virtual Machine" from the context menu.
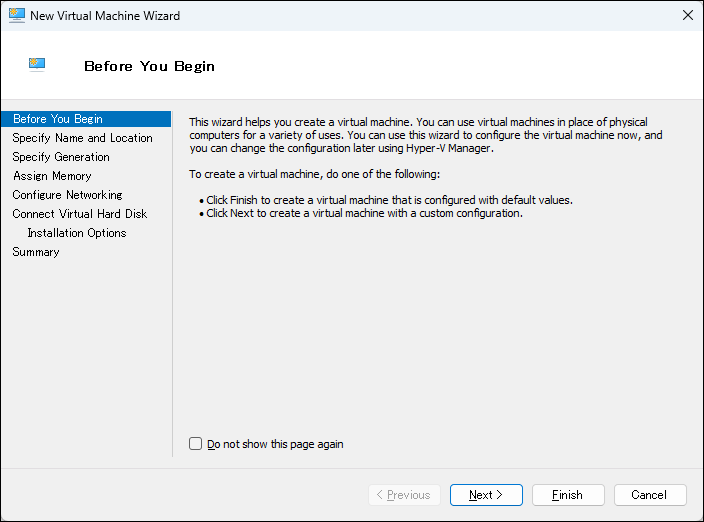
- The "Before You Begin" page of the "New Virtual Machine Wizard" appears, so click the "Next" button.
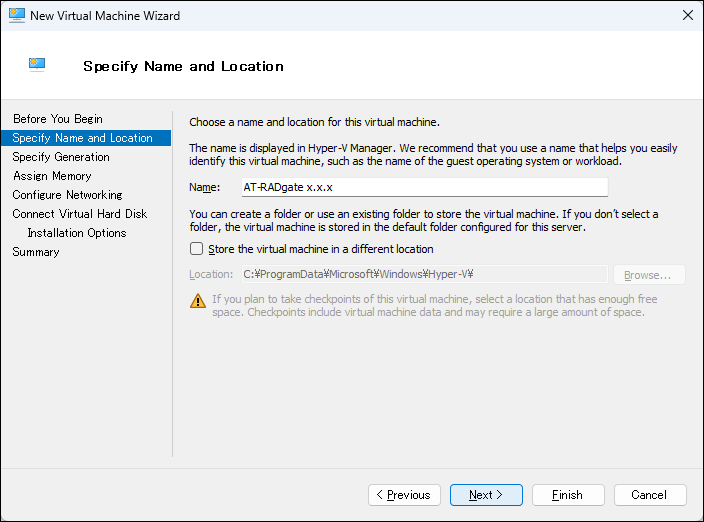
- On the "Specify Name and Location" page, enter a name for the virtual machine in the "Name" field and click the "Next" button.
You can leave the virtual machine location as the default.
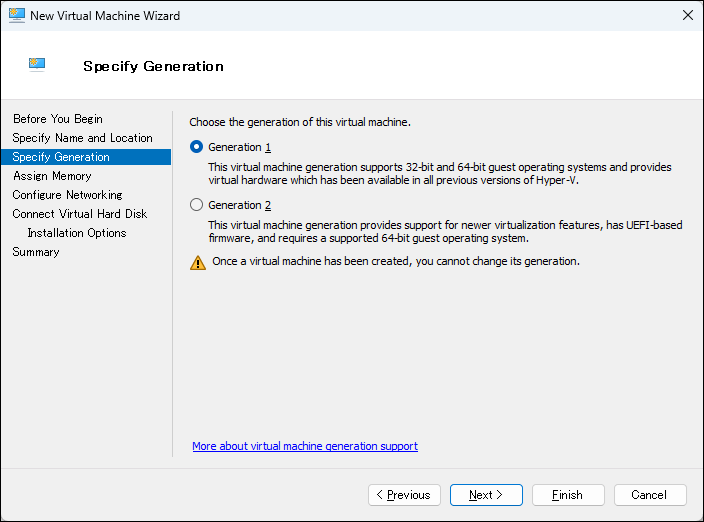
- On the "Specify Generation" page, select "Generation 1" and click the "Next" button.
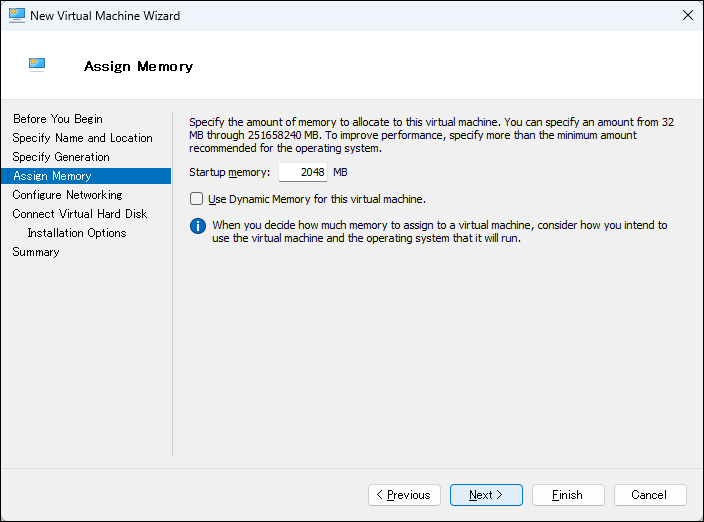
- On the "Assign Memory" page, enter the memory capacity that satisfies the required operating environment of 2048 MB or more in the "Startup memory" field and click the "Next" button (Reference: Operating Environment of AT-RADgate).
Do not check "Use Dynamic Memory for this virtual machine."
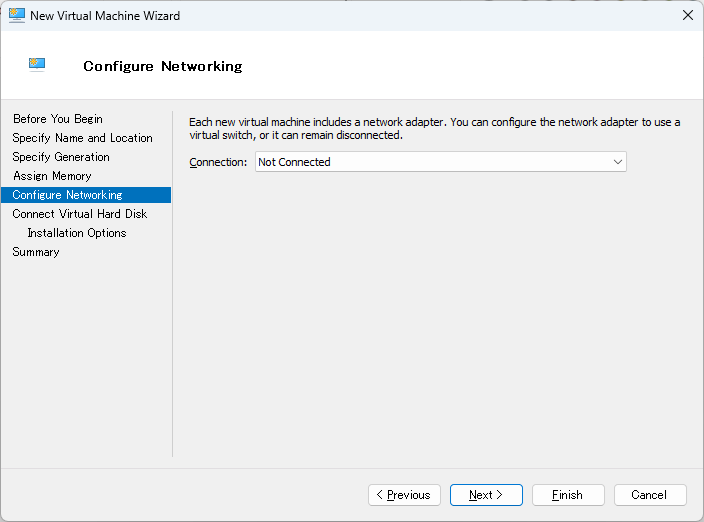
- On the "Configure Networking" page, leave the "Connection" column set to "Not Connected" and click the "Next" button.
The network settings are configured later.
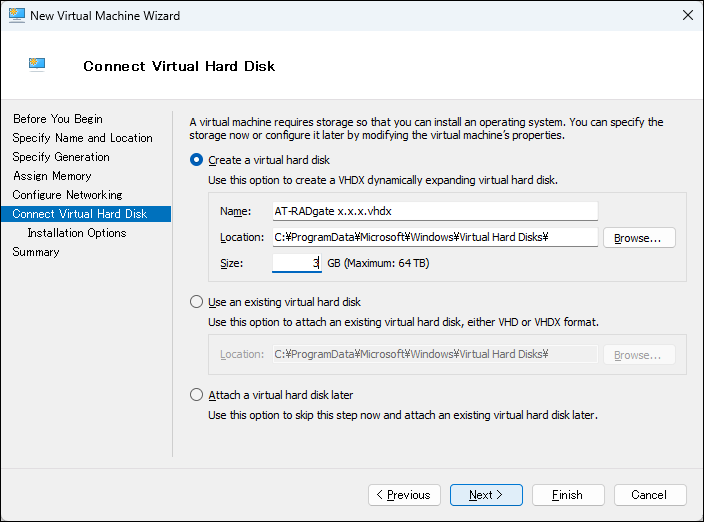
- On the "Connect Virtual Hard Disk" page, select "Create a virtual hard disk", specify a "Name", enter a value of 3 GB or more in the "Size" field that meets the required operating environment, and click "Next" (Reference: Operating Environment of AT-RADgate).
Leave "Location" as the default.
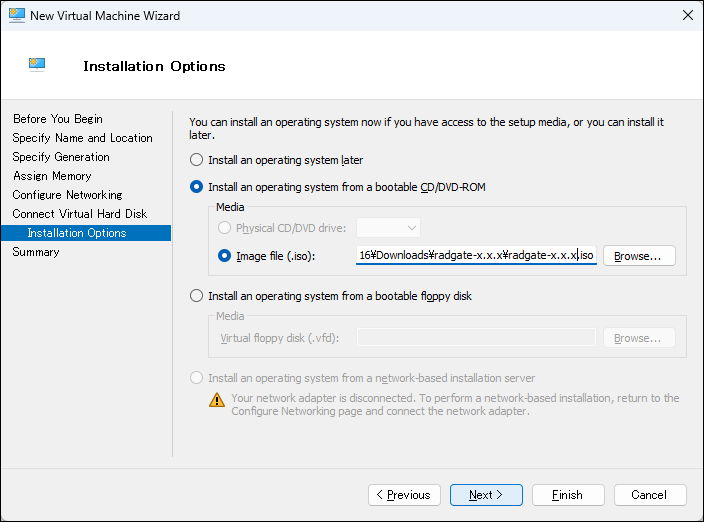
- On the "Installation Options" page, select "Install an operating system from a bootable CD/DVD-ROM", specify the installation ISO image file in the "Image File (.iso)" field, and click the "Next" button (Reference: Preparing the installation image file).
- Review the summary on the "Completing the New Virtual Machine Wizard" page, and if there are no problems, click the "Finish" button to close the wizard page.
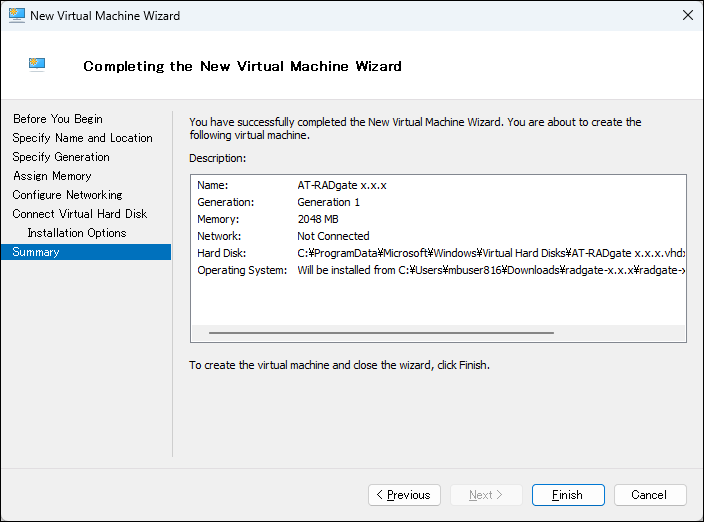
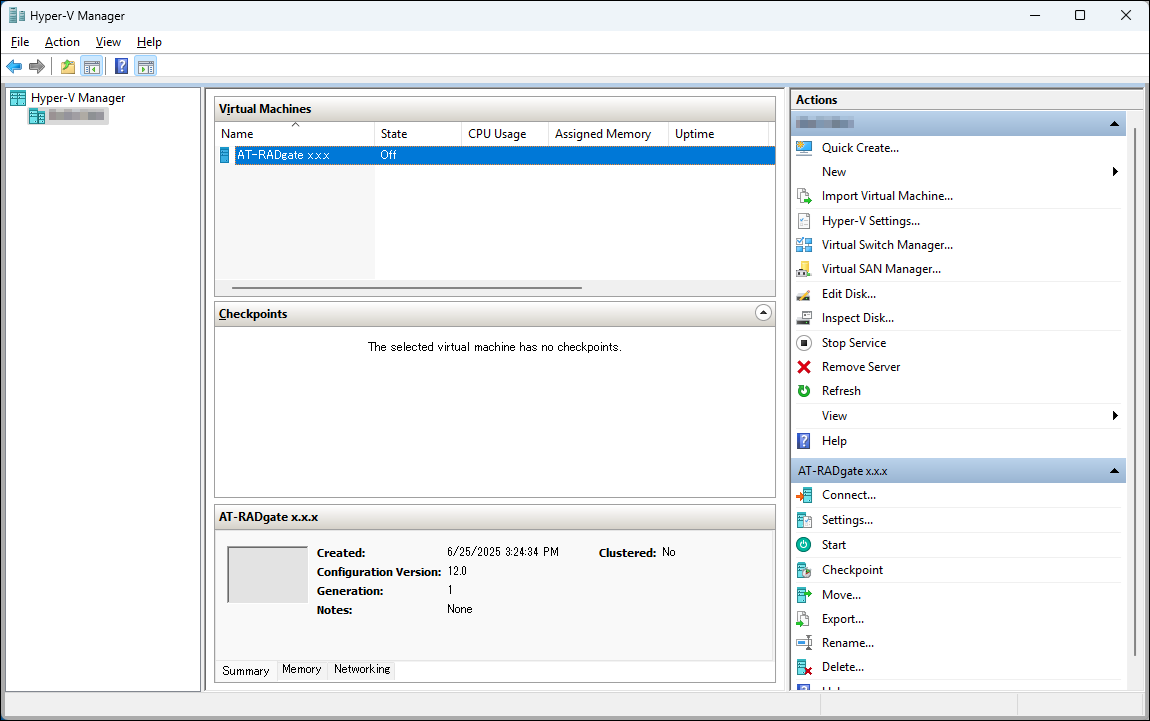
The virtual machine you created is displayed in the "Virtual Machines" pane of "Hyper-V Manager".
Creating a Virtual Switch
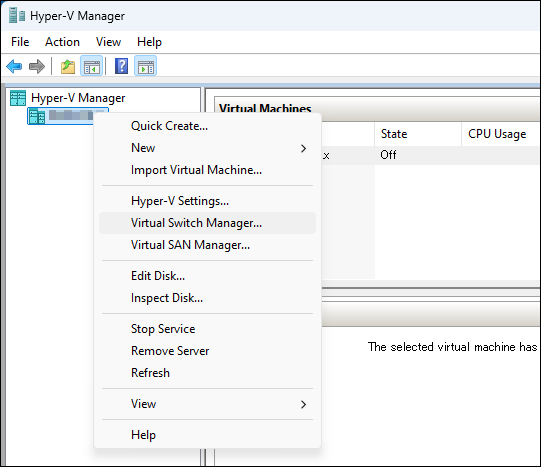
Next, configure the virtual switch.- Right-click the Hyper-V host name (local server name) displayed in the left pane of "Hyper-V Manager" and select "Virtual Switch Manager" from the context menu.
- If a virtual switch containing the name of the network adapter used by AT-RADgate is displayed in "Virtual Switches" in the left pane, select it and change the settings below.
If not, select "New virtual network switch" to create a new virtual switch and configure the following:
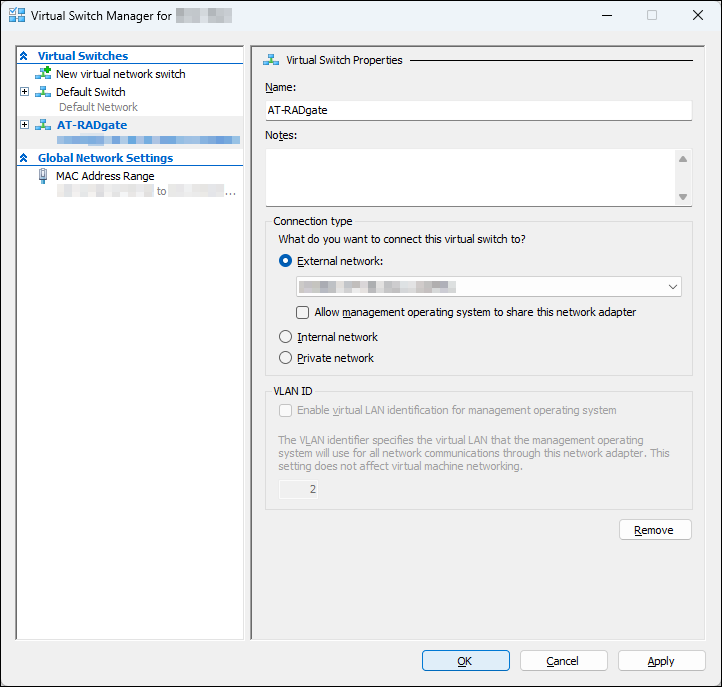
- Enter an appropriate name for the virtual switch in "Name" field.
- In "Connection type", select the appropriate one for the virtual switch destination.
- If you select "External network", select the network adapter to which you want to connect the AT-RADgate virtual machine from the drop-down list.
- It does not matter whether the "Allow management operating system to share this network adapter" checkbox is checked or not. In this setting, the check box is unchecked.
- It does not matter whether the "Allow management operating system to share this network adapter" checkbox is checked or not. In this setting, the check box is unchecked.
- Enter an appropriate name for the virtual switch in "Name" field.
Virtual Machine Configuration
Change the settings of the virtual machine you created for AT-RADgate.- Right-click the virtual machine in the "Virtual Machines" pane, and select "Settings" from the context menu.

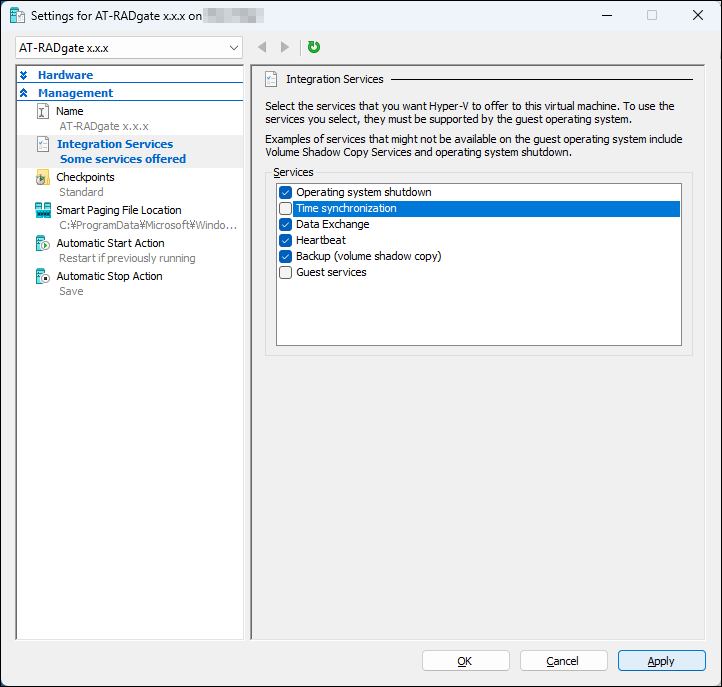
- Hyper-V virtual machines synchronize their time with the Hyper-V host by default. To allow the AT-RADgate virtual machine to manage its own time synchronization, automatic sync is disabled.
To do this, in the left pane, select "Management" > "Integration Services", then in "Services", clear the checkbox for "Time synchronization" and click the "Apply" button.
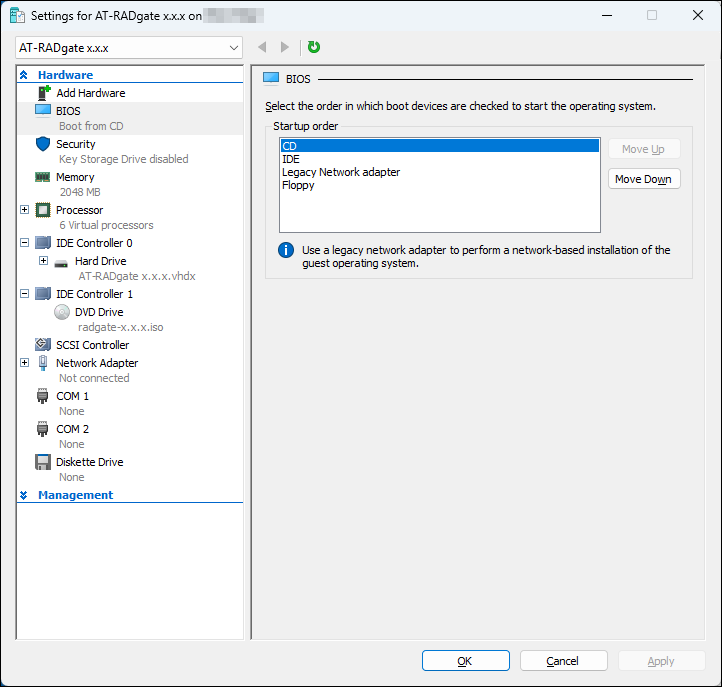
- In the left pane, select "Hardware" > "BIOS", then in "Startup order", confirm that "CD" is at the top of the list.
If "CD" is not at the top, use the buttons on the right to change the order, and click the "Apply" button.
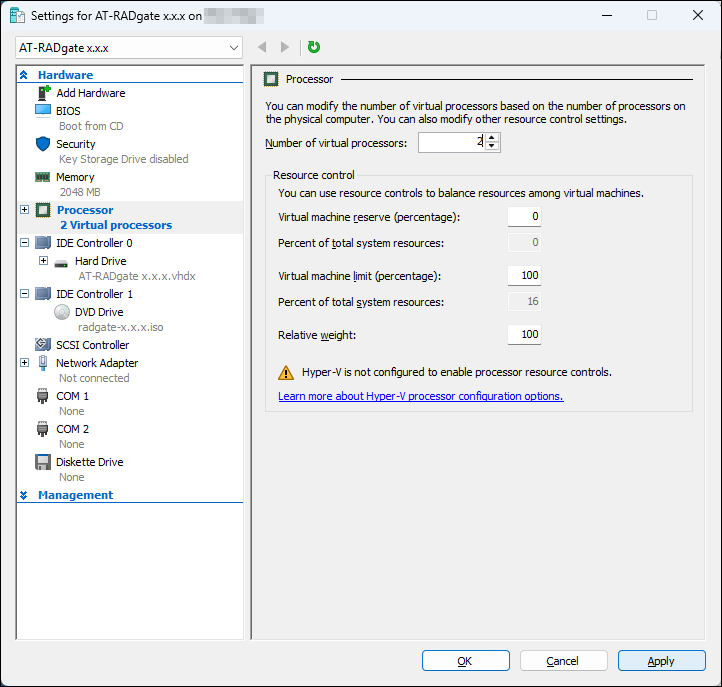
- In the left pane, select "Hardware" > "Processor", then in "Number of virtual processors", set a value that meets the required operating environment (2 or more), and click the "Apply" button (Reference: Operating Environment of AT-RADgate).
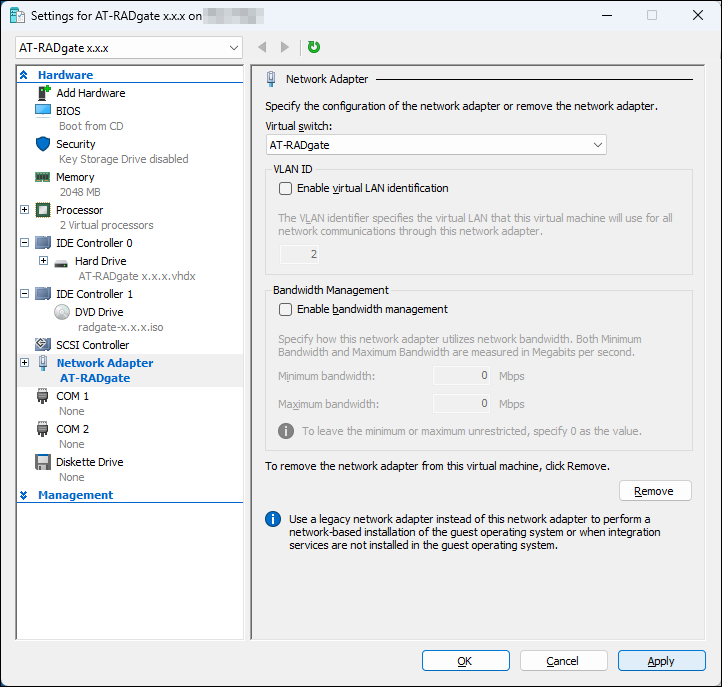
- In the left pane, select "Network Adapter" to display the "Network Adapter" page.
Initially, "Virtual switch" is set to "Not connected". From the drop-down list, select the name of the virtual switch created in the virtual switch settings, and click the "Apply" button.
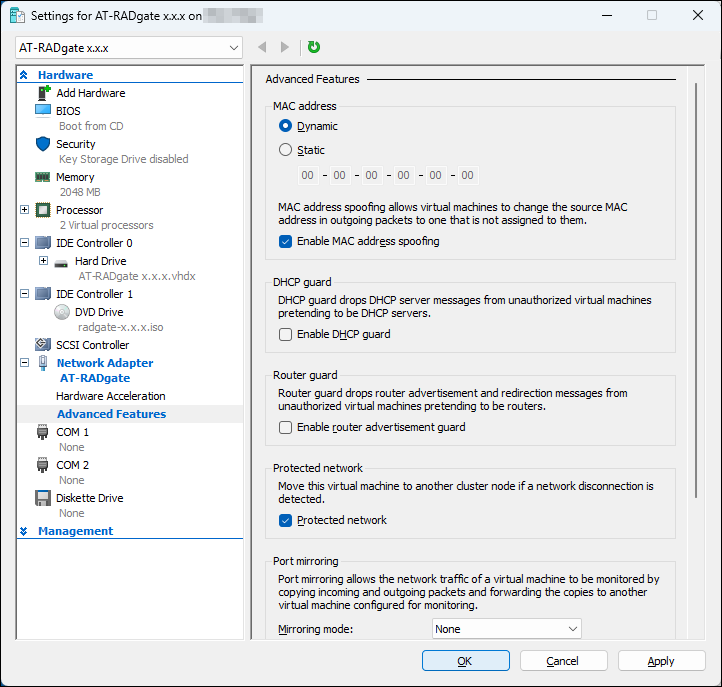
- In the left pane, select "Network Adapter" > "Advanced Features", then in "MAC Address", check "Enable MAC address spoofing", and click the "OK" button.
This setting prevents Hyper-V from discarding packets from each application that has a MAC Address different from that of the virtual machine.
Allied Telesis Container Platform Launches
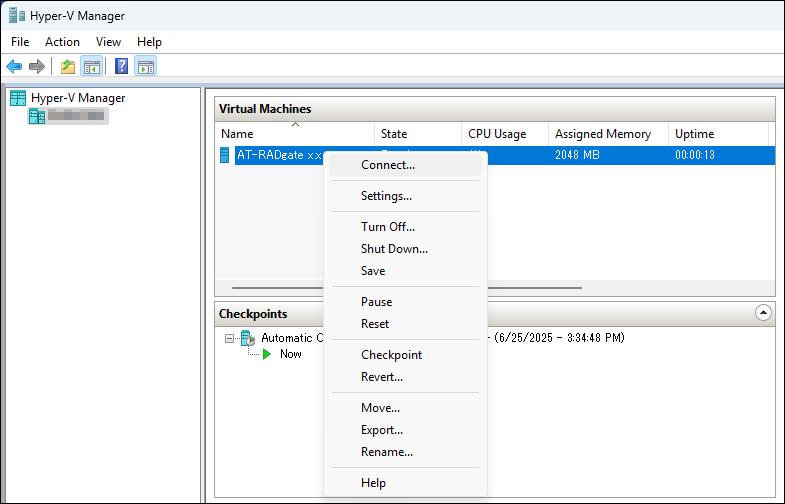
- In the "Virtual Machines" pane of Hyper-V Manager, right-click the virtual machine for this product and select "Start" from the context menu.
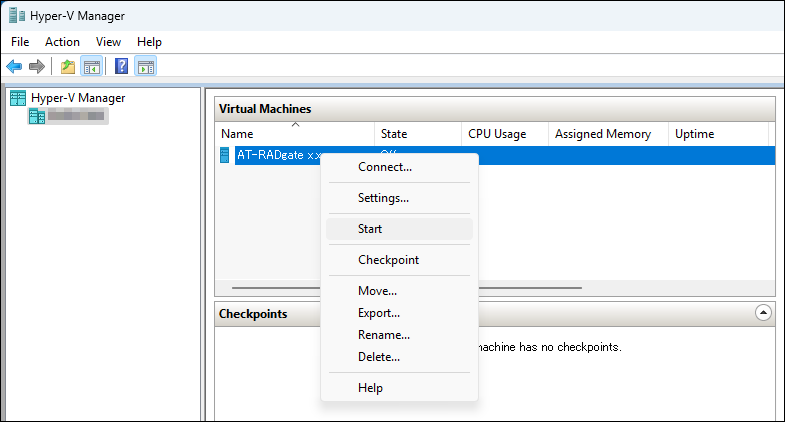
- Again, in the "Virtual Machines" pane of Hyper-V Manager, right-click the virtual machine for this product and select "Connect" from the context menu.
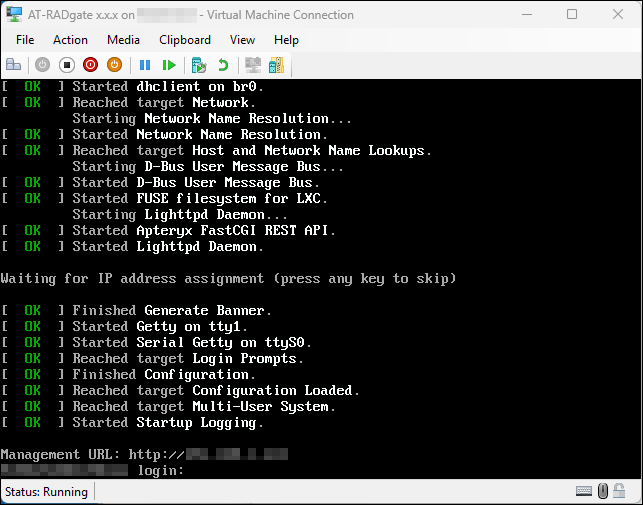
- When the virtual machine window for this product opens and the console screen appears with the IP Address displayed, the Allied Telesis Container Platform has successfully started. Login is not required.
02 Oct 2025 12:05