Updating AT-RADgate
This section explains how to upgrade AT-RADgate.
Although all uploaded files, including the SSL certificate (server certificate) and license data, are retained during the version upgrade, it is recommended to obtain backups of system settings, authentication policy information, and other data beforehand as a precaution.
For details, refer to AT-RADgate Backup.
Version Upgrade Process
The following outlines the version upgrade process.- Prepare the firmware file
- Shut down the Allied Telesis Container Platform
- Update the Allied Telesis Container Platform
- Update the AT-RADgate application
Prepare the firmware file
Download the AT-RADgate package version 1.1.1 file (radgate-1.1.1.iso) from our website.The following table shows the versions of the Allied Telesis Container Platform and the AT-RADgate application included in AT-RADgate package version 1.1.1.
| Package Version | Allied Telesis Container Platform | AT-RADgate application |
|---|---|---|
| 1.1.1 | 1.11.1 | 1.1.1 |
Shut down the Allied Telesis Container Platform
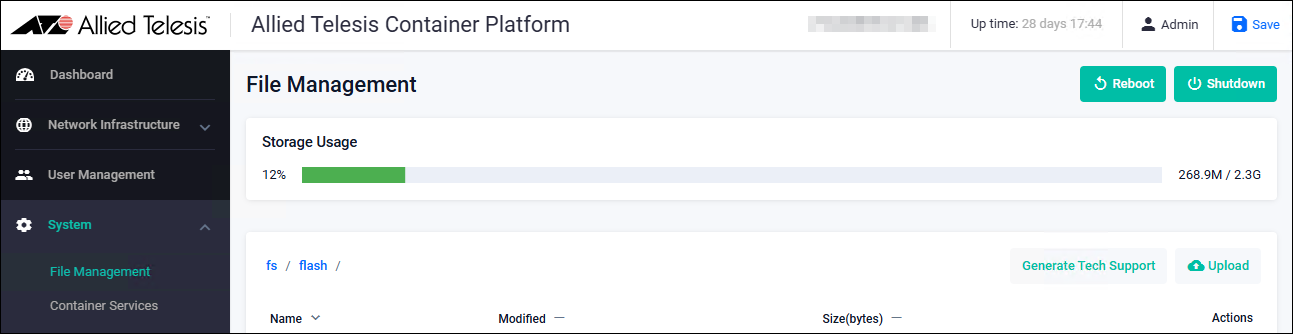
Log in to the configuration page of the Allied Telesis Container Platform.On the System > File Management page, click the "Shutdown" button.
Update the Allied Telesis Container Platform
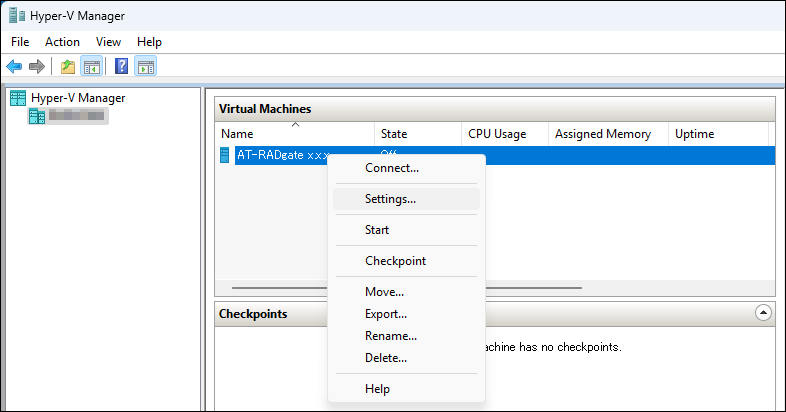
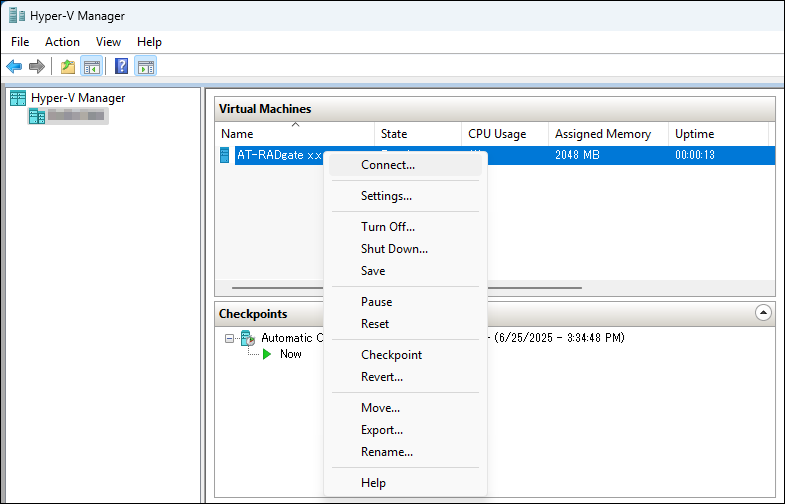
Change the virtual machine settings in Hyper-V Manager.- Launch "Hyper-V Manager" from the Start menu, etc.
- Right-click the virtual machine in the "Virtual Machines" pane, and select "Settings" from the context menu.
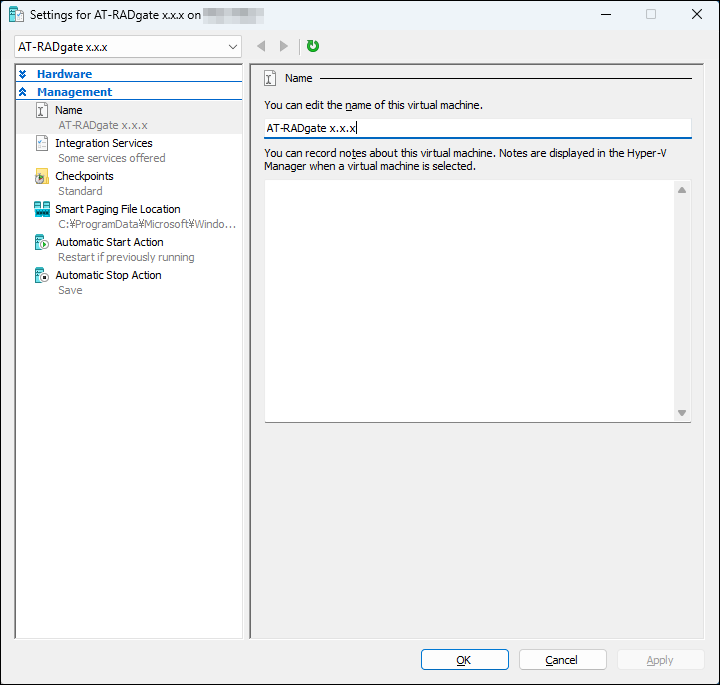
- When you select Management > Name from the left pane, the Name page appears.
Change to this version or another as needed, and click the "Apply" button.
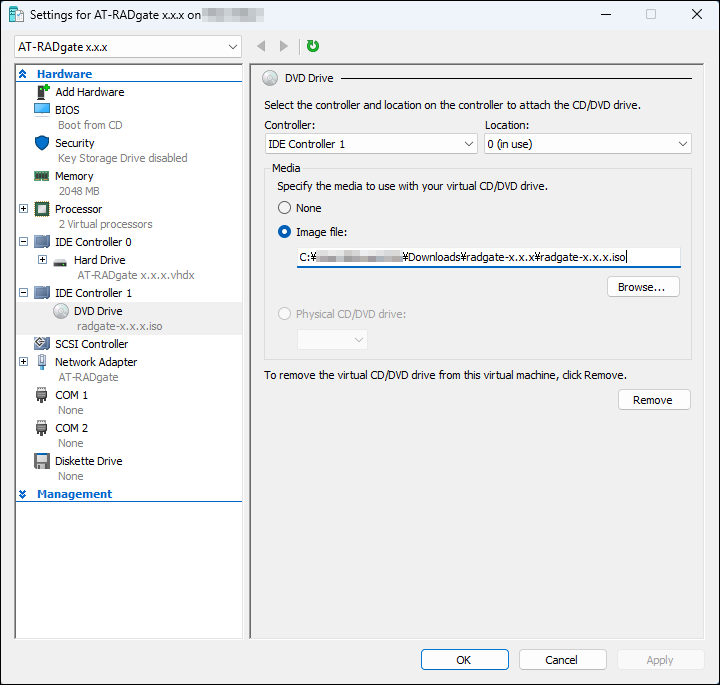
- When you select Hardware > DVD from the left pane, the DVD page appears.
Click the "Browse" button in the Image File field, specify the ISO image file for installing AT-RADgate, and click the "OK" button.
- Right-click the virtual machine in the Virtual Machine pane, and select "Start" from the context menu.

- Right-click the virtual machine for this product again in the Virtual Machine pane, and select "Connect" from the context menu.
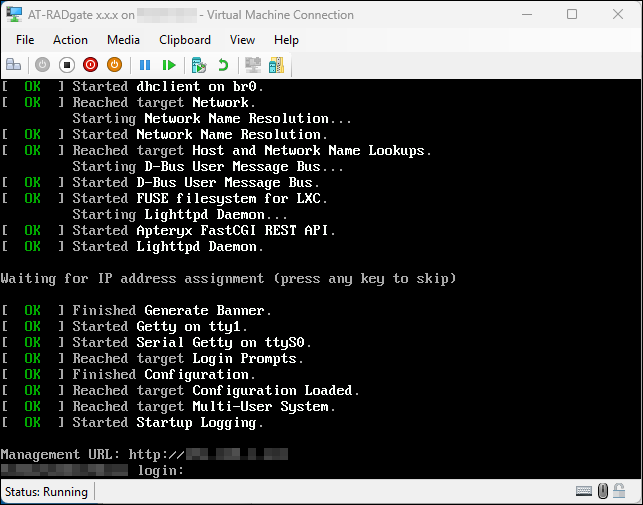
- When the virtual machine window for this product opens and the console screen appears with the IP Address displayed, the Allied Telesis Container Platform has successfully started. Login is not required.
Update the AT-RADgate application
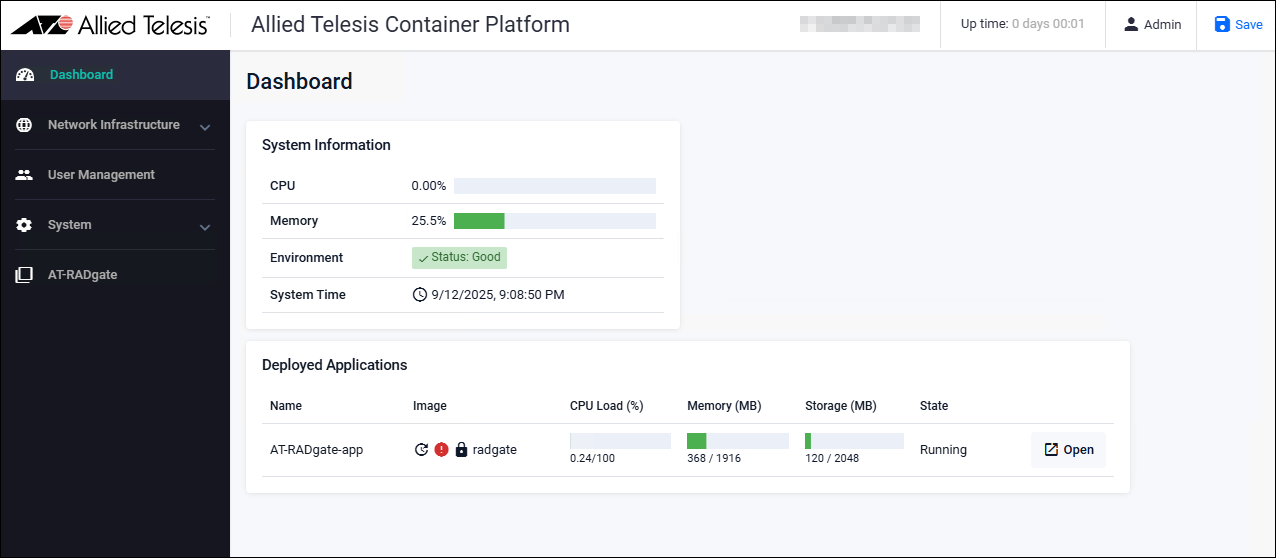
- Log in to the configuration page of the Allied Telesis Container Platform. The Dashboard page displays the following message.
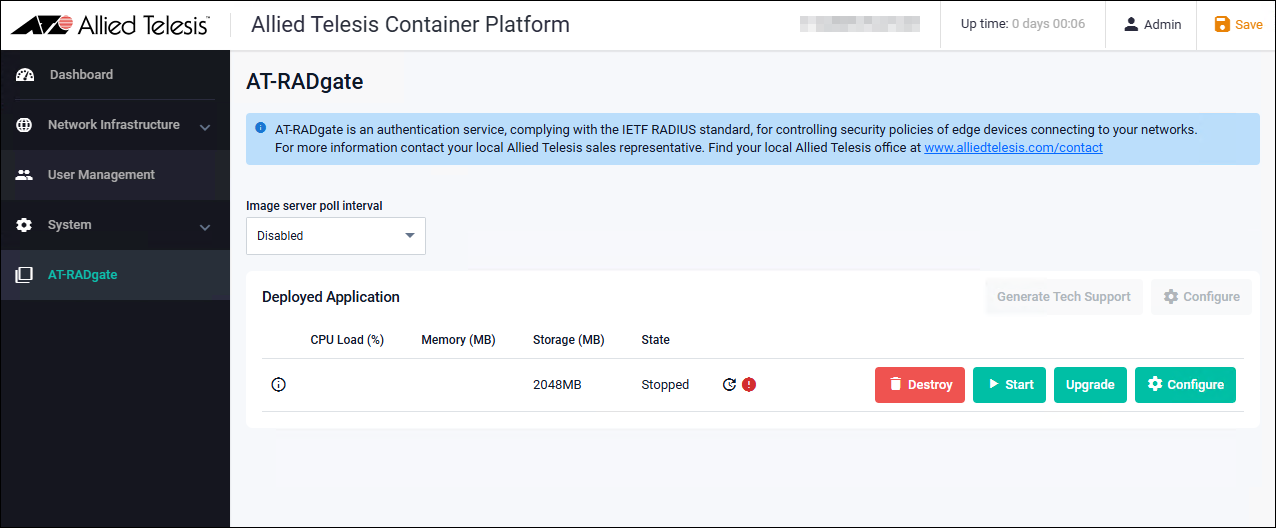
- Click the AT-RADgate menu on the left side of the page to display the AT-RADgate page, then click the "Stop" button.
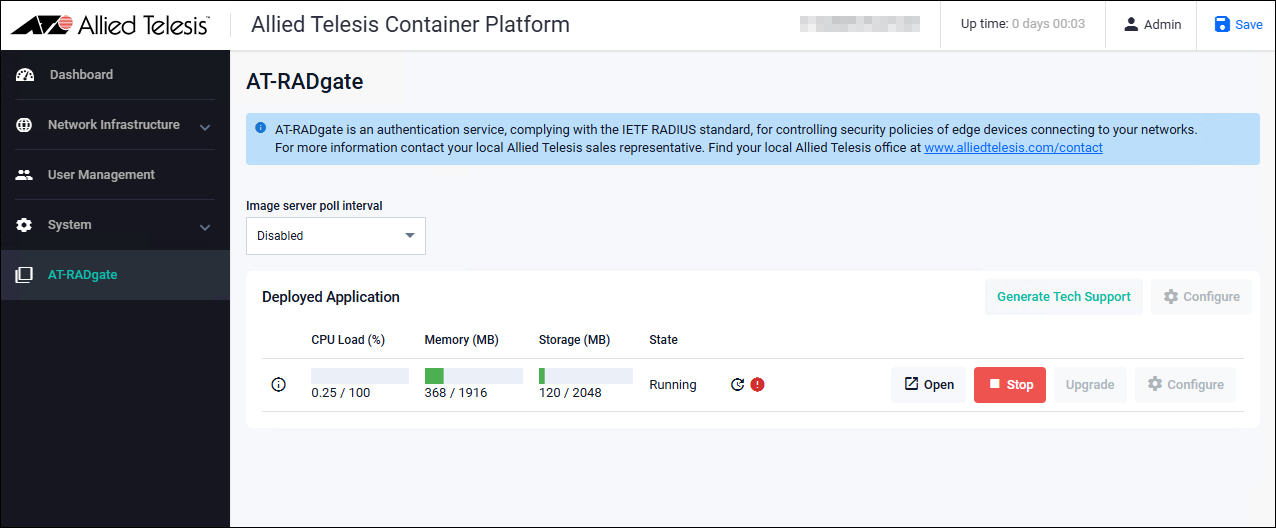
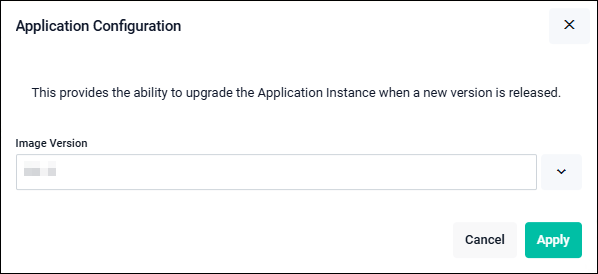
- When the following page appears, click the "Update" button.
- Select the firmware file for this version, then click the "Apply" button.
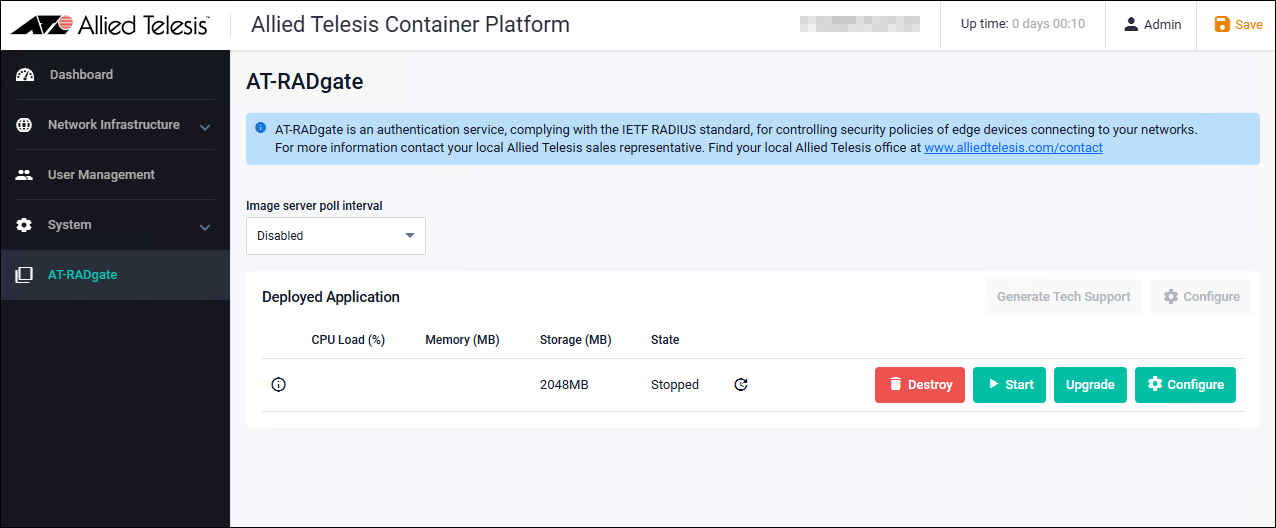
- Return to the AT-RADgate page, then click the “Start” button.
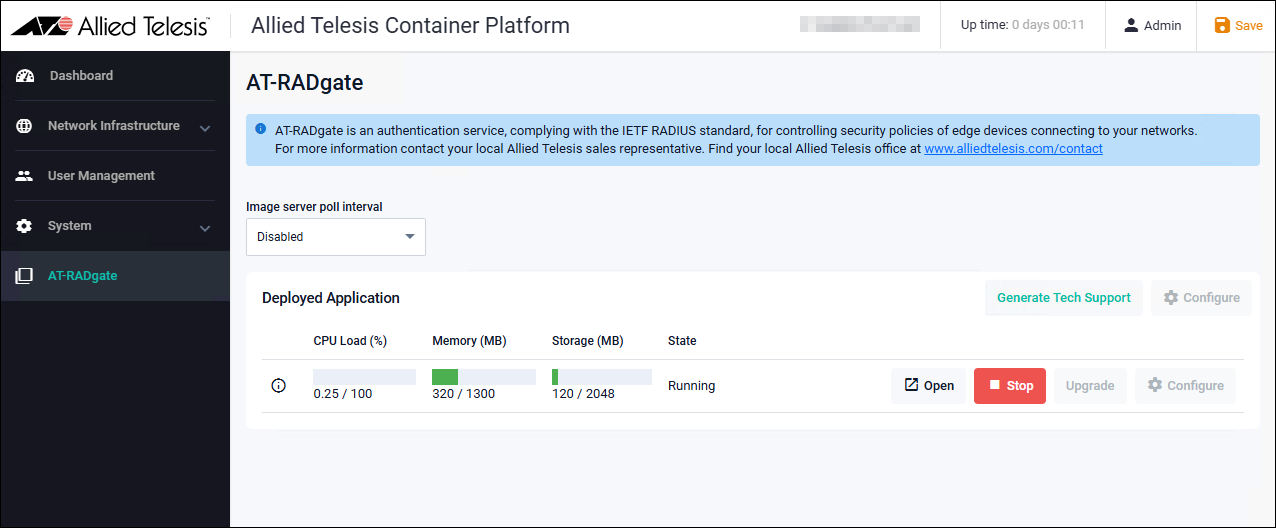
- When the "Open" button appears, the AT-RADgate application has been successfully updated and started. When the "Open" button appears, the AT-RADgate application has been successfully updated and started.
Make sure that the Allied Telesis Container Platform and the AT-RADgate application are operating correctly.
It is also recommended to obtain a backup file of the AT-RADgate application after the version upgrade.
02 Oct 2025 12:05