Create SC Profile
Next let's create SC Profiles for Smart Connect networks.
SC Profiles are a collection of setting items specific to Smart Connect, mainly SSID settings for SC management.
A SC Profile supplements configuration items specific to Smart Connect by overriding some parts of an AP Profile that are general operating settings for wireless APs.
When applying the AP Profile and SC Profile, if there is conflicting configuration between the Profiles, the configuration item defined in the SC Profile takes precedence over the AP Profile, and is written to the AP. When a configuration item is included only in the AP Profile, the configurations will be applied as is.
A SC Profile includes the following items:
- Profile configuration
Select the model of the AP or the management group to be applied.
- Basic configuration
Create a SC Management VAP to use instead of a wired connection.
- Wireless configuration
Select radio band and channel including SC VAP.
- AP List
Select the AP that uses Smart Connect and the AP that is used as the Root AP from the APs belonging to the management group.
- Select "Wireless Configuration" > "SC Profile" from the AWC Plug-in menu.
This shows a list of SC Profiles.
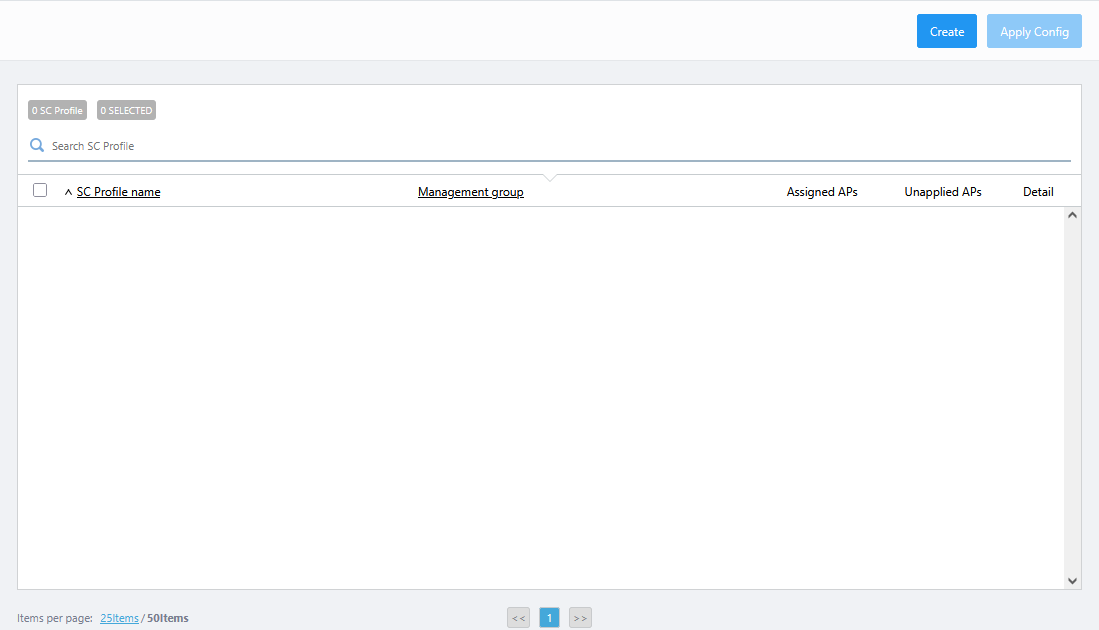
- Click "Create" at the top right corner.
The "Create SC Profile" dialog will appear.
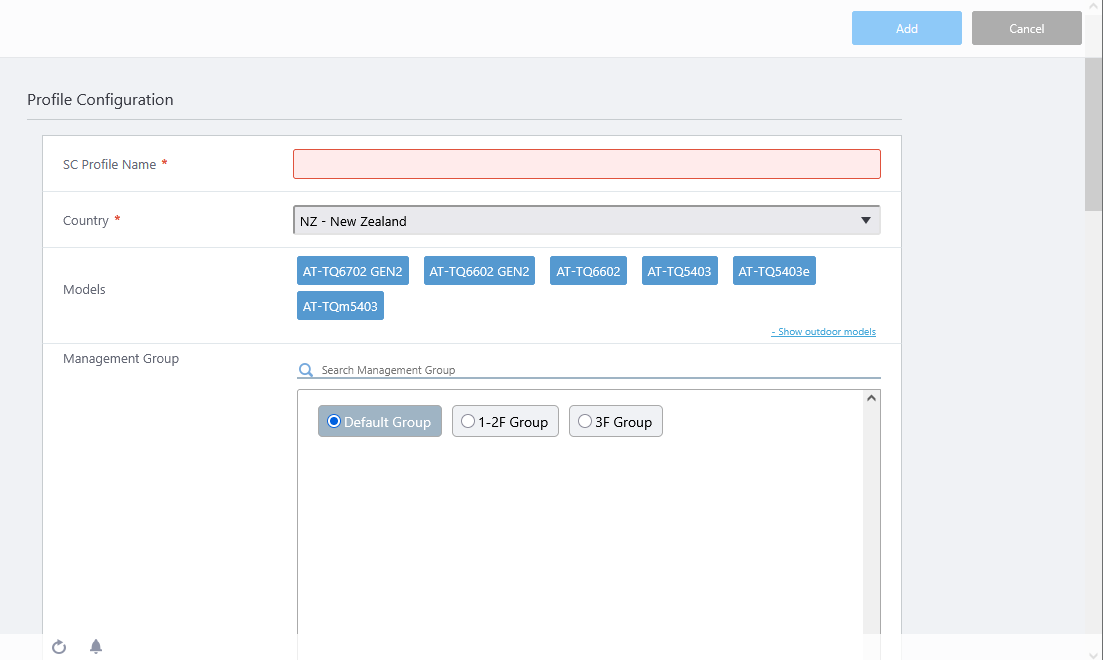
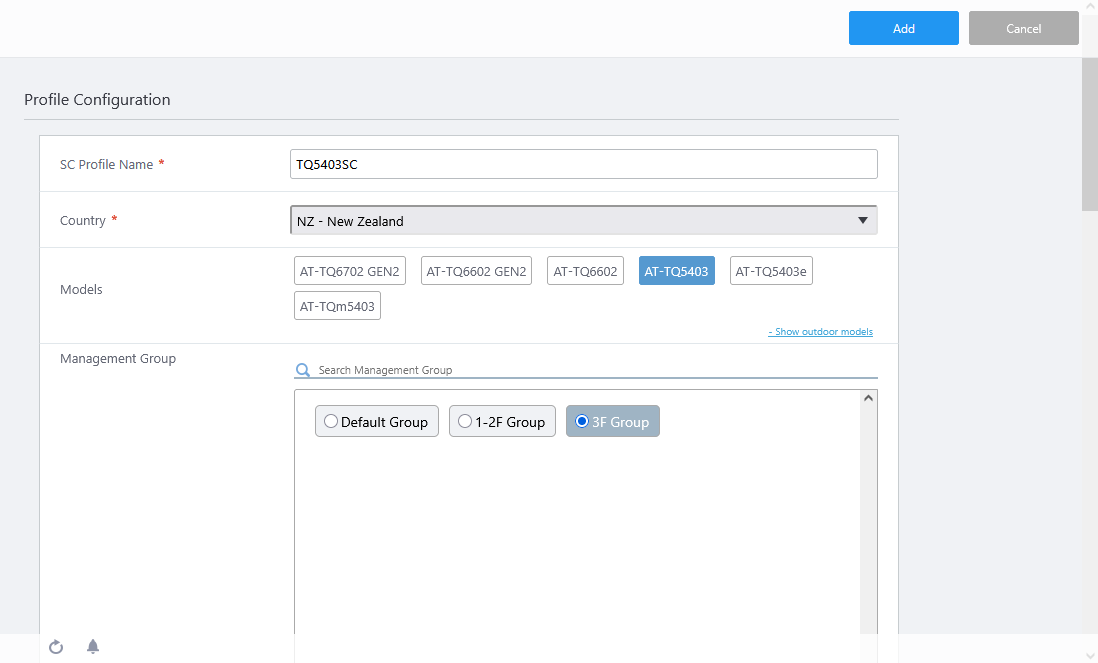
- Enter a name for the SC Profile.
Here, enter "TQ5403SC".
- Select a Country.
If the default country code for the currently logged in user is configured, it is selected by default.
- Select the AP model that uses Smart Connect.
Here, Select only "AT-TQ5403". The selected model name is displayed in blue.
Note
Note that although the TQ6602 appears as the target model for the SC profile, it is not supported and should not be selected.
Note
The TQ6602 GEN2 and TQ6702 GEN2 cannot coexist with the TQ5403/5403e or TQm5403 on the same Smart Connect network.
- Select the management group the SC Profile applies to.
One SC Profile can be created for one management group.
Here, we select "3F Group".
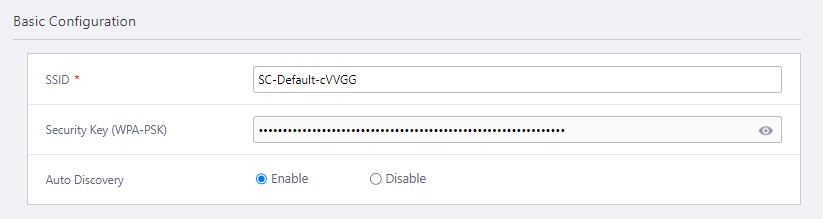
- Set "SSID" in "Basic Configuration" as necessary.
By default, this is automatically set in the form of "SC-Default-*****". "*****" and is 5 randomly generated alphanumeric characters (mixed case).
This SSID is not broadcast. Since it is used only between APs set via the AWC Plug-in, there is no special consideration, unless it overlaps with multi-channel VAPs, CB VAPs, and other SSIDs for SC management used in the same space.
Note that even if the beacon broadcast by the AP does not include the SSID, the communication packet will include the SSID to identify the wireless network. Since it is possible to display the hidden SSID from communication packets by using wireless network monitoring tools, it is recommended to avoid using strings that easily identify your network in order to prevent attacks from malicious users.
Here, the default "SC-Default-cVVGG" is used.
If necessary, click the icon to the right of "Security Key (WPA-PSK)" to check the set character string.
The security key is a pre-shared key used for the SC management SSID. There are 63 randomly generated alphanumeric characters (mixed case) automatically set and they cannot be changed.
The created SSID will overwrite the VAP 1 setting of the Frequency selected in the Radio Configuration.
Also, when "Auto Discovery" is enabled in the next section, the SSID "sc-initial-provisioning" for connecting the factory default AP to the Smart Connect network occupies VAP 2 in the same band.
When disabled, "sc-initial-provisioning" is not set for VAP2.
VAP settings created in the same wireless band with the AP Profile are ignored.
- Select whether to Enable or Disable "Auto Discovery".
- When set to "Enable", it responds to the connection request from the factory default AP. Enable "Auto Discovery" when adding a wireless AP by OTA (Over The Air).
Note
When using Auto Discovery, the network address 172.31.0.0/24 cannot be used on the network.
Note
Auto Discovery can be very time consuming. If this is the case, connect the AP directly to the network to which the AWC Plug-in belongs and configure the settings.
- When set to "Disabled", it does not respond to connection requests from the factory default AP. All Satellite APs (Connector APs / Terminator APs) need to be wired.
- When set to "Enable", it responds to the connection request from the factory default AP. Enable "Auto Discovery" when adding a wireless AP by OTA (Over The Air).
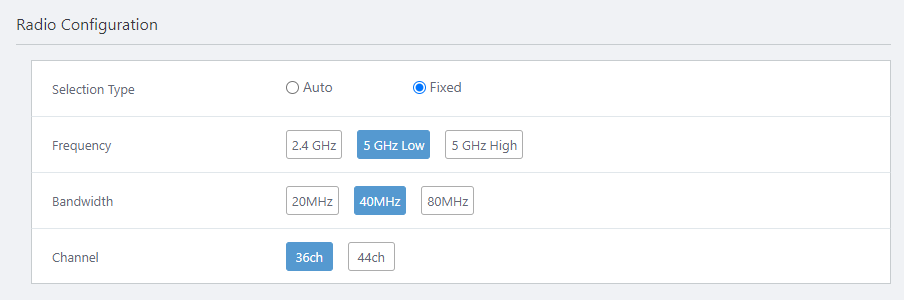
- In "Selection Type" of "Radio Configuration", select whether to automatically set the channel to use Smart Connect or set it to fixed.
- When "Auto" is selected, the channel is automatically selected according to "Frequency" and "Bandwidth".
Note
If you have selected a specific channel for the radio band that uses AWC-SC in the AP profile, do not set the Selection Type to "Auto" in the SC Profile. When "Auto" is selected, a channel other than the one set in the AP profile may be used.
- When "Fixed" is selected, the channel number corresponding to "Frequency" is displayed in the "Channel".
Here, set it to "Fixed".
- When "Auto" is selected, the channel is automatically selected according to "Frequency" and "Bandwidth".
- Select "Frequency" from "2.4 GHz" (Radio 1) and "5 GHz Low" (Radio 2 W52).
Here, select "5 GHz" because the SSID for SC management and the SSID for the factory default AP connection "sc-initial-provisioning" are created in the "Radio 2".
Note
In the radio band used by AWC-SC, the other VAPs will be disabled automatically.
- Select "Bandwidth".
Here, select "40MHz".
- Select "Channel".
When "Fixed" is selected in "Selection Type", specify the channel used for communication between APs.
Here, select "36ch"
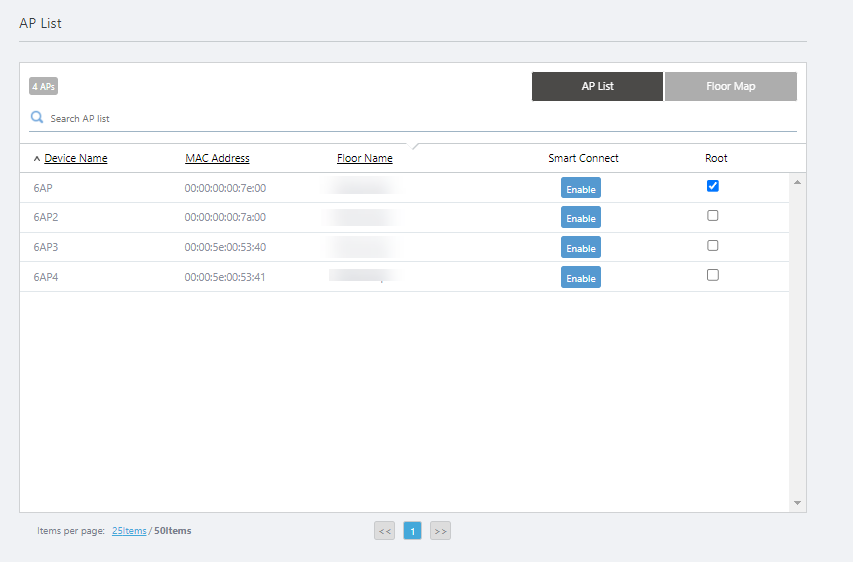
- From the "AP List", select the AP that uses Smart Connect.
The "AP List" displays a list of APs that belong to the selected management group.
By default, Smart Connect is enabled for all APs belonging to the management group.
If there is an AP that does not use Smart Connect in the AP List, in the "Smart Connect' column, click "Enable" (blue) to switch it to "Disable" (gray).
Here, it is assumed that all registered APs use Smart Connect.
Note
In the "AP list", all APs belonging to the same management group are displayed, including APs that do not support AWC-SC.
Even if Smart Connect is set to "Enable" for an AP that does not support AWC-SC, it cannot connect to the Smart Connect network.
Additionally, if there are APs that do not support AWC-SC in the management group, set Smart Connect to "Disable" in the "AP List" on the "Edit SC Profile" screen. When Smart Connect is set to "Enable" for an AP that does not support AWC-SC, some wireless settings that overlap with the SC profile, such as the channel used, are ignored.
- From the "AP List", select the AP to use as the Root AP.
Here, check the "Root" of "TQ5403-SC-1".
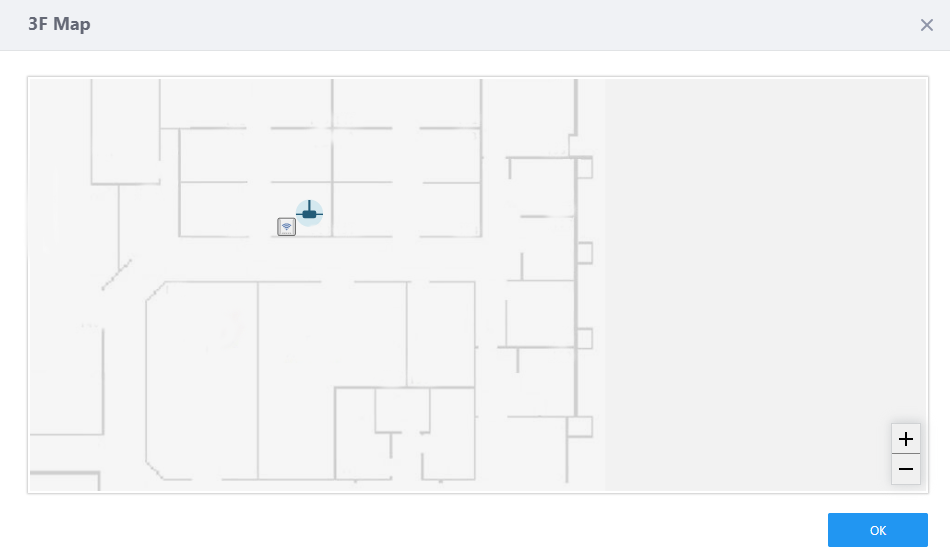
The Root AP can also be selected from the Floor Map.
Click the "Floor Map" at the top right of the "AP List" to display floor map panels belonging to the management group. Click the floor map panel to display the Floor Map dialog, APs on the map are shown graphically.
Put your mouse cursor on an AP, the IP address, MAC address, and model name will pop up. Click the wireless AP icon, the Root AP icon will be displayed at the top right of the AP icon. Click "OK" to close the Floor Map dialog.
- Click the "Add" button on the top right of the screen.
SC Profile "TQ5403SC" is registered.
10 Nov 2025 11:46