SNMP Plug-in System Configuration
"SNMP Plug-in Configuration Utility" allows you to change various configurations of the SNMP Plug-in server.
Launch the Utility
To launch the utility, right-click [Vista Manager EX Installation Directory]\Plugins\AT-SNMP\NetManager\bin32\ANMPluginConfig.exe and select "Run as administrator".Configuration Items
The utility has the following application window.Configuration parameters are categorized into six groups shown on the left side of the window.
When you select a group, configuration items in the group are shown on the right side of the window.
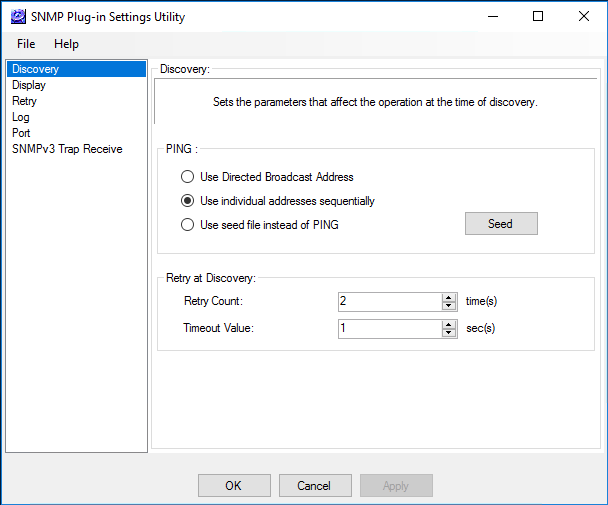
Discovery Configuration
"Discovery Configuration" category lets you change configurations on subnet auto-discovery funciton.
| Item | Content |
|---|---|
| PING Method |
|
| Retries |
|
Directed Broadcast Address
SNMP Plug-in can use a Ping packet destined to the directed broadcast address of a subnet for auto discovery.Altough it generates less traffic and takes less time than sending a unicast Ping for every address in the subnet, the packet may be filtered by a router for security reason. Moreover, there are devices which do not respond to packets destined to the directed broadcast address. In those cases, the plug-in cannot find all or some devices in the subnet.
To workaround them, select "Use unicast addresses sequentially" or change your router configuration to allow directed broadcasts.
By default, SNMP Plug-in sends a unicast Ping one by one to every address in the subnet.
Note"Use unicast addresses sequentially" takes more time than "Use directed broadcast address" to finish an auto discovery.
NoteFor configurations to allow directed broadcast packets on your network equipment, please refer to the equipment's manual.
Seed File
If you select "Use a seed file instead of PING", the plug-in skips the IP node discovery (by PING) stage and directly proceeds to the SNMP discovery stage, where it scans the hosts in a seed file first, then also scans the hosts known to the already scanned hosts.A seed file is a plain text file which contains one IP address per line. Its fullpath is "[Vista Manager EX Installation Directory]\Plugins\AT-SNMP\NetManager\etc\seed.lst".
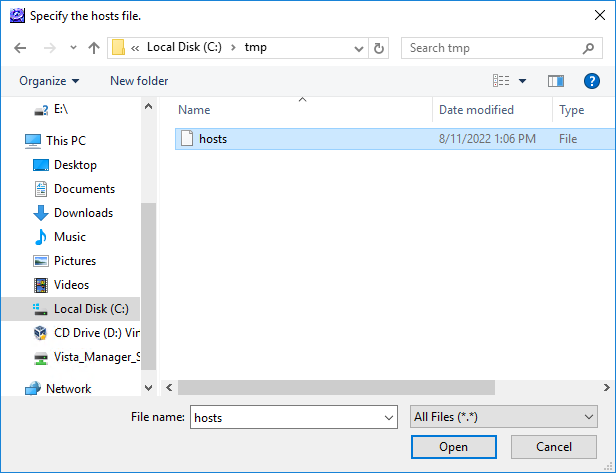
Altough it can be created by hand, usually you generate it using "Generate Seed" button. To create a seed file, do the following steps.
- Prepare a hosts file in the following format.
# sample hosts file
 192.168.10.1 saba
 192.168.10.5 tara
 192.168.20.1 tai
 192.168.20.100
 192.168.30.2
- Filename can be any. Its filename does not have to be "hosts".
- It does not have to be used for actual name resolution.
- A valid entry begins with an IP address.
- Lines starting with "#" and empty lines are ignored.
- Only the first field (IP address) is used for a seed file (hostname in the second field is not used).
- Filename can be any. Its filename does not have to be "hosts".
- Click "Generate Seed" button on the "Discovery Configuration" category.
- Select the prepared hosts file and click "Open" on the following dialog box.
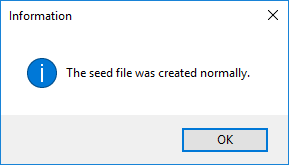
- A seed file will be generated in the following file path.
([Vista Manager EX Installation Directory]\Plugins\AT-SNMP\NetManager\etc\seed.lst)
Device Display Configuration
"Device Display Configuration" category lets you specify interface types to be recognized as ports and how to name the detected devices and ports.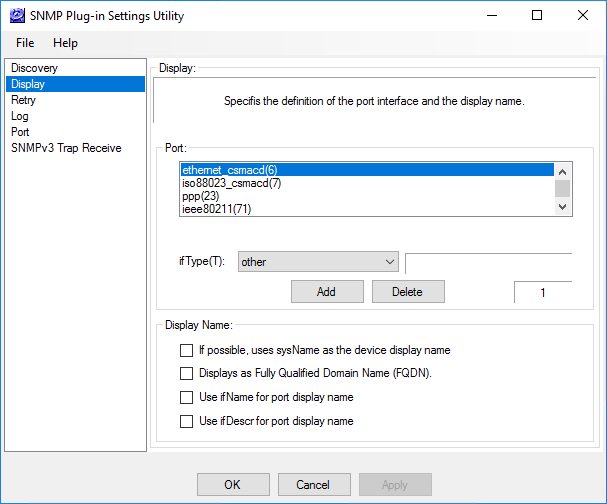
| Item | Content |
|---|---|
| Port | Lets you specify interface types (ifType) to be displayed as ports on the tree or main view. Only the interfaces with one of the specified ifTypes are recognized as ports. By default, interfaces with ifType 6 (ethernet_csmacd), 7 (iso88023_csmacd), 23 (ppp), 71 (ieee80211) and 117 (gigabitEthernet) are recognized as ports. If you want other interface types such as frame relay or SLIP to be treated as ports, select a interface type from "ifType" dropdown list and click "Add". To add an unlisted ifType value, select "Any" from "ifType" and enter a value at the "Enter Value" dialog box. |
| Display Name |
Lets you configure how to determine display names for the devices and ports found in an auto discovery.
|
Retry Configuration
"Retry Configuration" category lets you configure retry counts and timeouts applied to the operations other than auto discovery.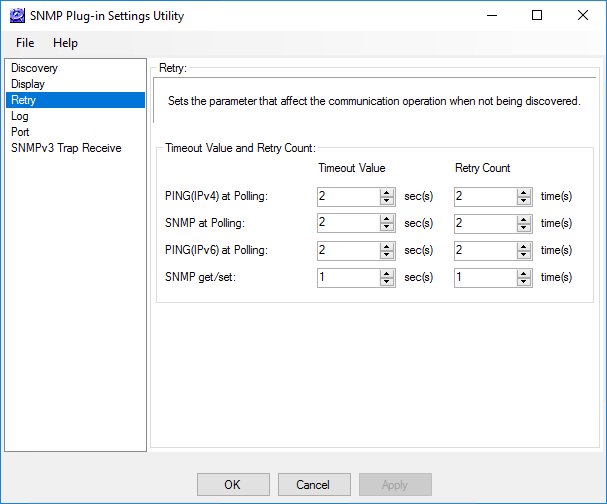
| Item | Content |
|---|---|
| Timeout/Retry Count Configurations |
You can change retry timeouts and counts applied to "Regular polling PING (IPv4)", "Regular polling SNMP", "Regular polling PING6 (IPv6)" and "Single SNMP Get/Set" operations.
|
Logging Configuration
"Logging Configuration" category lets you configure logging behaviors.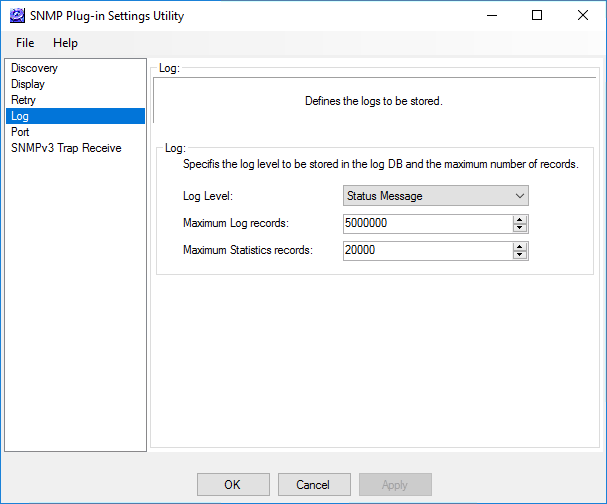
| Item | Content |
|---|---|
| Log Level |
Specify a minimum log level to be stored in the log history database. You can select one from the following three levels (default is "Informational"). This setting also applies to the logs displayed on the viewer.
|
| Maximum History Records | Specify a number of records which can be stored in the history database. |
| Maximum Statistics Records | Specify a number of statistics records which can be stored in the database. |
Port Configuration
"Port Configuration" category lets you change the UDP ports for SNMP and SNMP trap protocols.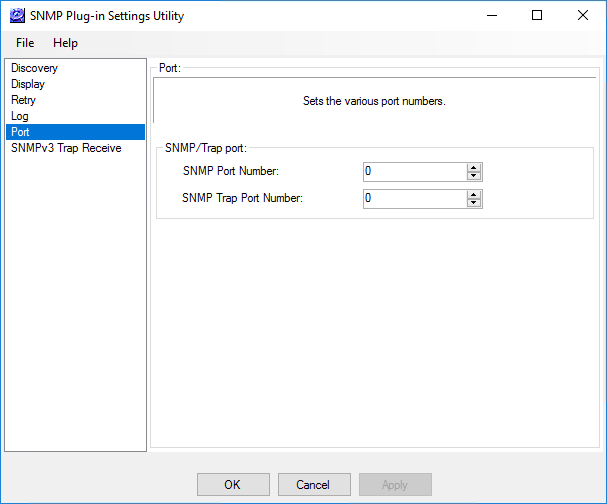
NoteChanges to "Port Configuration" category become effective after restarting SNMP Plug-in server.
NoteA value of "0" means the system default.
It's 161 for SNMP and 162 for SNMP trap.
| Item | Content |
|---|---|
| SNMP Port Number | Specify a UDP port number used for SNMP Get/Set. (valid range: 0 to 65535) |
| SNMP Trap Port Number | Specify a UDP port used for receiving SNMP traps. (valid range: 0 to 65535) |
SNMPv3 Trap Receiver Configuration
"SNMPv3 Trap Receiver Configuration" category lets you configure SNMP Parameters used for receiving SNMPv3 traps.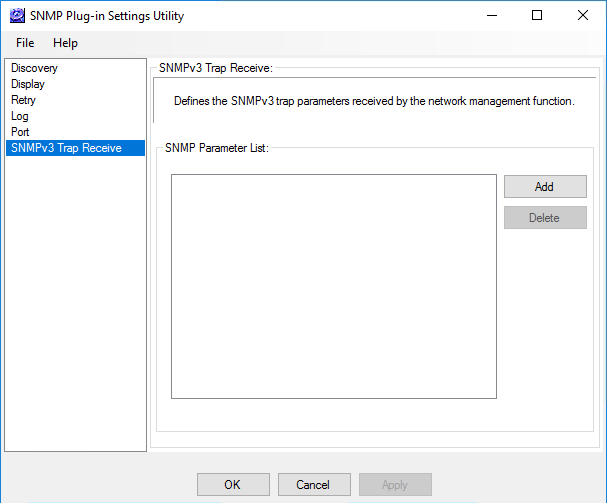
| Item | Content |
|---|---|
| Parameter List | Shows a list of SNMP Parameters used for receiving SNMPv3 traps. |
| Add | Lets you add or edit SNMP Parameters used for receiving SNMPv3 traps. SNMP Parameter List dialog box will appear. |
| Remove | Remove a selected SNMP Parameter from the list of parameters used for receiving SNMPv3 traps. It just removes the parameter from the list. It does not delete the parameter definition. |
NoteTo make changes on this category effective, you have to restart SNMP Plug-in server.
SNMP Parameter List Dialog Box
When you click "Add" button on "SNMPv3 Trap Receiver Configuration" category, "SNMP Parameter List" dialog box will appear.This dialog box lets you select parameters to use for receiving SNMPv3 traps, or create/edit/delete parameter definitions.
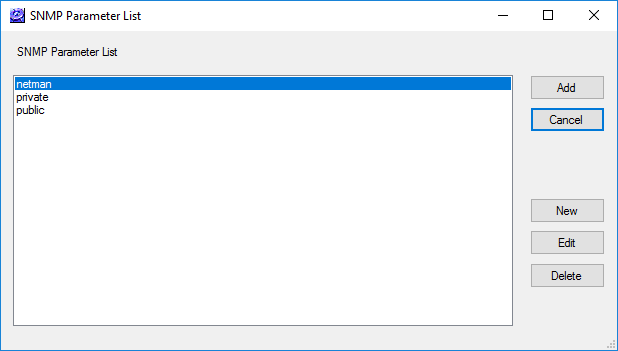
NoteSNMP Parameters on this dialog box are the same as the ones on SNMP Parameter page on management web interface.
| Item | Content |
|---|---|
| SNMP Parameter List | Shows a list of SNMP Parameters. |
| Add | Adds selected parameters to the list of parameters for receiving SNMPv3 traps. |
| Cancel |
Cancel the dialog box. You will be back to the "SNMPv3 Trap Receiver Configuration" screen. Note"Add", "Edit" and "Delete" operations prior to clicking "Cancel" button remain effective after "Cancel". |
| Add | Lets you add a new SNMP Parameter. SNMP Parameter Properties dialog box will appear. |
| Edit | Lets you edit a selected SNMP Parameter in the "SNMP Parameter List". SNMP Parameter Properties dialog box will appear. |
| Delete | Lets you delete a selected SNMP Parameter in the "SNMP Parameter List". |
SNMP Parameter Properties Dialog Box
You can create a new SNMP parameter or edit an existing one on this dialog box.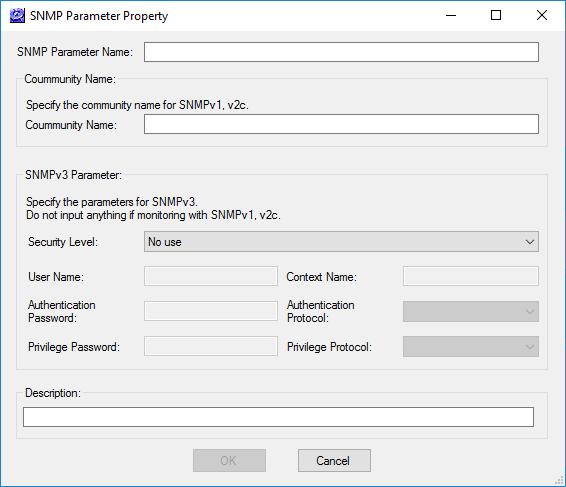
| Item | Content |
|---|---|
| SNMP Parameter Name | Enter a name of the SNMP Parameter (Max 255 characters). |
| Community Name | Specify a community name for SNMPv1 and v2c. |
| SNMPv3 Parameters |
Specify parameters used for SNMPv3.
|
| Description | Enter a comment for the parameter. |
28 Nov 2022 12:59