Recovery Mode
Recovery Mode is an emergency feature which lets you reset the configurations of AT-SESC in case that you forgot the critical information such as login password or management IP address.
To enter the Recovery Mode, you have to boot the server from the AT-SESC installation media.
- Connect a monitor and a keyboard to the server.
- Power on the server and the monitor, then insert the AT-SESC installation media into a DVD drive on the server.
Note
Refer to your server's documentation for instructions on how to set it up to boot from a DVD.
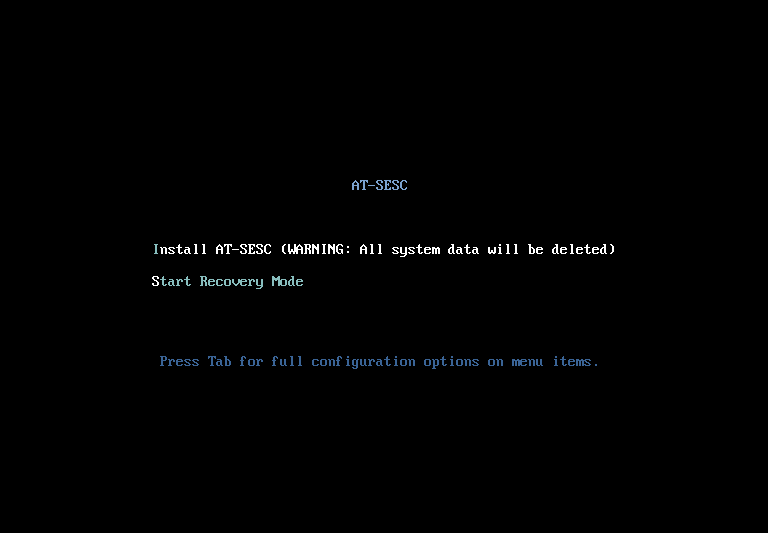
The AT-SESC Installation Media does not support UEFI boot. Make sure that the server is using the legacy BIOS for system startup. - At the following screen, Select "Start Recovery Mode" and press Enter.
Note
Please be warned that if you select "Install AT-SESC" and press Enter, fresh installation process begins and erases all the HDD content of the server.
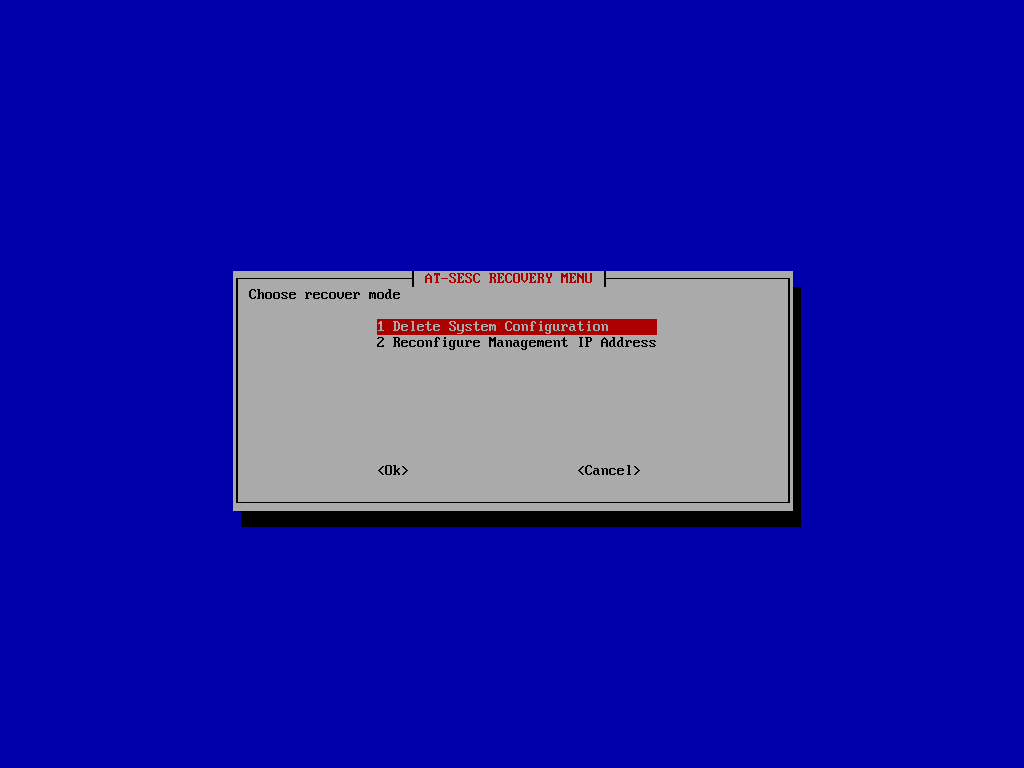
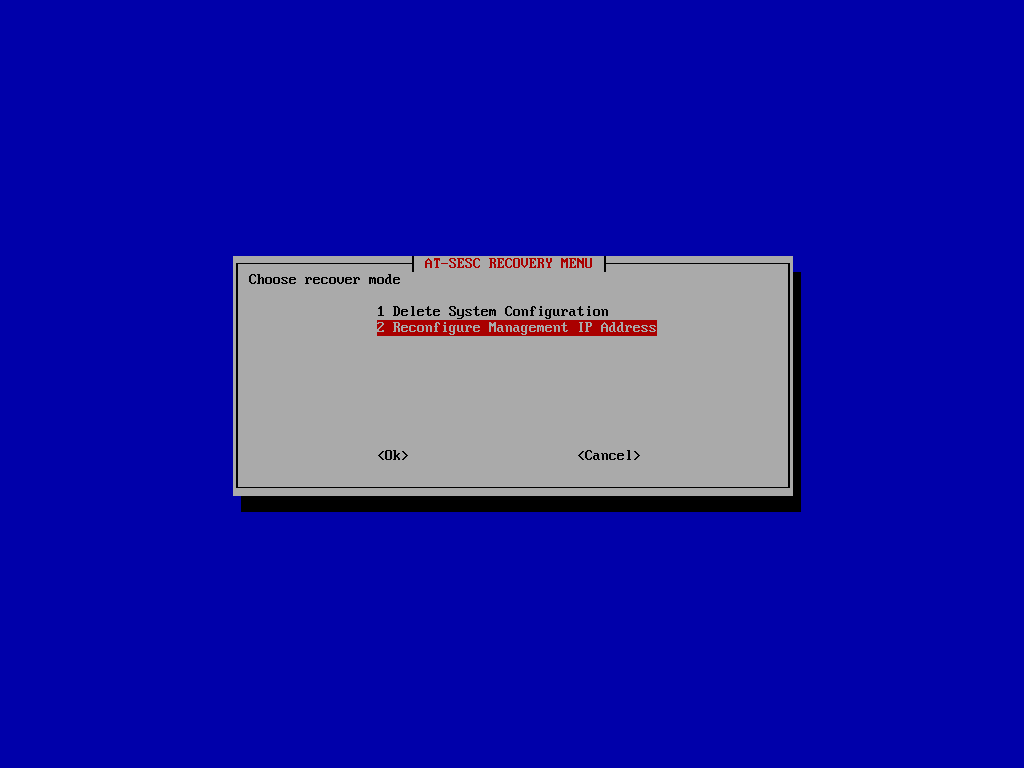
In the Recovery Mode, you can perform the following operations.
- Delete System Configuration
- Reconfigure Management IP Address
Delete System Configuration
When you run the "Delete System Configuration", system configuration files are deleted and AT-SESC is factory reset.This function is intended to restore the system in case the web interface does not work due to misconfiguration or you cannot login to the AT-SESC because of the lost password or IP address.
Those elements are collectively referred to as security policies. Here is a list of elements of security policies:
The following configurations are kept after deleting system configuration.
- User Authentication Database
- Licenses
- User-configured SSL Certificate
- System IP Address
- At the AT-SESC RECOVERY MENU page, select "1 Delete System Configuration" and press Enter.
- A confirmation message appears.
- Selecting "Yes" deletes the system configuration.
Note
Once deleted, system configuration cannot be restored.
After the successful operation, the following message appears. Selecting "OK" brings you to the AT-SESC RECOVERY MENU page. To reboot the system, select "Cancel" and select "Yes" at the confirmation prompt.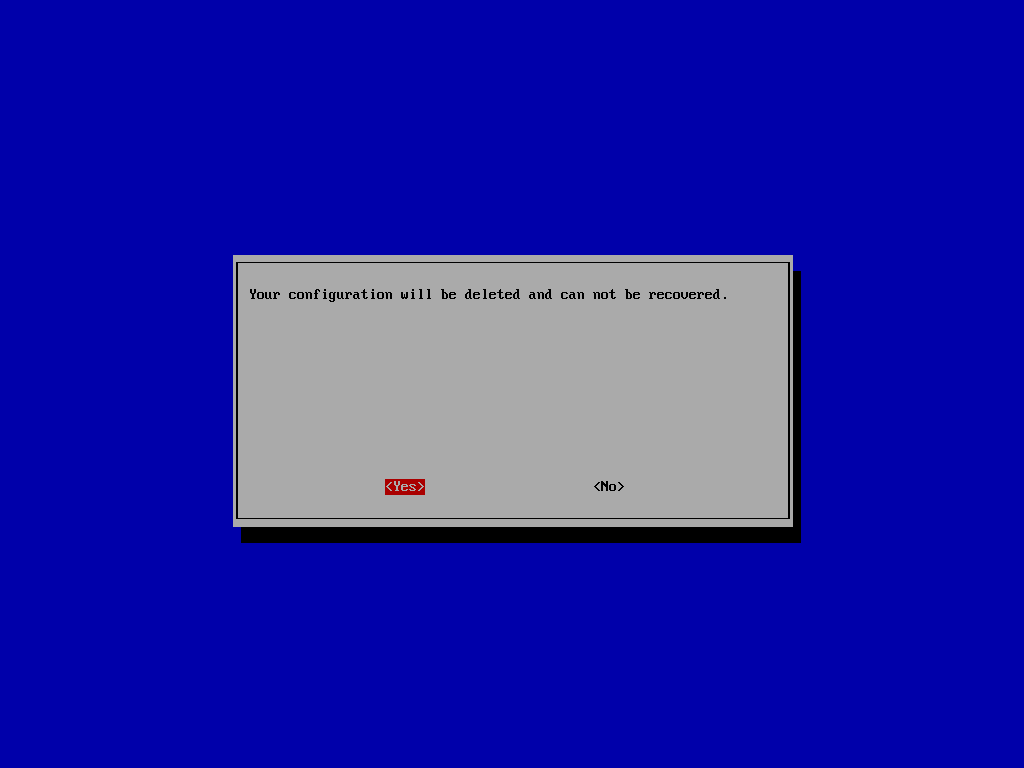
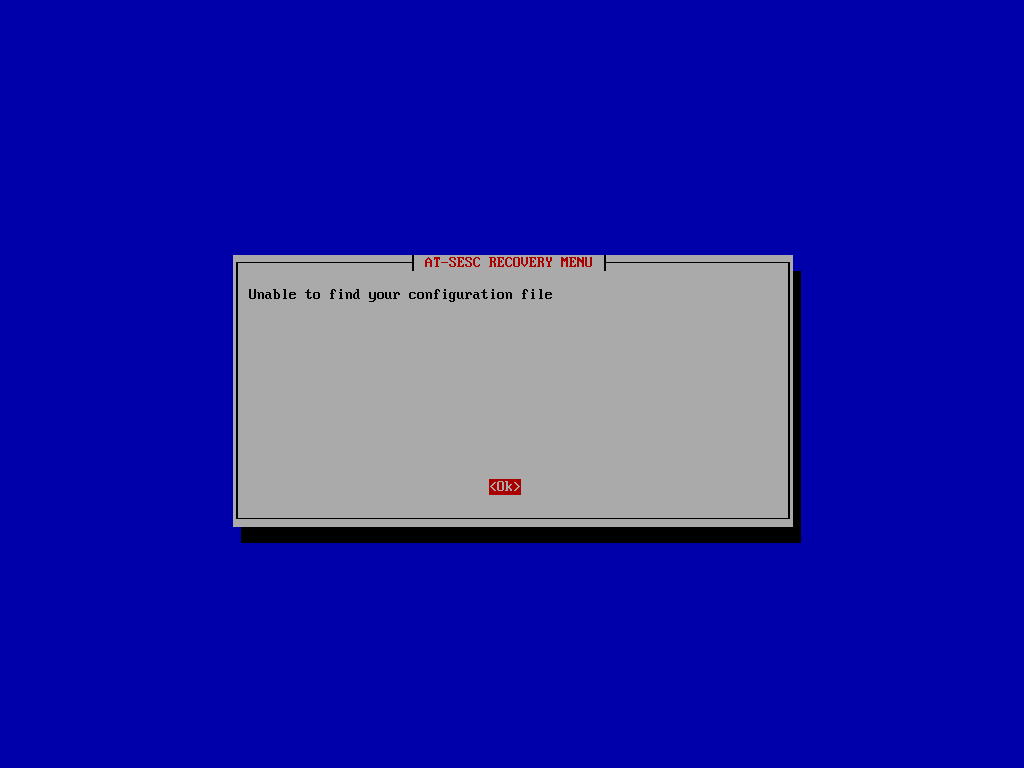
If no system configuration is found, the following error message appears.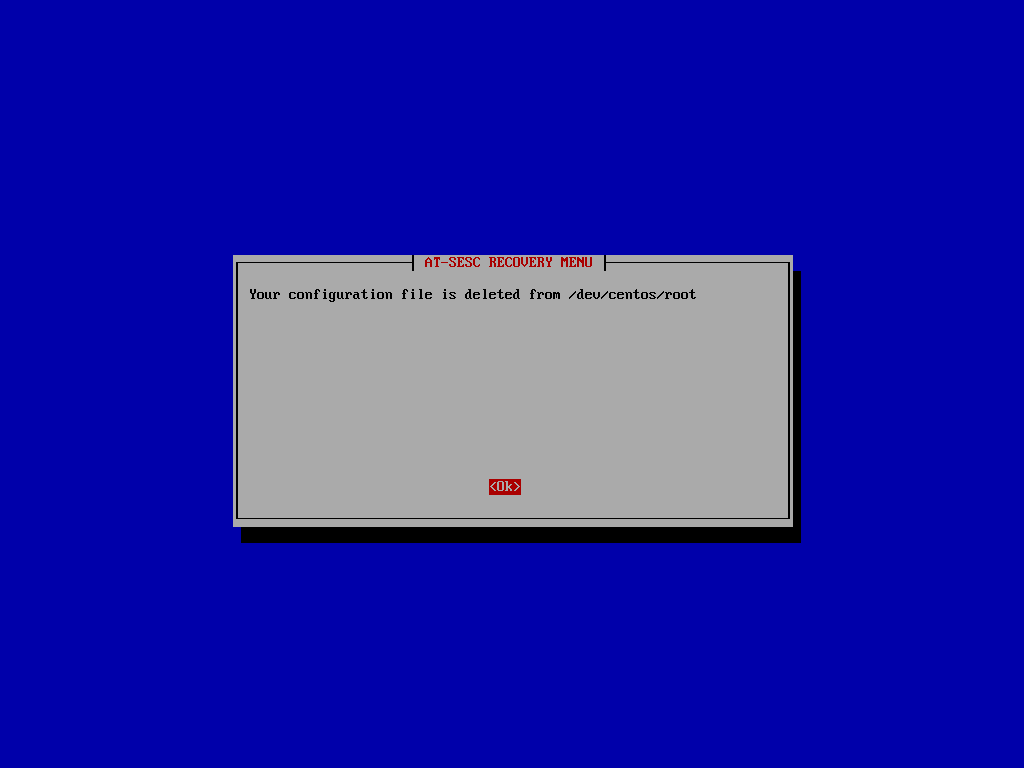
- Selecting "No" brings you to the following page without deleting files. You can reboot the system from here.
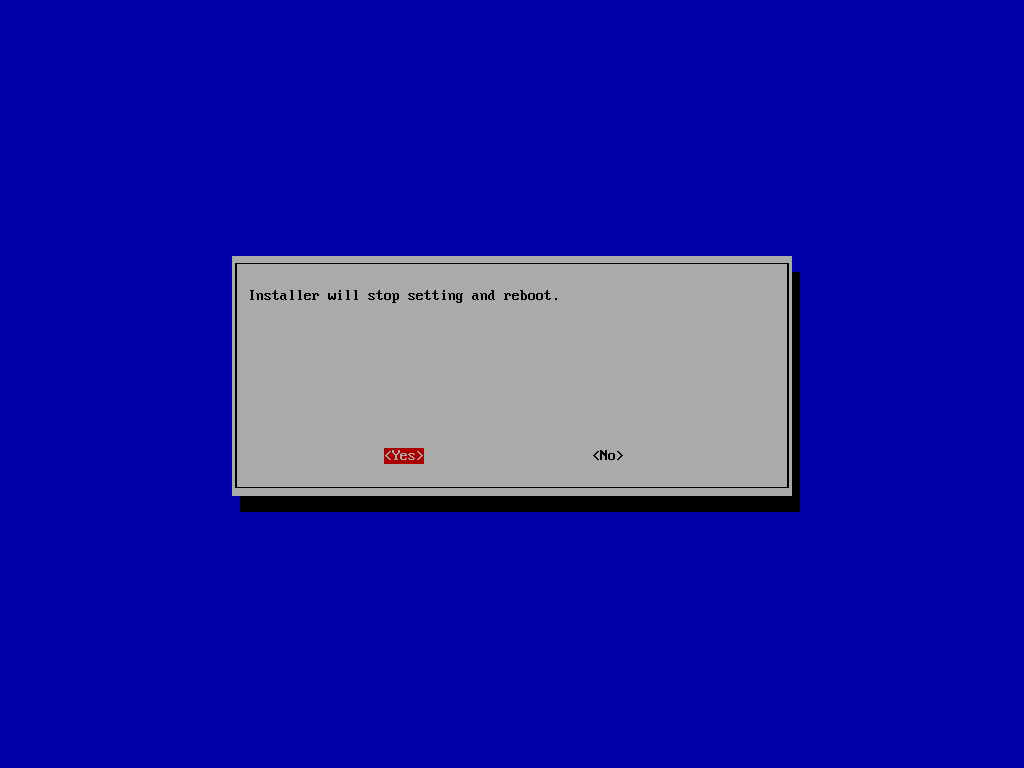
- Selecting "Yes" deletes the system configuration.
Reconfigure Management IP Address
Selecting "Reconfigure Management IP Address" takes you to the IP address configuration screen same as the one you saw in the initial installation process.The screen lets you re-select a management interface and assign an IP address, a subnet mask, a default gateway address and DNS server addresses.
This function is intended for the case where you can no longer access AT-SESC's web interface due to the lost address or wrong network configuration.
If the server has more than one network interfaces, configurations for the interfaces which are not selected here is deleted after reconfiguring management IP address.
- At the "AT-SESC RECOVERY MENU" screen, select "2 Reconfigure Management IP Address" and press Enter.
- Reconfigure the management interface by taking the steps described in the Installation/Installing AT-SESC section.
14 Jun 2021 09:30