Controlling Devices with AMF Application Proxy
Configuring AMF Application Proxy
In this section, this is an example of setting the AMF Application Pproxy.For each device connected to the AMF Member, AT-SESC performs authentication and assigns an appropriate VLAN.
If AT-SESC is configured to work with external applications, AT-SESC also performs the action defined on the System Settings > Trap Monitor Settings page when it's notified of a suspected node by the application.
Those elements are collectively referred to as security policies. Here is a list of elements of security policies:
NoteTo use this function, the feature license is required on the AMF master side. AMF Cloud and SwitchBlade come with the feature license as standard, and other AMF Master devices require an optional AMF Application Proxy license. Please check our website for details.
◼ Configuration
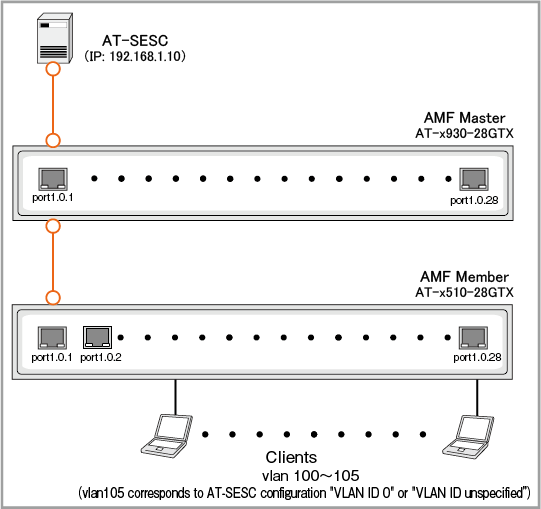
As an example, configure the following network:
| Item Name | Value |
|---|---|
| IPv4 address | 192.168.1.10 |
| AMF Master IP Address | 192.168.1.1 |
| AMF Master Username | manager |
| AMF Master Password | friend |
| Pre-shared key (between AT-SESC and AMF Master) | password |
◼ Device Authentication Data to register on AT-SESC
| Item Name | Value |
|---|---|
| Device1 | |
| Device ID | Device1 |
| MAC Address | 00:00:00:00:00:01 |
| VLAN to assign | VLAN100 |
| Device2 | |
| Device ID | Device2 |
| MAC Address | 00:00:00:00:00:02 |
| VLAN to assign | VLAN101 |
| Device3 | |
| Device ID | Device3 |
| MAC Address | 00:00:00:00:00:03 |
| VLAN to assign | None |
◼ AMF Master Configuration
| Item Name | Value |
|---|---|
| Username | manager |
| Password | friend |
| Hostname | AMF-Master |
| AMF Network Name | AMF001 |
| IP Address | 192.168.1.1 |
| AT-SESC IP Address | 192.168.1.10 |
| Pre-shared key (between AT-SESC and AMF Master) | password |
◼ AMF Member Configuration
| Item Name | Value |
|---|---|
| Hostname | AMF-Member |
| AMF Network Name | AMF001 |
| AMF Actions | Drop Packets |
NoteIn this setting example, the account (Username and Password) uses the default “manager and friend”. However, it is recommended that you create a user account with a privilege level of 15 on AMF Master and AMF Member and separate it from the user account used for console connection.
Configuring AMF Master
The case of using AT-x930-28GTX is explained as an example.Refer to the AlliedWare Plus Product's command reference manual for the commands described below.
- Configure the hostname.
awplus(config)# hostname AMF-Master ↓
- Configure the AMF network name.
AMF-Master(config)# atmf network-name AMF001 ↓
- Enable AMF Master functionality.
AMF-Master(config)# atmf master ↓
- Enable GUI support function for AT-SESC.
AMF-Master(config)# atmf topology-gui enable ↓
- Enable AMF Application Proxy.
AMF-Master(config)# service atmf-application-proxy ↓
- Configure the AMF Application Proxy Whitelist server (AT-SESC)'s IP address and a pre-shared key.
AMF-Master(config)# application-proxy whitelist server 192.168.1.10 key password ↓
- Create VLANs for packet forwarding.
AMF-Master(config)# vlan database ↓
AMF-Master(config-vlan)# vlan 100-105 ↓
- Assign the VLANs to a port and configure it as an AMF link to the AMF Member.
AMF-Master(config)# interface port1.0.1 ↓
AMF-Master(config-if)# switchport mode trunk ↓
AMF-Master(config-if)# switchport trunk allowed vlan add 100-105 ↓
AMF-Master(config-if)# switchport atmf-link ↓
- Assign an IP address to vlan1 for communicating with AT-SESC.
AMF-Master(config)# interface vlan1 ↓
AMF-Master(config-if)#ip address 192.168.1.1/24 ↓
Configuring AMF Members
The case of using AT-x510-28GTX is explained as an example.Refer to the AlliedWare Plus Product's command reference manual for the commands described below.
- Configure the hostname.
awplus(config)# hostname AMF-Member ↓
- Configure the AMF network name.
AMF-Member(config)# atmf network-name AMF001 ↓
- Enable AMF Application Proxy.
AMF-Member(config)# service atmf-application-proxy ↓
- Create VLANs for packet forwarding.
AMF-Member(config)# vlan database ↓
AMF-Member(config-vlan)# vlan 100-105 ↓
- Assign the VLANs to a port and configure it as an AMF link to the AMF Master.
AMF-Member(config)# interface port1.0.1 ↓
AMF-Member(config-if)# switchport mode trunk ↓
AMF-Member(config-if)# switchport trunk allowed vlan add 100-105 ↓
AMF-Member(config-if)# switchport atmf-link ↓
- Assign a VLAN to device ports.
AMF-Member(config)interface port1.0.2-1.0.28 ↓
AMF-Member(config-if)# switchport access vlan 105 ↓
- Enable AMF Application Proxy Whitelist on device ports.
AMF-Member(config-if)# application-proxy whitelist enable ↓
Note
For the target port, the default setting of the authentication suppression period (quietPeriod) after authentication failure is 60 seconds. To shorten the authentication suppression period, use the "auth timeout quiet-period" command.
- Enable AMF Application Proxy Whitelist's session timeout on the device ports.
With the session timeout enabled, authentication state for a device is deleted when the time configured on the AMF > AMF Application Proxy Settings page has passed after the device was successfully authenticated.
When the session timeout is set to 0, authentication state of a device is not deleted due to the time passed since a successful authentication.
AMF-Member(config-if)# auth session-timeout ↓
Note
Make sure to configure the session timeout when you are going to use schedule-based authentication.
- Set the authentication mode for the device ports to "Multi-Supplicant".
AMF-Member(config-if)# auth host-mode multi-supplicant ↓
- Enable dynamic vlan on the device ports.
AMF-Member(config-if)# auth dynamic-vlan-creation type multi ↓
Note
If the device may move to another port, disable ingress filtering on all ports involved in the device movement. (Specify "disable" in the "ingress-filter" parameter of the "switchport mode" command.)
If ingress filtering is enabled, device information remains on the port before the move, and you are not able to authenticate on the destination port.
When dynamic vlan is not enabled, a vlan configured on the device ports is used for authenticated devices even if AT-SESC assigned a specific vlan to each device.
- Set AMF Application Proxy's blocking action to 'Drop'.
AMF-Member(config-if)# application-proxy threat-protection drop ↓
Configuring AT-SESC
- Registering AMF Master
Register the AMF Master on the AMF > AMF Application Proxy Settings page.
Click "Add" in "AMF Master/VistaManagerEX" section.
Enter the AMF Master's IP address, username, password and pre-shared key, check all boxes and click "Submit".
Those elements are collectively referred to as security policies. Here is a list of elements of security policies:
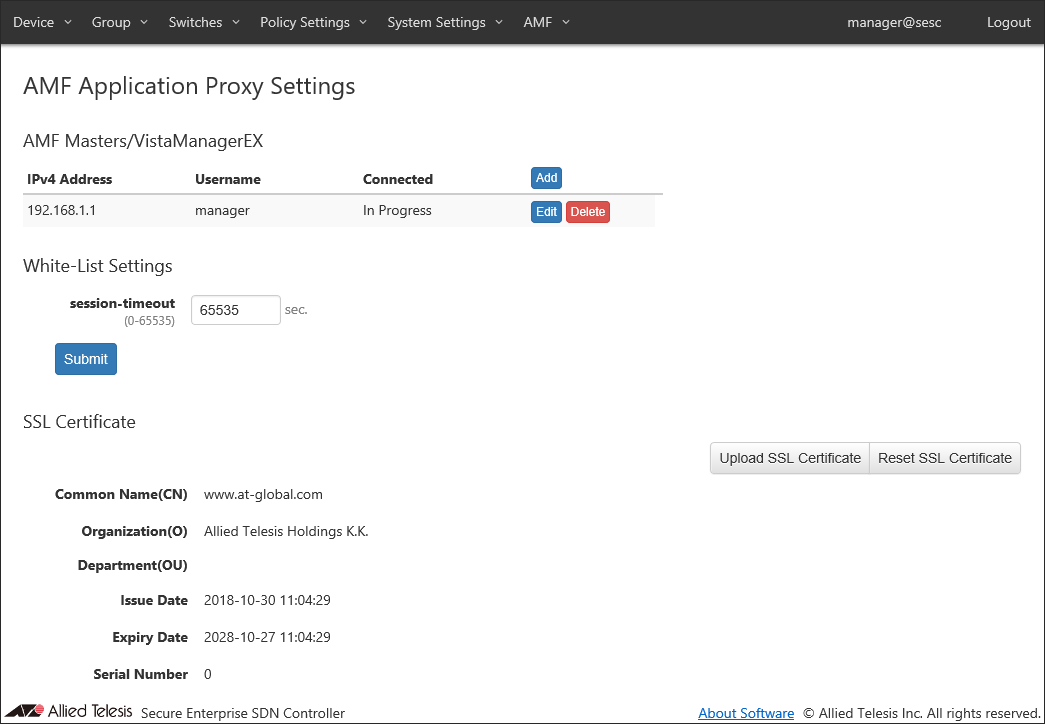
You can view the registered AMF Master on the AMF > AMF Application Proxy Settings page.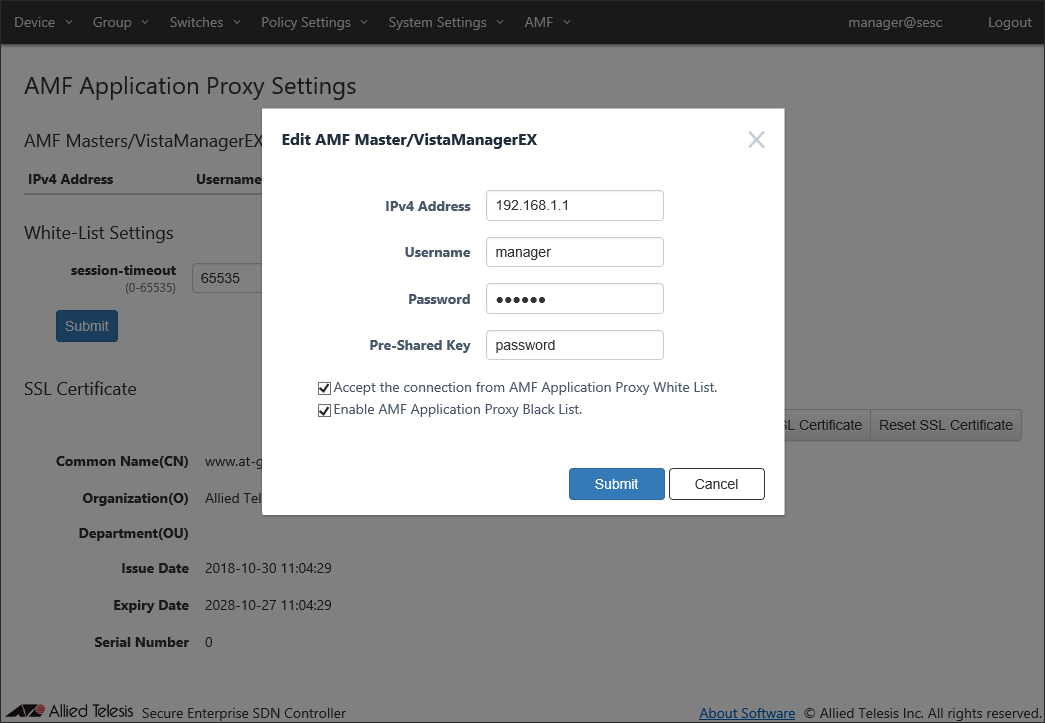
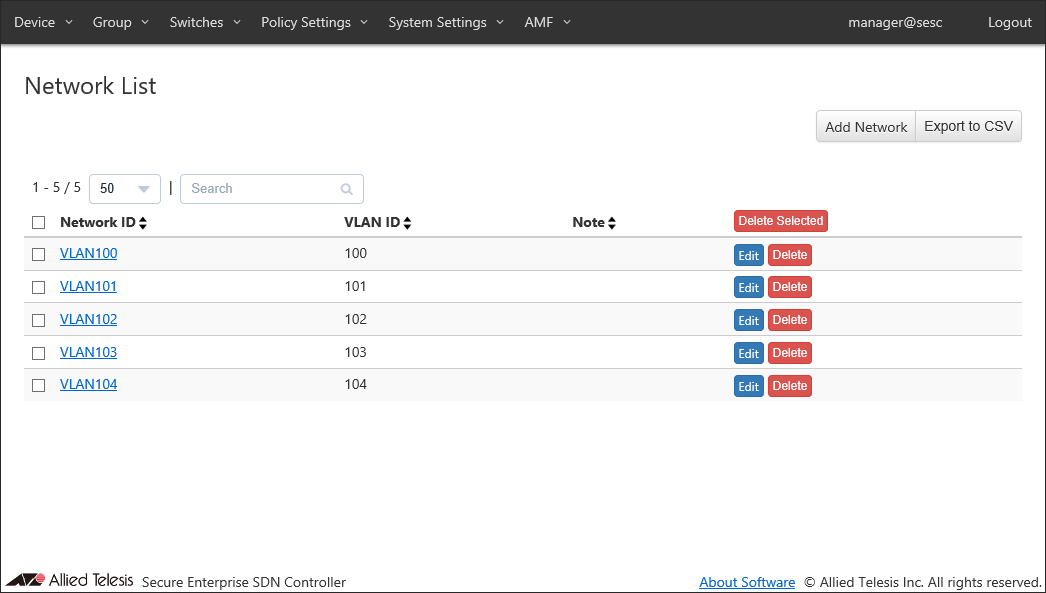
- Registering Network
Open Add Network page from the Policy Settings > Network List page to register a network to which devices is assigned.
Enter a Network ID and a VLAN ID, then click "Submit".
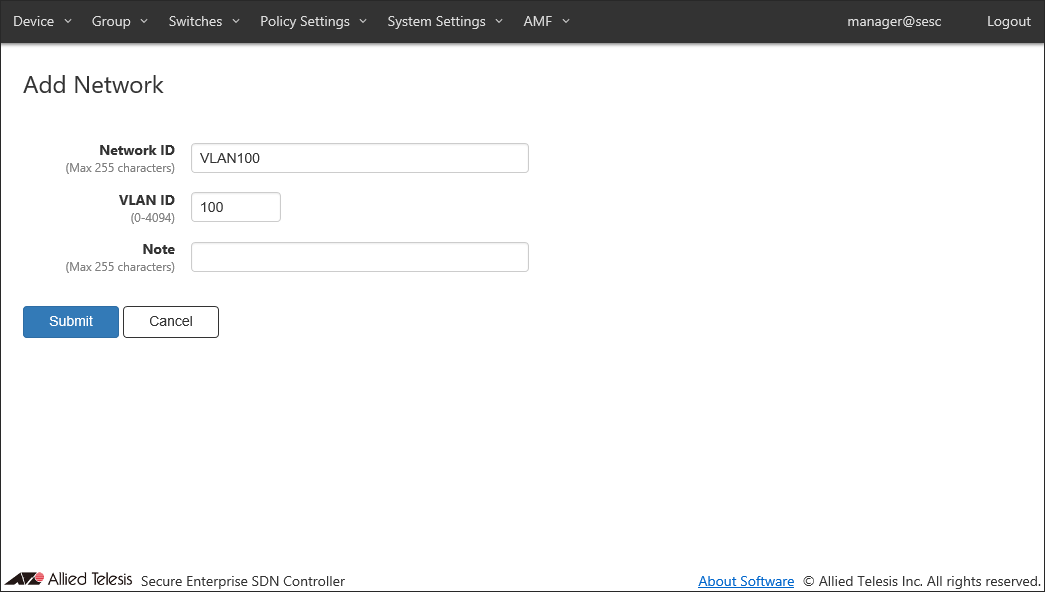
You can view the added network on the Policy Settings > Network List page. Repeat this process until you add all required networks.
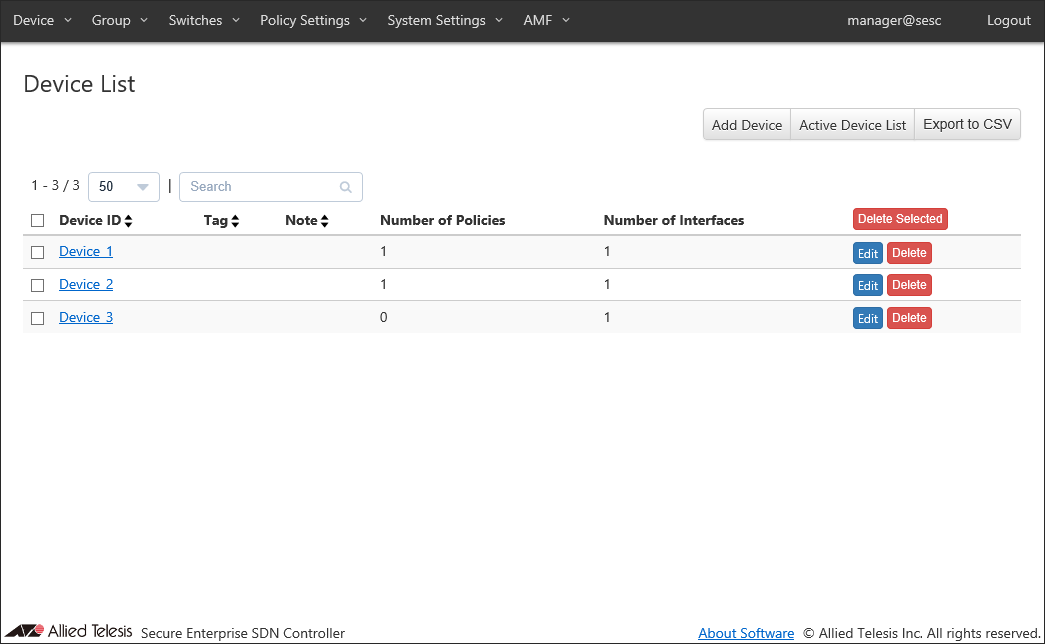
- Registering Device
Open Add Device page from the Device > Device List page to register devices.
Enter a device ID, then click the "Add Interface" button to open the "Edit Interface" dialog.
Enter the device's MAC address and click "Submit".
Those elements are collectively referred to as security policies. Here is a list of elements of security policies: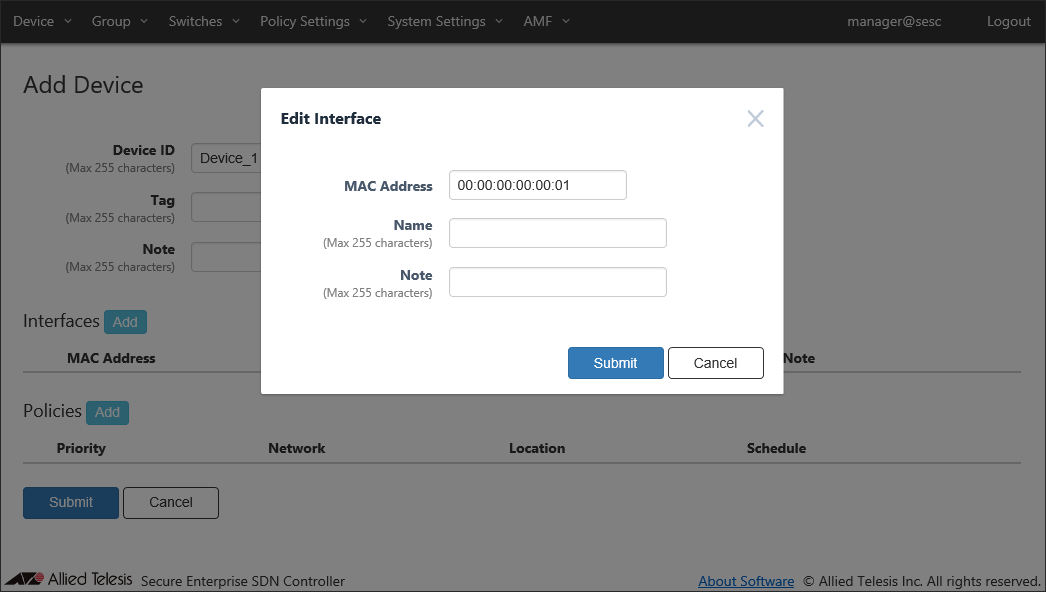
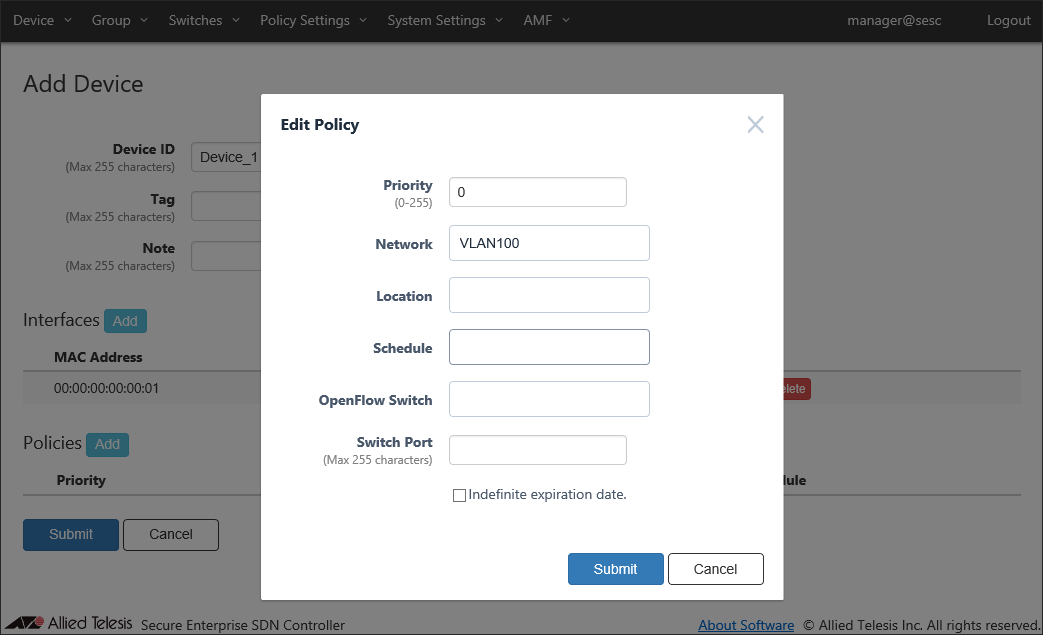
Click "Add" in "Policies" section to specify a network to assign to the device.
Enter a priority, select a network to assign and click "Submit".
Once the interface and the policy are added, click "Submit" to register the device.
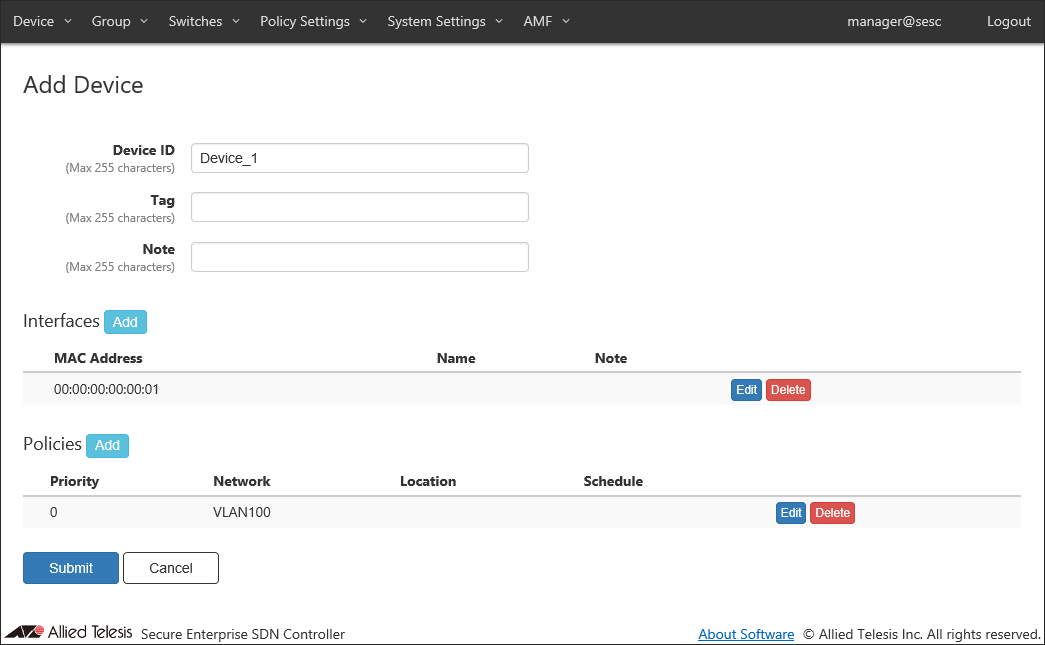
You can view the added device on the Device > Device List page. Repeat this process until you add all devices.
- Registering AMF Members
Connect the AT-SESC, the AMF Master and the AMF Member to the network.
Once the connection between AT-SESC and the AMF Master is established, connected AMF nodes are displayed on the Switches > Active AMF Member List page.

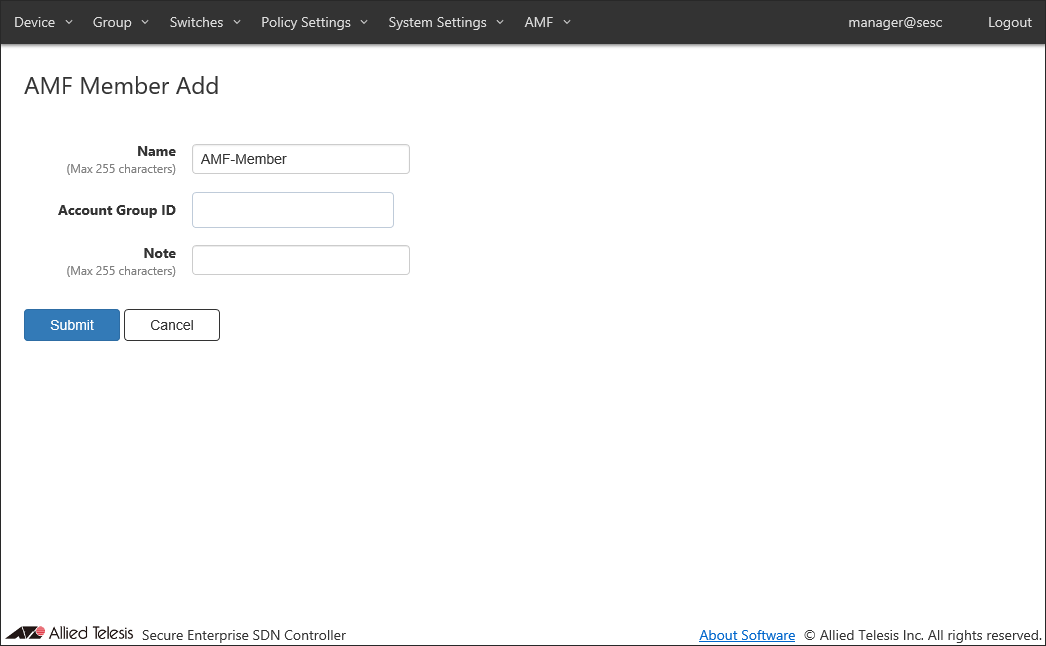
Click "Register" in "Register Status" column to open AMF Member Add page.
If the default name looks good, just click "Submit".
Note
Name must be the same as the host name of AMF Member. This is because AMF Member is managed by the host name of AMF Member.
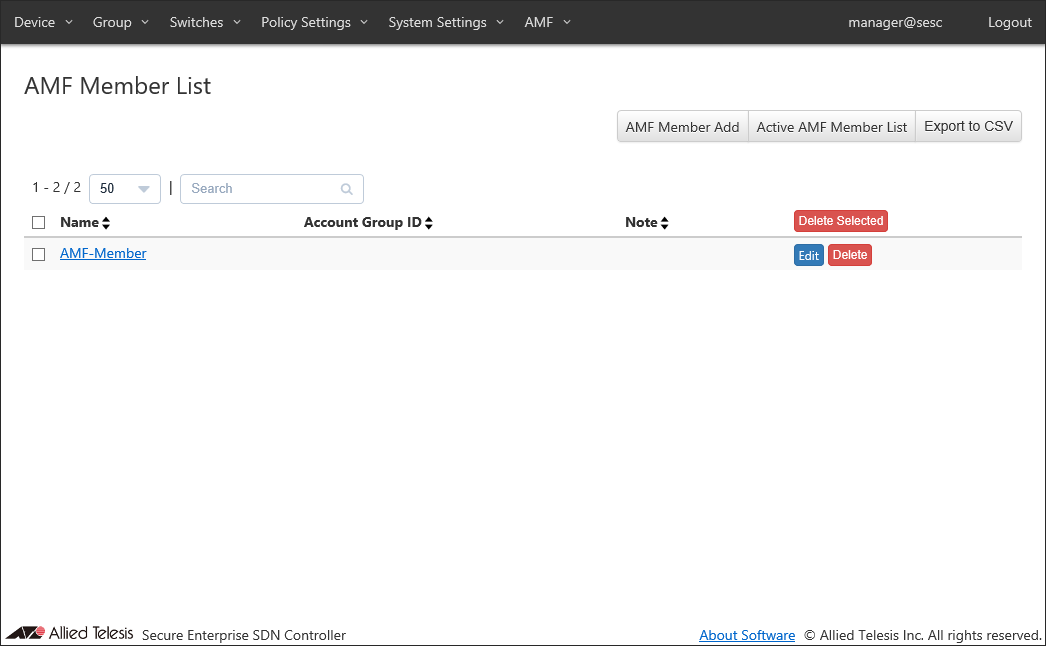
You can view the added AMF Member on the Switches > AMF Member List page.
Note
If you are not using location-based authentication, you do not have to register AMF Members.
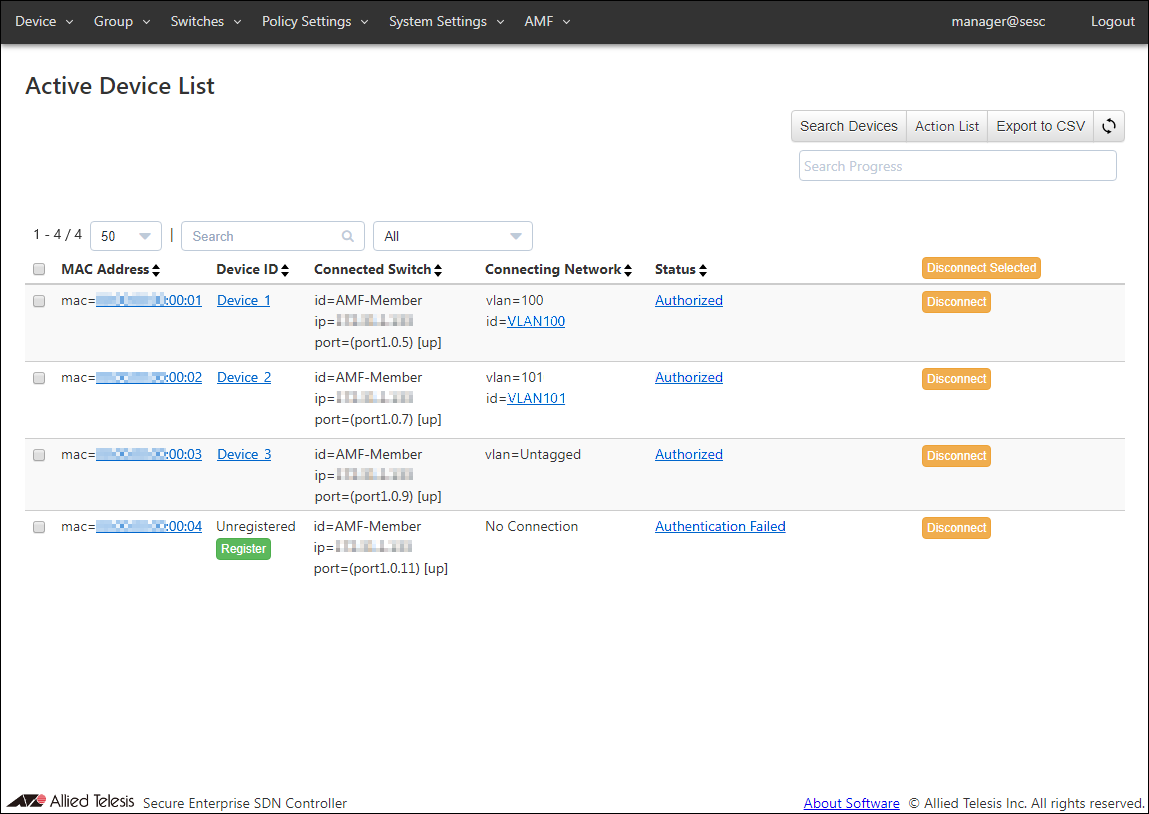
AT-SESC authenticates devices connected to the AMF Member using the registered authentication data.
You can view the authentication results on the Device > Active Device List page.
Those elements are collectively referred to as security policies. Here is a list of elements of security policies:
AMF Master Configuration (AT-x930-28GTX)
! hostname AMF-Master ! atmf network-name AMF001 atmf master atmf topology-gui enable ! service atmf-application-proxy application-proxy whitelist server 192.168.1.10 key password ! vlan database vlan 100-105 ! interface port1.0.1 switchport mode trunk switchport trunk allowed vlan add 100-105 switchport atmf-link ! interface vlan1 ip address 192.168.1.1/24 ! end |
AMF Member Configuration (AT-x510-28GTX)
! hostname AMF-Member ! atmf network-name AMF001 ! service atmf-application-proxy ! vlan database vlan 100-105 ! interface port1.0.1 switchport mode trunk switchport trunk allowed vlan add 100-105 switchport atmf-link ! interface port1.0.2-1.0.28 switchport access vlan 105 application-proxy whitelist enable auth session-timeout auth host-mode multi-supplicant auth dynamic-vlan-creation type multi application-proxy threat-protection drop ! end |
14 Jun 2021 09:30